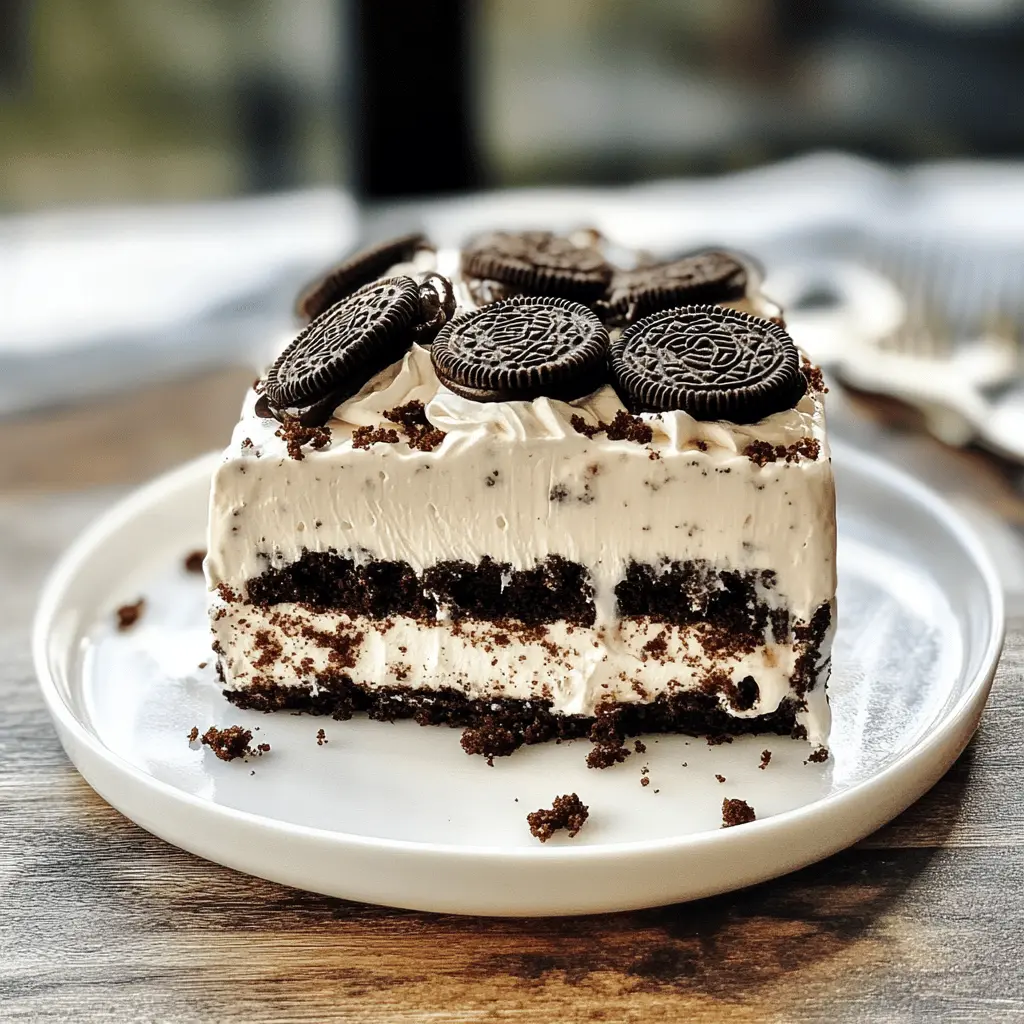
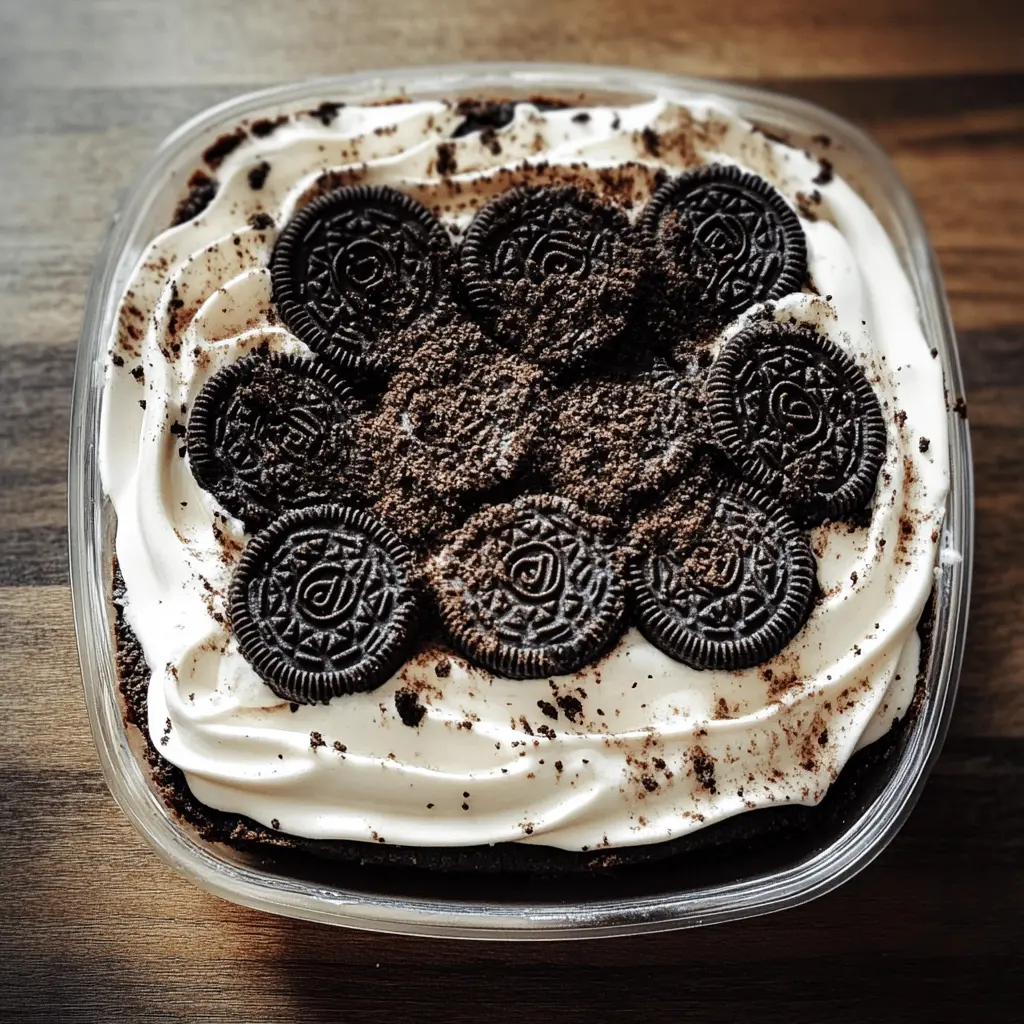
This Heavenly Oreo Dessert is a delightful treat that layers creamy goodness with crunchy Oreo cookies. It’s sweet, smooth, and every bite feels like a little slice of heaven!
Whenever I make this, I can barely resist sneaking a spoonful or five before serving! 😄 It’s perfect for parties or just a sweet night in with loved ones. Enjoy!
Key Ingredients & Substitutions
Oreo Cookies: These are essential for the crust, providing that classic chocolate flavor. If you want a twist, you can use other cookie types like chocolate sandwich cookies or even gluten-free cookies if needed.
Cream Cheese: Softened cream cheese gives the dessert a rich, tangy flavor. For a lighter option, you might choose neufchâtel cheese, which has less fat. Vegan cream cheese can also work well for dairy-free diets.
Powdered Sugar: This sweetener helps to create a smooth consistency in the cream cheese layer. If you’re limiting sugar, you can substitute with a sugar alternative like powdered erythritol, but keep in mind that it may change the flavor slightly.
Whipped Topping: I use Cool Whip for its light texture. If you prefer homemade, you can easily whip heavy cream with a bit of sugar and vanilla extract. Coconut whipped cream is a fantastic dairy-free choice!
Instant Pudding Mix: The chocolate and vanilla pudding provide flavor and creaminess. If you can’t find instant pudding, you can use regular pudding; just remember to cook it according to package instructions first.
How Do I Make Sure the Layers Stay Distinct?
To achieve those nice layers, the key is to let everything set properly. Here’s how to ensure your layers come out beautifully:
- Make sure each layer is smoothed out evenly; use an offset spatula if you have one.
- Allow the cream cheese layer to chill a bit before adding the puddings. This helps them not to mix.
- Chill the dessert for at least 4 hours, but overnight is best. This way, every layer firms up well.
Patience is important! The longer it chills, the easier it will be to serve without mixing the layers.
How to Make Heavenly Oreo Dessert
Ingredients You’ll Need:
For the Crust:
- 1 package (15.25 oz) Oreo cookies
- 1/2 cup unsalted butter, melted
For the Cream Cheese Layer:
- 1 (8 oz) package cream cheese, softened
- 1/2 cup powdered sugar
- 1 (8 oz) container whipped topping (like Cool Whip), thawed
For the Pudding Layers:
- 1 cup milk
- 1 package (3.9 oz) instant chocolate pudding mix
- 1 package (3.9 oz) instant vanilla pudding mix
For the Topping:
- 1/2 cup chocolate syrup
- Additional Oreos for garnish (crushed)
How Much Time Will You Need?
This recipe takes about 20 minutes to prepare and then needs at least 4 hours to chill in the fridge. So, you could whip it up in the morning or afternoon and enjoy it later in the day!
Step-by-Step Instructions:
1. Prepare the Crust:
In a food processor, crush the Oreo cookies until they form fine crumbs. In a mixing bowl, combine the crushed Oreos with melted butter, stirring until everything is mixed well. Press this mixture evenly into the bottom of a 9×13 inch baking dish to create a solid crust.
2. Make the Cream Cheese Layer:
In a separate bowl, beat the softened cream cheese with powdered sugar until the mixture is smooth. Gently fold in half of the whipped topping until everything is combined nicely. Spread this creamy mixture over the Oreo crust in an even layer.
3. Prepare the Pudding Layers:
In two separate bowls, whisk together the instant chocolate pudding mix with 1 cup of milk and the instant vanilla pudding mix with 1 cup of milk. Mix each for about 2 minutes until they thicken up nicely.
4. Layer the Puddings:
Start by spooning the chocolate pudding over the cream cheese layer and spreading it out evenly. Then, add the vanilla pudding on top of the chocolate layer, making sure to spread it evenly as well.
5. Add the Whipped Topping:
Take the remaining whipped topping and spread it over the entire dessert to create a nice, smooth layer.
6. Garnish:
Crush some additional Oreos and sprinkle them over the top for a lovely garnish. If you like, you can also drizzle chocolate syrup on top for extra flavor.
7. Chill:
Cover your dessert and place it in the refrigerator. Let it chill for at least 4 hours or overnight to allow the layers to set properly.
8. Serve:
Once chilled, slice the dessert and serve it cold. Enjoy all the delicious layers of flavor!
Can I Use Gluten-Free Oreos for This Recipe?
Absolutely! You can substitute regular Oreos with gluten-free Oreos to make this dessert suitable for those with gluten sensitivities. Just follow the same steps to prepare the crust, and your dessert will still be heavenly!
Can I Make This Dessert Ahead of Time?
Yes, this dessert is perfect for making ahead! You can prepare it up to a day in advance. Just be sure to store it in the refrigerator, covered tightly to keep it fresh. The flavors will even improve as it sits!
How to Store Leftovers
Store any leftovers in an airtight container in the fridge for up to 3-4 days. You may want to re-garnish with additional crushed Oreos before serving again for that fresh look!
Can I Use Different Pudding Flavors?
Of course! While chocolate and vanilla are classic choices, you can experiment with other flavors like butterscotch or cheesecake pudding for a unique twist. Just ensure they are instant mixes for the best texture!