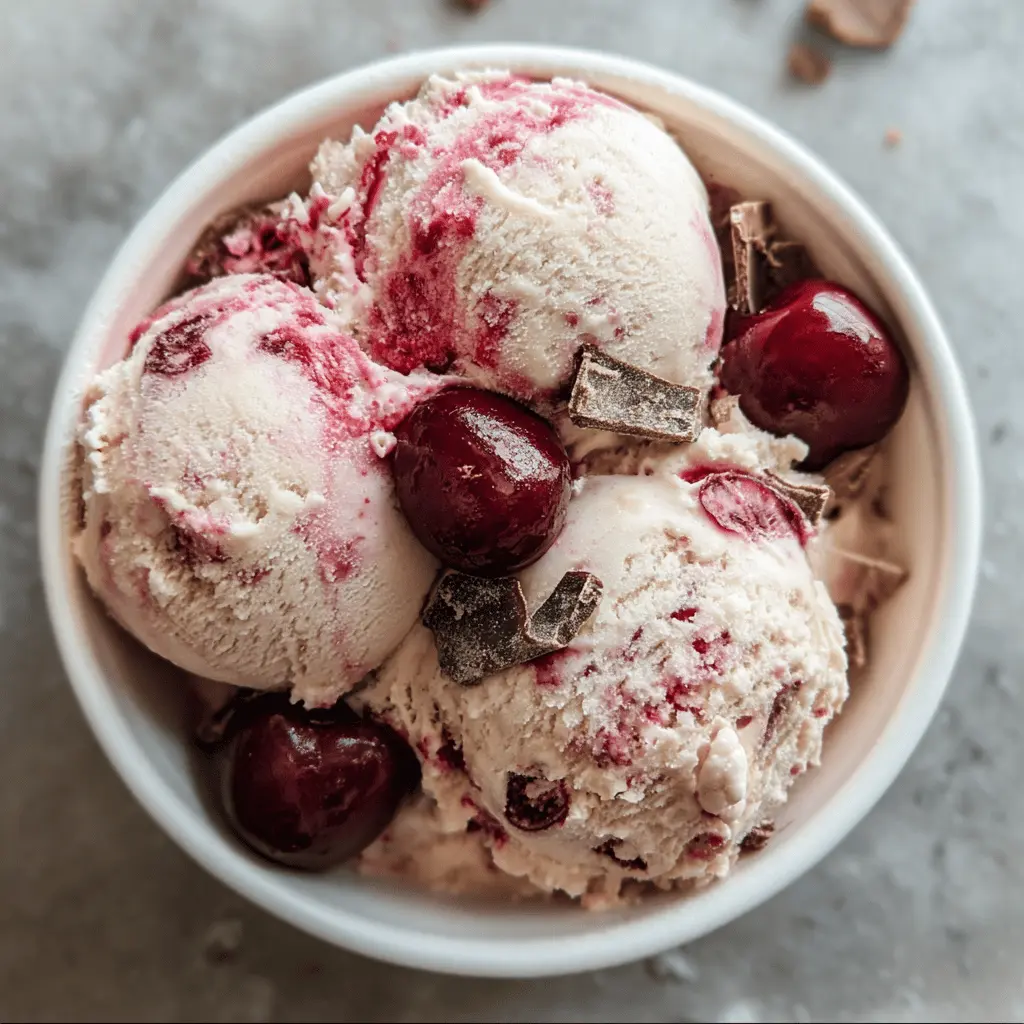
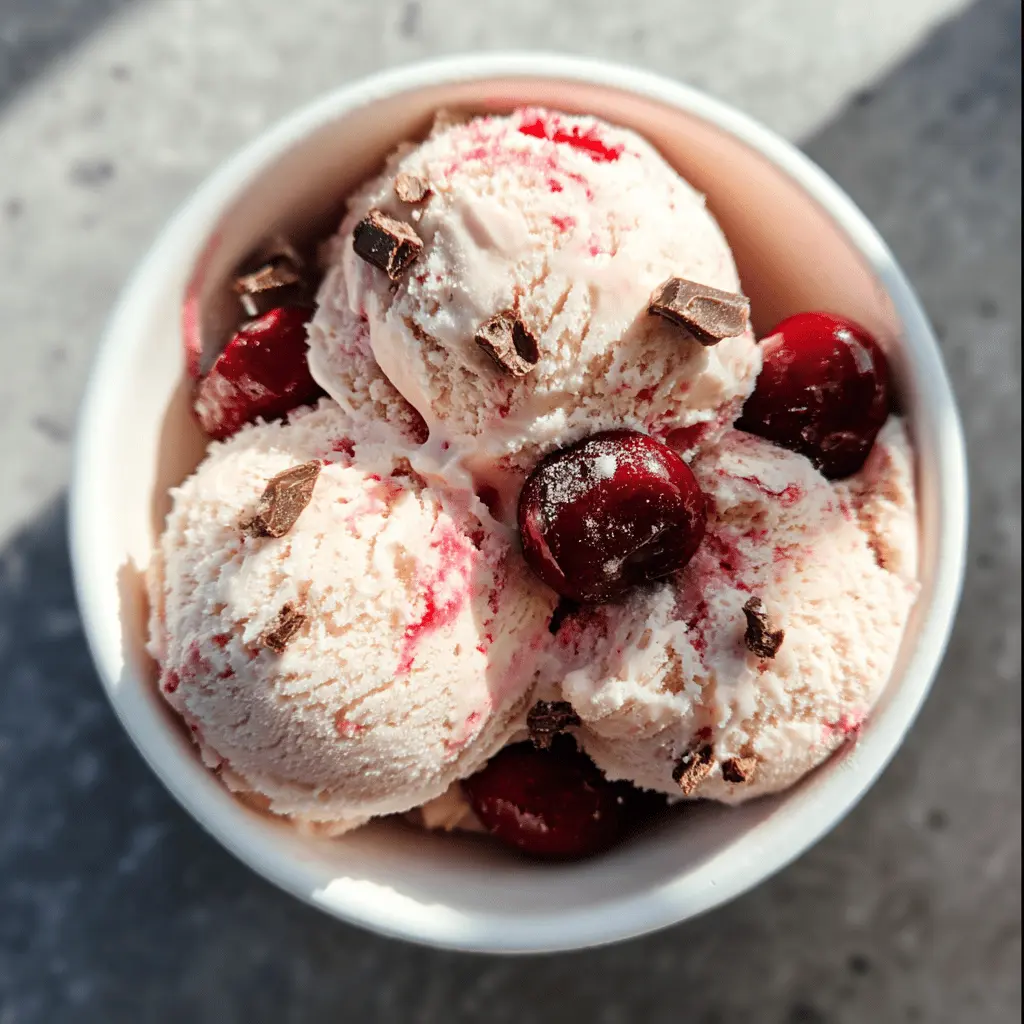
This creamy cherry ice cream, packed with sweet cherries and chocolate flakes, is a summer favorite. It’s so easy to make, you’ll wonder why you haven’t done it sooner!
Making this ice cream is like a fun science project. You mix everything, freeze it, and in no time, you have a tasty treat! Perfect for hot days or just because! 🍒
Key Ingredients & Substitutions
Heavy Cream: This gives the ice cream a rich and creamy texture. If you’re looking for a lighter option, you could use half and half. However, keep in mind that it may not be as creamy.
Whole Milk: Whole milk helps balance the richness of the heavy cream. You can replace it with low-fat milk, but it might affect the creaminess of the final product.
Granulated Sugar: Sugar sweetens the ice cream, enhancing the cherry flavor. For a different taste, consider using brown sugar or a sugar substitute like honey or maple syrup, adjusting to taste.
Pitted Cherries: Fresh cherries are best when in season, but frozen ones work well too. If you can’t find cherries, raspberries or strawberries can be a delightful alternative.
Dark Chocolate Chunks: I love using dark chocolate for a rich flavor. You can substitute it with milk chocolate or white chocolate if that’s what you prefer.
What’s the Best Way to Use an Ice Cream Maker?
Using an ice cream maker can seem tricky, but it’s usually easier than you think! Here are some helpful tips:
- Make sure your ice cream maker’s bowl is fully frozen (check instructions) before adding the mixture. This helps the ice cream freeze properly.
- Churn the ice cream until it has the texture of soft serve. This is where the air gets incorporated, making it light.
- If you don’t have an ice cream maker, pour the mixture into a freezer-safe container and stir every 30-60 minutes for a few hours. This mimics the churning process.
Enjoy making this Cherry Garcia ice cream! It’s perfect for hot days or anytime you crave a sweet treat. 🍒🍦
Easy Homemade Cherry Garcia Ice Cream
Ingredients You’ll Need:
- 2 cups heavy cream
- 1 cup whole milk
- 3/4 cup granulated sugar
- 1 teaspoon pure vanilla extract
- 1 cup fresh or frozen pitted cherries, chopped
- 1/2 cup dark chocolate chunks or chocolate chips
- 1 tablespoon lemon juice (optional, to brighten cherry flavor)
- Pinch of salt
How Much Time Will You Need?
This ice cream recipe takes about 10 minutes to prepare. You’ll need to freeze it for at least 2 hours afterward to firm it up, so plan for a total of around 2 hours and 10 minutes before it’s ready to enjoy!
Step-by-Step Instructions:
1. Mixing the Base:
In a mixing bowl, whisk together the heavy cream, whole milk, granulated sugar, pure vanilla extract, lemon juice (if you’re using it), and a pinch of salt. Keep whisking until the sugar has completely dissolved and the mixture is smooth and creamy.
2. Churning the Ice Cream:
Pour the creamy mixture into your ice cream maker. Turn it on and churn according to the manufacturer’s instructions. This typically takes about 20-25 minutes, and you’ll notice it thickening up as it churns.
3. Adding the Cherry and Chocolate:
In the last 5 minutes of churning, add the chopped cherries and dark chocolate chunks. This way, they’ll be evenly distributed in the ice cream, giving you bits of delicious cherries and chocolate in every scoop!
4. Freezing the Ice Cream:
After churning, transfer your ice cream into an airtight container. Spread it evenly and smooth the top. Place it in the freezer for at least 2 hours to firm up and become the perfect scoopable texture.
5. Serving the Delight:
When you’re ready to enjoy, scoop the homemade Cherry Garcia ice cream into bowls and, if you like, garnish with a few extra cherries or chocolate chunks. Dive in and savor the deliciousness!
FAQ for Easy Homemade Cherry Garcia Ice Cream
Can I Use Other Types of Fruit?
Absolutely! While cherries are the star here, you can substitute them with other fruits like raspberries, strawberries, or even peaches. Just make sure to adjust the amount based on the sweetness of the fruit you choose!
What If I Don’t Have an Ice Cream Maker?
No problem! You can still make this ice cream without an ice cream maker. Simply pour the mixture into a freezer-safe container and freeze it. Stir it every 30-60 minutes for about 3-4 hours to break up the ice crystals, creating a creamy texture.
How Should I Store the Ice Cream?
Store any leftover ice cream in an airtight container in the freezer. It’ll stay fresh for about 1-2 weeks. To soften it for easier scooping, let it sit at room temperature for a few minutes before serving.
Can I Make This Ice Cream Dairy-Free?
Yes! To make a dairy-free version, substitute the heavy cream and whole milk with coconut cream and almond milk or another plant-based milk. The flavor will change slightly, but it will still be delicious!