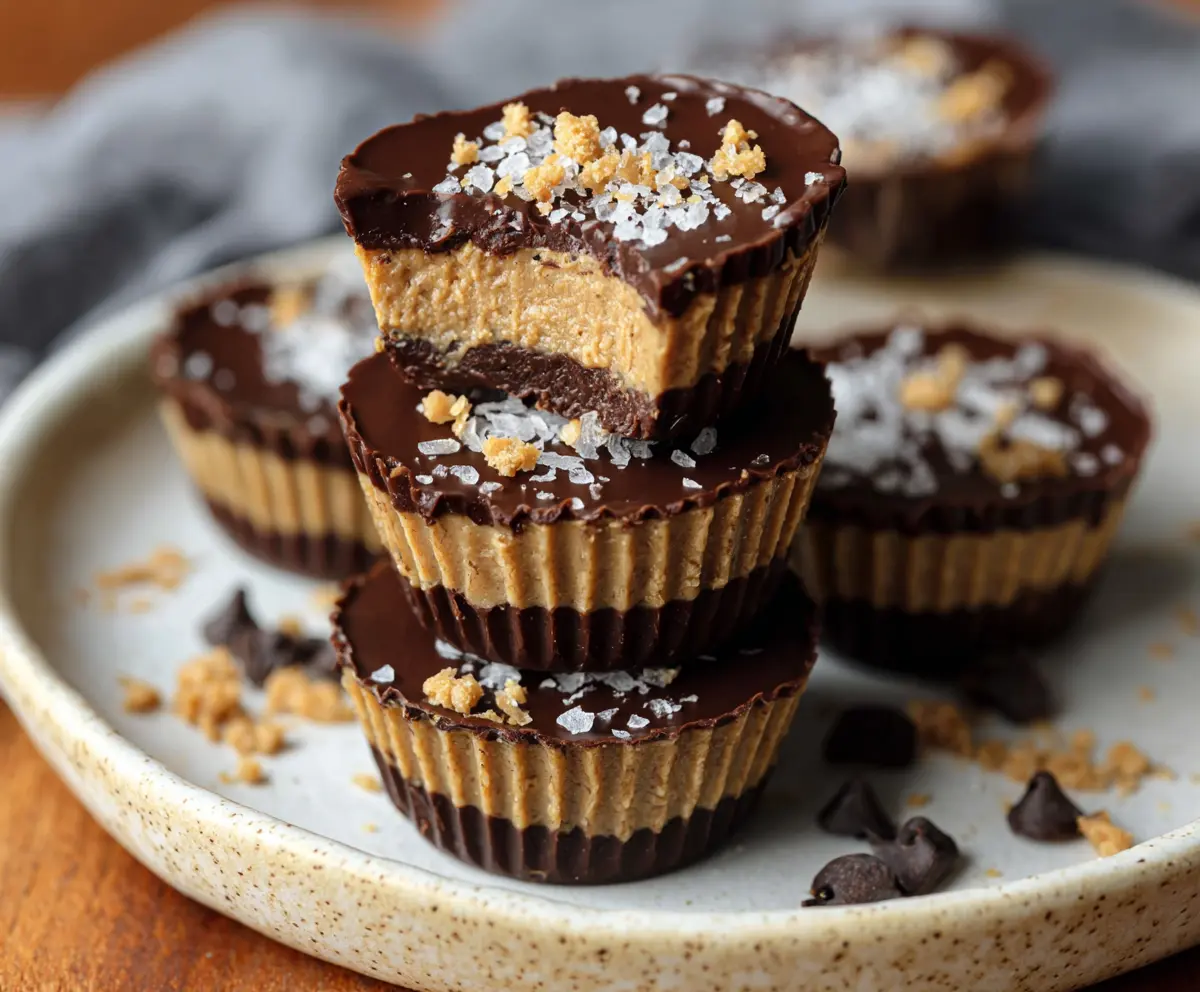
These Peanut Butter Protein Cups are a tasty treat packed with peanut butter and protein powder! They’re simple to make and perfect for a quick snack or dessert.
Honestly, what’s better than peanut butter? When you add chocolate, it just gets better! I love popping these in the fridge for a sweet pick-me-up during the day!
Key Ingredients & Substitutions
Peanut Butter: I always recommend using creamy, natural peanut butter for the best texture and flavor. It’s smooth and mixes well. If you’re allergic to peanuts, almond butter or sunbutter are great alternatives.
Coconut Oil: Melted coconut oil helps bind the mixture and adds a slight coconut flavor. If you don’t have it, you can swap it for unsalted butter or another neutral oil, like avocado oil.
Sweetener: Honey gives a nice taste, but if you prefer a vegan option, maple syrup works perfectly too. Just ensure it’s pure maple syrup for the best flavor.
Protein Powder: I like using vanilla protein powder for a hint of sweetness, but chocolate protein powder adds a rich taste. If you’re avoiding protein powder, try oat flour or ground nuts for a different texture.
Chocolate Chips: Dark chocolate gives a nice, rich flavor, but semi-sweet chocolate works too. If you want to keep it dairy-free, look for vegan chocolate chips.
How Do You Melt Chocolate Without Burning It?
Melted chocolate is key for these cups, but it can burn easily if not watched closely. Here’s how to do it right:
- Use a double boiler: Place a heat-proof bowl over a pot of simmering water, making sure the bowl doesn’t touch the water. Stir often until melted.
- Microwave method: Put chocolate chips in a microwave-safe bowl, heat for 30 seconds, then stir. Repeat until melted, stirring in between.
- Start slow: Always heat at lower power settings and keep a close eye, as chocolate can transition from melted to burned quickly.
With these tips, you’ll have smoothly melted chocolate ready for your delicious Peanut Butter Protein Cups!
Peanut Butter Protein Cups
Ingredients You’ll Need:
- 1 cup creamy peanut butter (natural, unsweetened preferred)
- 1/4 cup coconut oil, melted
- 1/4 cup honey or maple syrup
- 1/2 cup vanilla or chocolate protein powder
- 1 cup dark chocolate chips (or semi-sweet chocolate)
- Pinch of sea salt
- Optional for topping: flaky sea salt, crushed peanuts, or cookie crumbs
How Much Time Will You Need?
This recipe takes about 15 minutes to prepare, plus 40 minutes to chill in the freezer. You’ll spend a few minutes mixing and assembling the layers, then let them set in the freezer. It’s a simple, satisfying treat to make!
Step-by-Step Instructions:
1. Prepare Your Muffin Tin:
Start by lining a muffin tin with paper liners or using silicone cupcake liners. This will help prevent the cups from sticking and make them easier to remove later.
2. Make the Peanut Butter Mixture:
In a medium bowl, combine the creamy peanut butter, melted coconut oil, honey (or maple syrup), protein powder, and a pinch of sea salt. Stir with a spoon or spatula until everything is smooth and well combined. This creamy mix will be the star of your cups!
3. Melt the Chocolate:
Next, melt the chocolate chips, either in a double boiler or in the microwave. If using the microwave, heat in 30-second intervals, stirring after each, until the chocolate is fully melted and smooth.
4. Create the Chocolate Base:
Once the chocolate is melted, spoon about 1 tablespoon into the bottom of each cup. Use the back of the spoon to spread it evenly and create a solid base layer. Yum!
5. Chill the Chocolate Base:
Place the muffin tin in the freezer for about 10 minutes so the chocolate can harden. This step helps create a good base for when you add the peanut butter layer.
6. Add the Peanut Butter Layer:
After the chocolate has hardened, take the muffin tin out of the freezer. Spoon the peanut butter mixture over the chocolate, filling each cup about 3/4 full. Don’t worry if it’s a little messy; that’s part of the fun!
7. Top with More Chocolate:
Now, take the remaining melted chocolate and spoon about 1 tablespoon over the peanut butter layer in each cup, spreading it to completely cover the mixture. This keeps everything deliciously locked in!
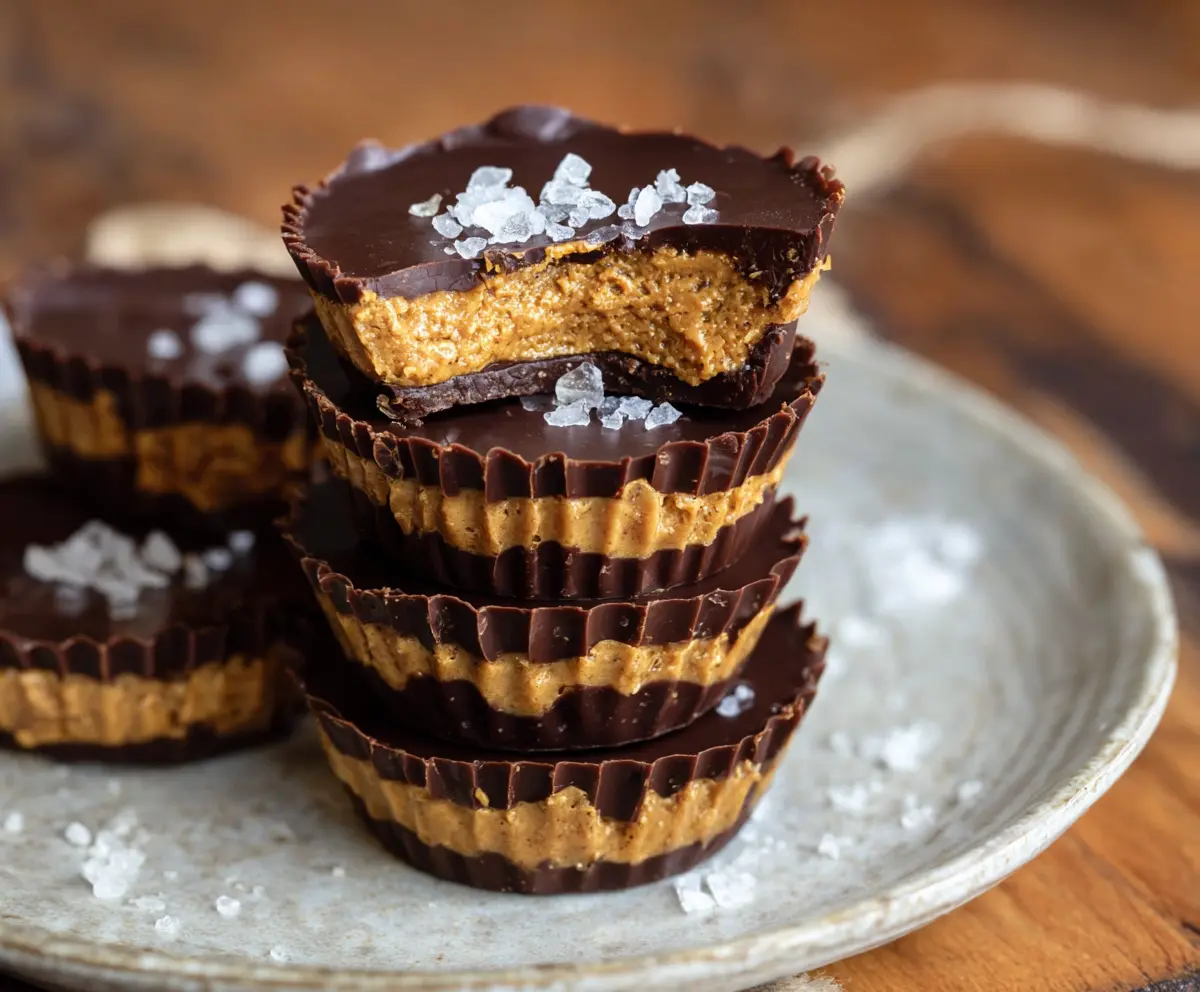
8. Add Optional Toppings:
While the chocolate is still wet, sprinkle a pinch of flaky sea salt or some crushed peanuts or cookie crumbs on top. This adds a delightful crunch and extra flavor.
9. Freeze Until Solid:
Put the muffin tin back in the freezer for at least 30 minutes or until the cups are fully solid. This is the hardest part—waiting!
10. Store and Enjoy:
Once they’re solid, you can take them out of the muffin tin and store the cups in an airtight container in the refrigerator or freezer. Enjoy chilled for a tasty, protein-packed snack anytime!
Your Peanut Butter Protein Cups are now ready to be enjoyed! Their layered structure with the chocolate on both the top and bottom, along with the creamy peanut butter center, makes them irresistible!
Can I Use Crunchy Peanut Butter Instead of Creamy?
Yes, you can! Crunchy peanut butter will add texture to your Protein Cups, giving them a nice crunch. Just keep in mind that the mixture may be a bit thicker than with creamy peanut butter.
Can I Make These Cups Vegan?
Absolutely! To make this recipe vegan, use maple syrup instead of honey, and choose dairy-free chocolate chips. Everything else in the recipe is already plant-based!
How Do I Store Leftovers?
Store any leftover Protein Cups in an airtight container in the refrigerator for up to a week. You can also freeze them for longer storage; they’ll keep well for up to 3 months. Just make sure to separate layers with parchment paper to prevent sticking!
What Can I Use Instead of Protein Powder?
If you don’t have protein powder, you can substitute it with oat flour or ground nuts. Just be aware that this will change the texture slightly, and the cups won’t be as high in protein. Adjust the sweetener if necessary to balance the flavors.