
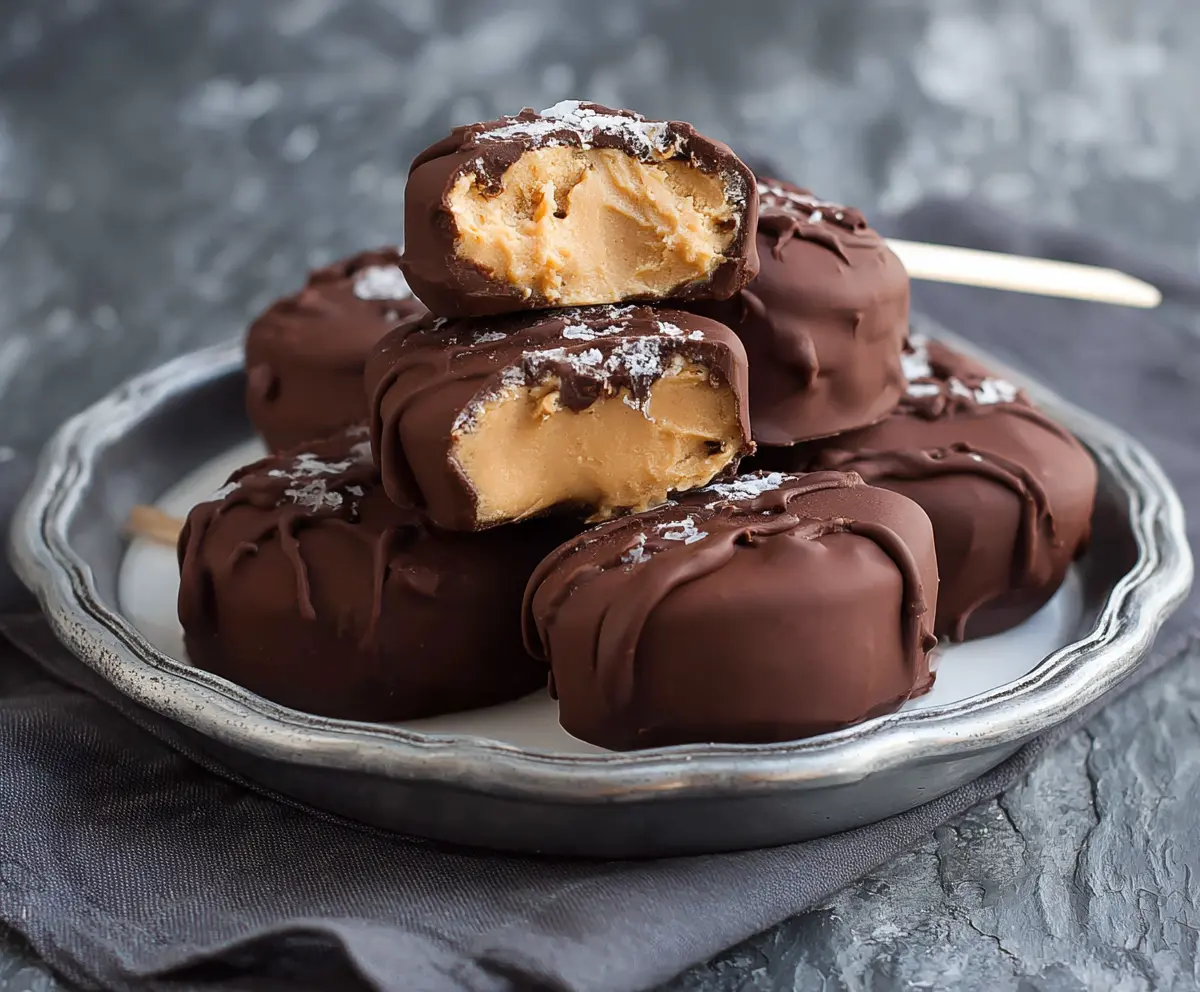
These Chocolate Peanut Butter Frozen Yogurt Bites are a treat anyone will love! Creamy yogurt mixed with rich peanut butter and a touch of chocolate creates a yummy snack.
They’re easy to make, and honestly, they’re perfect for when you’re craving something sweet but want to keep it healthy. Just freeze, pop, and enjoy – simple as that!
Key Ingredients & Substitutions
Greek Yogurt: Plain or vanilla Greek yogurt gives a nice tang and creaminess. If you’re avoiding dairy, consider using coconut yogurt or any dairy-free yogurt option.
Peanut Butter: I recommend creamy peanut butter for a smooth texture. If you have nut allergies, sunflower butter or tahini can work well as substitutes.
Sweeteners: Honey or maple syrup adds sweetness. If you prefer, you can use stevia or agave syrup; just adjust the amount to your taste.
Graham Crackers: They give a fantastic crunch. If you want a gluten-free option, crushed almonds, gluten-free graham crackers, or even oats can be used instead.
Chocolate: Semisweet or dark chocolate enhances the richness. You can also use dairy-free chocolate chips if you want to keep it plant-based.
How Do I Get the Perfect Chocolate Coat on My Bites?
Getting a smooth, even coating of chocolate is key to making your frozen yogurt bites look tasty. Here’s how to do it:
- Make sure your yogurt bites are completely frozen before dipping, or they may break apart.
- Melt chocolate chips with a little coconut oil. The coconut oil helps the chocolate coat evenly and gives it a nice shine.
- Dip each bite quickly to avoid melting, and let excess chocolate drip off before placing them back on the parchment paper.
- If you want extra flair, add sprinkles immediately after dipping, so they stick before the chocolate sets.
Freezing them for about 30 minutes after coating will help the chocolate harden properly. Enjoy your delicious creations!
Chocolate Peanut Butter Frozen Yogurt Bites
Ingredients You’ll Need:
Base Ingredients:
- 2 cups plain or vanilla Greek yogurt
- 1/2 cup creamy peanut butter (divided)
- 2-3 tbsp honey or maple syrup (optional, to taste)
- 1 tsp vanilla extract
For Texture and Coating:
- 1 1/2 cups crushed graham crackers or digestive biscuits
- 1 cup semisweet or dark chocolate chips
- 1 tsp coconut oil (optional, to smooth chocolate coating)
For Garnish:
- Sprinkles or chopped peanuts for garnish (optional)
How Much Time Will You Need?
This recipe will take about 15-20 minutes to prepare, plus about 3 hours of freezing time in total. You’ll spend time mixing and forming the bites, along with some patience as they chill. Overall, it’s a simple, rewarding recipe!
Step-by-Step Instructions:
1. Line Your Baking Sheet:
Start by lining a baking sheet with parchment paper. This will help prevent your yogurt bites from sticking, making cleanup a breeze later!
2. Mix the Yogurt Base:
In a bowl, combine the Greek yogurt, 1/4 cup of peanut butter, honey (if you want it sweeter), and vanilla extract. Mix everything together until it’s smooth and creamy. You want a nice base for your bites!
3. Add the Crunch:
Now, gently fold in the crushed graham crackers. This will add a lovely texture to your bites. Mix until it’s well incorporated.
4. Form the Yogurt Rounds:
Using a spoon or a cookie scoop, form small rounds of the yogurt mixture and place them on the parchment paper. Flatten each round slightly. Pop them in the freezer for about 1 hour to help firm them up.
5. Make the Peanut Butter Center:
While the yogurt rounds are chilling, take the remaining 1/4 cup of peanut butter and mix it until it’s creamy and easy to scoop.
6. Assemble Your Bites:
Once the yogurt rounds are nice and firm, take them out of the freezer. On half of the rounds, place about 1/2 tsp of the creamy peanut butter in the center. Then, place another yogurt round on top, pressing gently to seal. This makes your tasty sandwiches!
7. Freeze Again:
Return the assembled yogurt bites to the freezer for another 2 hours until they are completely solid.
8. Melt the Chocolate:
When you’re ready to coat your bites, melt the chocolate chips and coconut oil together. You can do this in the microwave in 30-second intervals, stirring in between, or using a double boiler.
9. Coat the Bites:
Once melted, dip each frozen yogurt bite into the chocolate, making sure they’re fully coated. Let any excess chocolate drip off before placing them back on the parchment paper.
10. Add the Finishing Touch:
If you want, sprinkle some chopped peanuts or colorful sprinkles on top before the chocolate sets. This makes them look even more delicious!
11. Final Freeze:
Put the chocolate-covered bites back in the freezer for at least 30 minutes to let the chocolate harden.
12. Enjoy!
Once set, you can serve these delicious frozen yogurt bites straight from the freezer. Store any leftovers in an airtight container in the freezer, and enjoy as a sweet treat anytime!
These Chocolate Peanut Butter Frozen Yogurt Bites are a delightful mixture of creamy and crunchy, perfect for satisfying your sweet tooth without the guilt! Enjoy!
Can I Use Non-Dairy Yogurt?
Absolutely! For a dairy-free version, you can substitute Greek yogurt with coconut yogurt or any other non-dairy yogurt you prefer. This will keep the bites creamy and delicious.
How Should I Store Leftovers?
Store any leftover frozen yogurt bites in an airtight container in the freezer. They can last up to a month, but they’re usually gone much quicker since they’re so tasty!
What If I Don’t Have Graham Crackers?
No worries! You can use crushed digestive biscuits, crushed cookies, or even oats for a similar texture. If you want a gluten-free option, look for gluten-free alternatives!
Can I Customize the Toppings?
Definitely! Feel free to get creative with your toppings. Chopped nuts, shredded coconut, or even different colored sprinkles would all be delightful additions for added flavor and presentation.