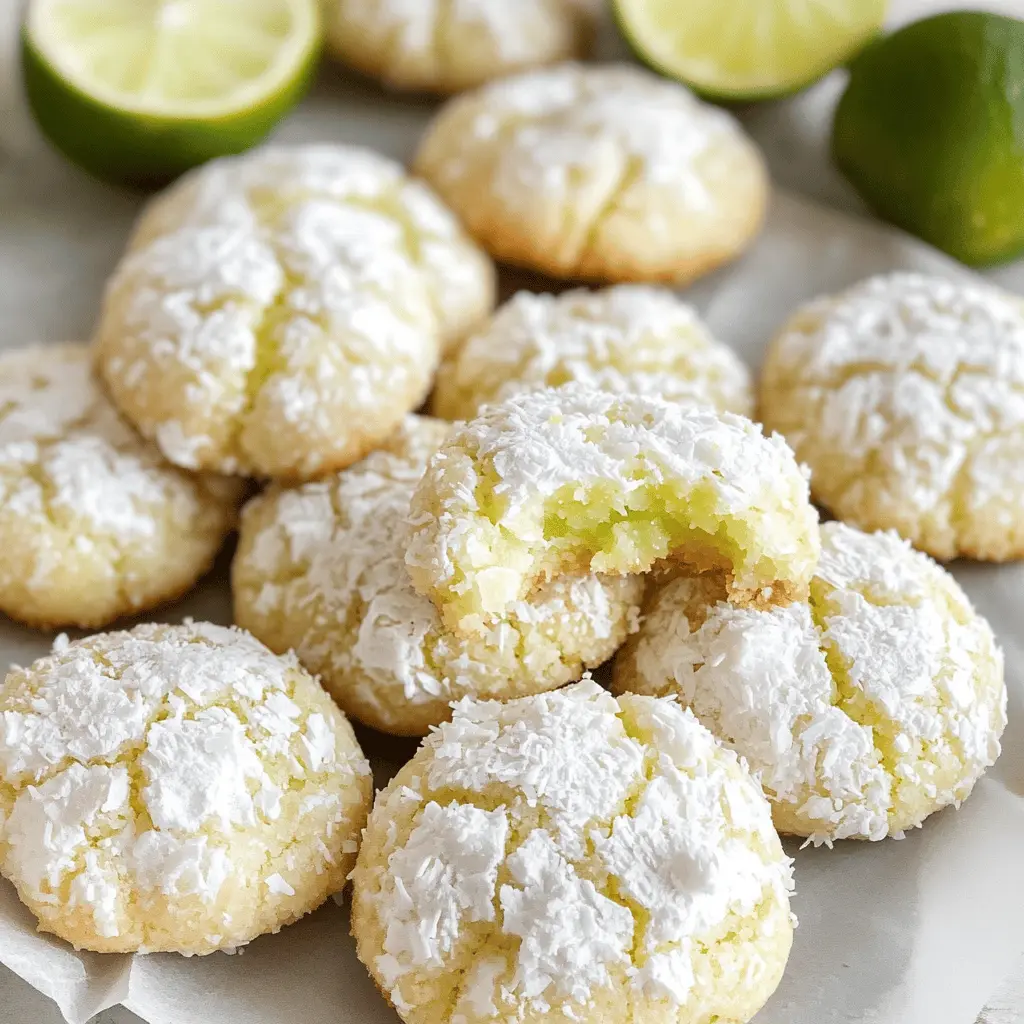
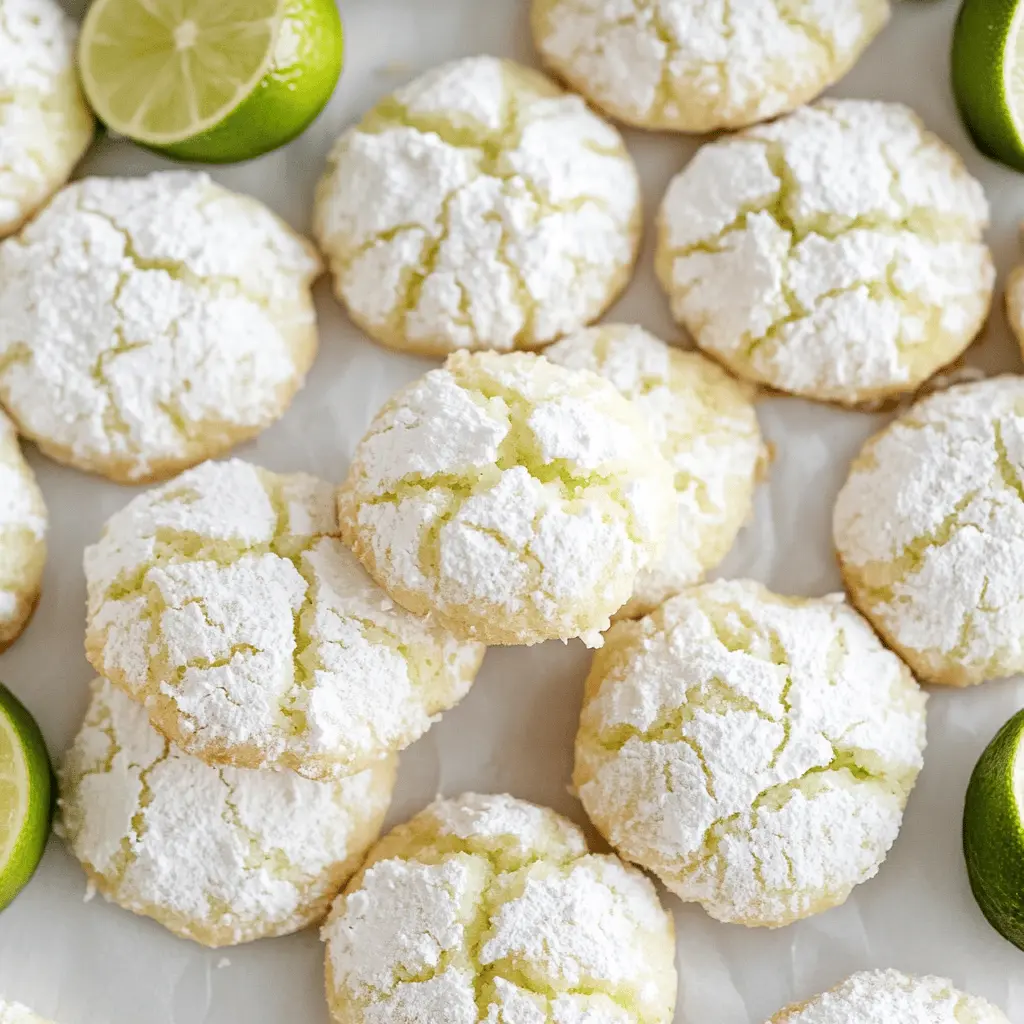
These Coconut Key Lime Crinkle Cookies are a fun twist on classic cookies! With zesty lime and a touch of coconut, they’re soft, chewy, and bursting with flavor.
Trust me, the powdered sugar dusting makes them look fancy, but they’re super easy to whip up! I love serving these with a cup of tea; they brighten any day! 🍪🌿
Key Ingredients & Substitutions
Shredded Coconut: This is key for that tropical flavor. Sweetened coconut works well, but if you’re watching your sugar, unsweetened coconut is a great alternative. I love using unsweetened because it adds texture without extra sweetness.
All-purpose Flour: This gives cookies their structure. If you’re gluten-free, you can try a 1:1 gluten-free baking blend. Just make sure it contains xanthan gum for the best results. I’ve found some blends work perfectly in cookies!
Key Limes: Their juice and zest really brighten the flavors. While regular limes can be a substitute, they are a bit more tart. I personally think key limes add a unique sweetness that’s worth the effort!
Unsalted Butter: Softened butter makes a fluffier dough. If you’re dairy-free, coconut oil or vegan butter is an excellent swap. Just keep in mind that it might slightly change the flavor.
How Do I Get That Perfect Crinkly Texture?
Achieving that signature crinkle is all about the baking process. Start by really creaming the butter and sugar until light – this helps add air into your dough. Here’s how to get there:
- Make sure your butter is at room temperature for easy creaming.
- When rolling the dough in powdered sugar, be generous; it helps create that lovely cracked surface as the cookies bake.
- Don’t overbake! They should be slightly soft in the center when you take them out. They’ll firm up on the cooling rack.
With a bit of patience, you’ll end up with beautifully crinkled cookies that taste just as great as they look!
How to Make Coconut Key Lime Crinkle Cookies?
Ingredients You’ll Need:
For the Cookie Dough:
- 1 cup shredded coconut
- 2 cups all-purpose flour
- 1 tsp baking powder
- 1/2 tsp salt
- 1/2 cup unsalted butter, softened
- 1 cup granulated sugar
- 2 large eggs
- Zest of 2 key limes
- 2 tbsp fresh key lime juice
- 1 tsp vanilla extract
For Dusting:
- Powdered sugar for dusting
How Much Time Will You Need?
This recipe takes about 15 minutes to prep and 10-12 minutes to bake. After baking, let the cookies cool for a few minutes. In total, you’ll need about 30-35 minutes to make these delicious cookies!
Step-by-Step Instructions:
1. Preheat and Prepare:
Start by preheating your oven to 350°F (175°C). While that’s warming up, line a baking sheet with parchment paper to make sure the cookies don’t stick.
2. Mix the Dry Ingredients:
In a medium bowl, combine the all-purpose flour, baking powder, and salt. Whisk it together and then set it aside for now. This will help the cookies rise nicely!
3. Cream Together Butter and Sugar:
Take a large mixing bowl and add in the softened butter and granulated sugar. Using a mixer, beat them together until the mixture is light and fluffy. This usually takes about 2-3 minutes.
4. Add Eggs and Flavor:
Crack in the eggs, adding them one at a time. Make sure to mix well after each addition so everything is nicely combined. Then, stir in the key lime zest, lime juice, and vanilla extract until it’s all blended together.
5. Combine Wet and Dry Ingredients:
Now it’s time to gradually add the dry mixture into the wet ingredients. Mix until everything is just combined – be careful not to over-mix! It’s okay if there are a few lumps.
6. Fold in the Coconut:
Gently fold in the shredded coconut, making sure it’s evenly distributed throughout the dough. You want those yummy coconut flakes in every bite!
7. Shape and Roll:
Using a cookie scoop or your hands, scoop out dough (about 1-2 tablespoons each) and roll them into balls. Then, roll each ball in powdered sugar until fully coated. This gives them a lovely crinkle once baked!
8. Bake the Cookies:
Place the dough balls on your prepared baking sheet, making sure to space them about 2 inches apart. Pop them in the oven and bake for 10-12 minutes, or until the edges are set and the tops are crinkly. The centers should still feel slightly soft, which is perfect!
9. Cool and Serve:
Once they are done baking, let the cookies cool on the baking sheet for a few minutes. After that, transfer them to a wire rack to cool completely. If you like, dust them with a little extra powdered sugar before serving. Enjoy your delightful Coconut Key Lime Crinkle Cookies with a tropical twist!
Can I Substitute Regular Limes for Key Limes?
Absolutely! While key limes provide a unique flavor, regular limes can be used as a substitute. Just note that regular limes tend to be a bit juicier and less tart than key limes, so you might want to adjust the juice quantity to taste.
What Can I Use Instead of Unsalted Butter?
If you don’t have unsalted butter on hand, you can use salted butter. Just remember to reduce or skip the added salt in the recipe to keep your cookies from becoming too salty. Alternatively, coconut oil could be a great dairy-free substitute!
How Should I Store Leftover Cookies?
Store your Coconut Key Lime Crinkle Cookies in an airtight container at room temperature for up to 4 days. To keep them fresh even longer, consider refrigerating them, where they can last for about a week. Just make sure to let them come to room temperature before enjoying!
Can I Freeze These Cookies?
Yes! To freeze, place the rolled dough balls (before baking) on a baking sheet to freeze them individually. Once frozen, transfer the dough balls to a freezer-safe bag, and they can be stored for up to 3 months. Bake directly from the freezer, just adding a couple of extra minutes to the baking time!