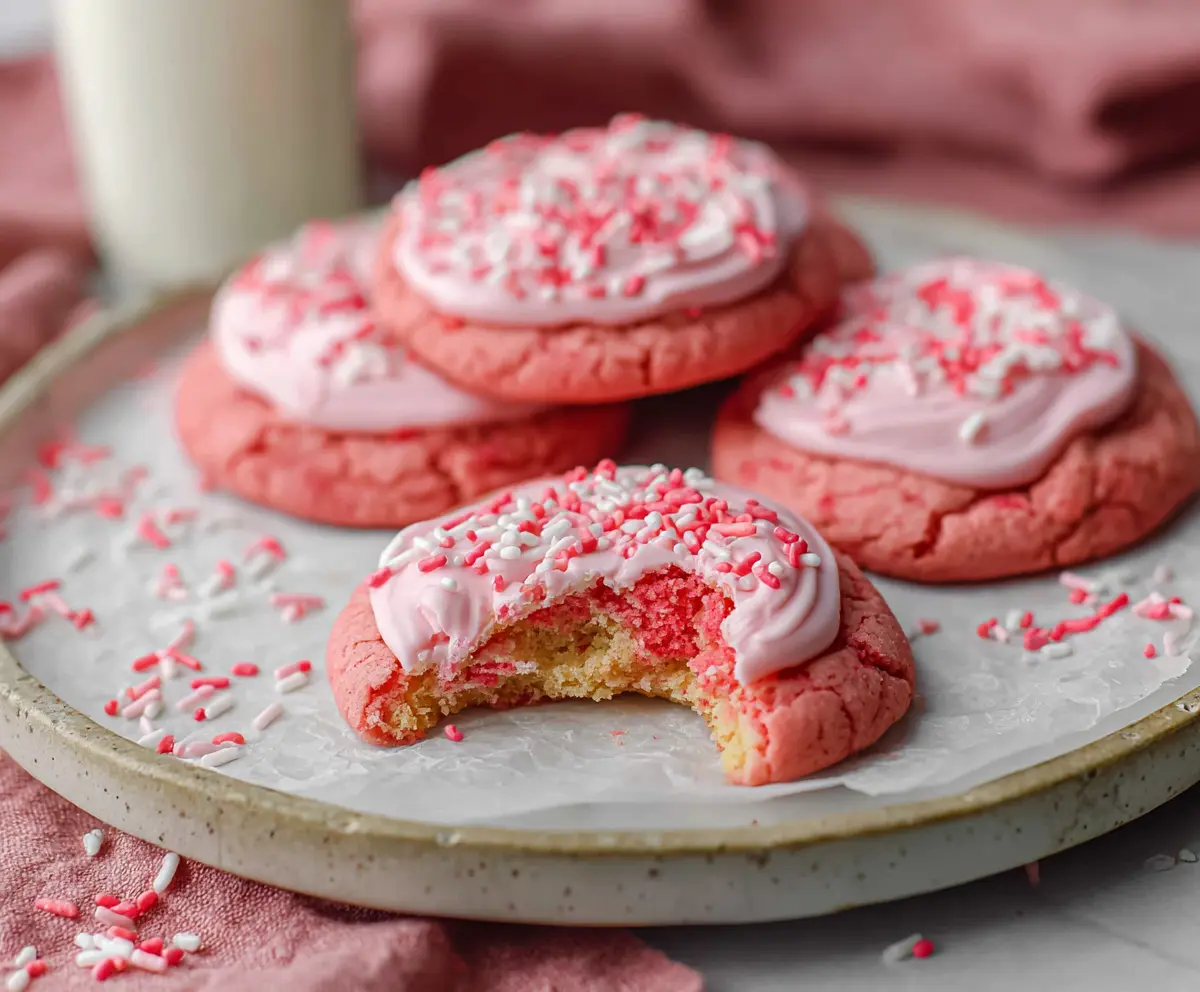
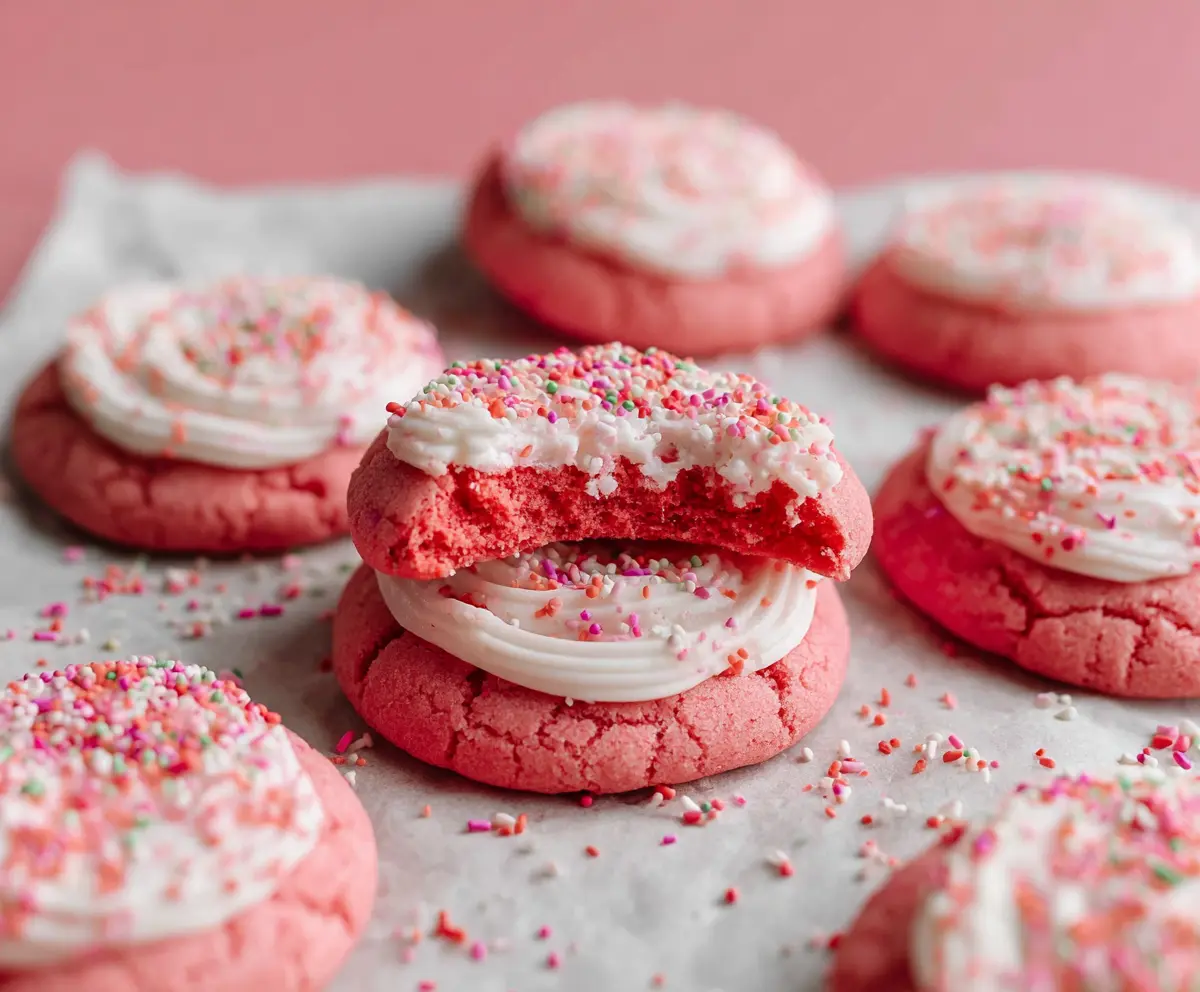
Crumbl Pink Velvet Cookies are soft, colorful cookies that are perfect for any occasion! They have a lovely pink hue, hinting at the sweet flavor inside, topped with a creamy frosting.
These cookies are like little hugs for your taste buds! I love baking a batch to share, but let’s be real—I often keep a few for myself! Who can resist a pink cookie? 😄
Key Ingredients & Substitutions
All-Purpose Flour: This is the base of the cookies. If you need a gluten-free option, you can use a 1:1 gluten-free flour blend. Just make sure it contains xanthan gum for the right texture.
Butter: Unsalted butter gives the best flavor. If you’re trying to reduce dairy, you can substitute with coconut oil or a dairy-free butter substitute.
Buttermilk: This adds moisture and tang. If you don’t have buttermilk, mix 1 tablespoon of vinegar or lemon juice with a cup of milk and let it sit for 5 minutes.
Food Coloring: Red food coloring brings out the cookie’s pink color. For a natural alternative, you can use beet juice, but it may alter the taste slightly.
How Do I Ensure My Cookies Are Soft and Chewy?
The secret to soft, chewy cookies lies in how you mix and bake them. Here are some tips:
- Don’t Overmix: Once you combine the wet and dry ingredients, mix just until they are combined. Overmixing can lead to tough cookies.
- Check Baking Time: Keep an eye on the cookies as they bake. Pull them out when the edges are set but the centers still look slightly underbaked. They will firm up as they cool.
- Cooling: Letting them cool on the baking sheet for a few minutes helps keep them soft. Then transfer to a wire rack to cool completely.
These tips will help you achieve delicious, soft Pink Velvet Cookies that everyone will love! Enjoy your baking!
How to Make Crumbl Pink Velvet Cookies
Ingredients You’ll Need:
For the Cookies:
- 2 1/4 cups all-purpose flour
- 1 teaspoon baking powder
- 1/2 teaspoon baking soda
- 1/4 teaspoon salt
- 3/4 cup unsalted butter, softened
- 1 cup granulated sugar
- 1 large egg
- 1 tablespoon buttermilk
- 2 teaspoons vanilla extract
- 1/4 teaspoon almond extract (optional for depth of flavor)
- Red food coloring (about 1-2 teaspoons to achieve vibrant pink)
For the Frosting:
- 1/2 cup unsalted butter, softened
- 2 cups powdered sugar, sifted
- 2-3 tablespoons heavy cream or milk
- 1/2 teaspoon vanilla extract
- Pink food coloring (a few drops)
For Decoration:
- Pink and white sprinkles or jimmies
How Much Time Will You Need?
This recipe will take about 20 minutes to prepare and around 10 minutes to bake. After baking, you’ll want to let the cookies cool for about 5 minutes before frosting them and a final 15 minutes for the frosting to set. So, in total, plan for about 45-50 minutes from start to finish!
Step-by-Step Instructions:
1. Preheat the Oven:
First, preheat your oven to 350°F (175°C). Line two baking sheets with parchment paper to prevent the cookies from sticking.
2. Mix Dry Ingredients:
In a medium bowl, whisk together the flour, baking powder, baking soda, and salt. Set this mixture aside for later.
3. Cream the Butter and Sugar:
In a large bowl, beat the softened butter and granulated sugar together until they’re fluffy and creamy. This usually takes about 2-3 minutes.
4. Add Wet Ingredients:
Now, add the egg, buttermilk, vanilla extract, and almond extract (if using) to the butter mixture. Beat everything together until well combined.
5. Combine Ingredients:
Gradually add the whisked dry ingredients to the wet mixture. Mix just until combined to avoid overmixing your dough.
6. Color the Dough:
Now it’s time to add the red food coloring! Start with about 1 teaspoon and mix in more until you get your desired vibrant pink color.
7. Scoop the Dough:
Scoop about 2 tablespoons of cookie dough onto the prepared baking sheets, spacing them about 2 inches apart. Lightly flatten each cookie to about 1/2 inch thick.
8. Bake:
Bake the cookies for 8-10 minutes, or until the edges are set but the centers are still soft. Remove them from the oven and let them cool on the baking sheet for about 5 minutes before transferring to a wire rack to cool completely.
9. Make the Frosting:
In the meantime, prepare your frosting! Beat the softened butter in a bowl until creamy. Gradually add in the powdered sugar, heavy cream (or milk), and vanilla extract, beating until the mixture is light and fluffy. Add a few drops of pink food coloring to reach your desired shade.
10. Frost the Cookies:
Once the cookies have cooled completely, generously spread or pipe the pink frosting on top of each cookie.
11. Add Sprinkles:
Immediately sprinkle the pink and white sprinkles on top of the frosted cookies so they stick well to the frosting.
12. Set and Serve:
Allow the frosting to set for about 15 minutes before serving. Then enjoy your beautiful and delicious Crumbl Pink Velvet Cookies!
Your cookies will be soft, buttery, and decorated just like you’d find at Crumbl. Happy baking!
Can I Use Different Types of Flour?
Yes, if you need a gluten-free option, you can substitute all-purpose flour with a 1:1 gluten-free flour blend. Make sure it contains xanthan gum for the best texture!
What Can I Use Instead of Buttermilk?
If you don’t have buttermilk on hand, you can easily make a substitute by mixing 1 tablespoon of vinegar or lemon juice with 1 cup of milk. Let it sit for about 5 minutes before adding it to the recipe.
How Should I Store Leftover Cookies?
Store any leftover cookies in an airtight container at room temperature for up to 3 days. If you want them to last longer, you can freeze them for up to a month. Just thaw them in the fridge or at room temperature before enjoying!
Can I Make These Cookies in Advance?
Absolutely! You can prepare the dough ahead of time. Just refrigerate it for up to 3 days. When you’re ready, scoop and bake them straight from the fridge, adding a minute or two to the baking time.