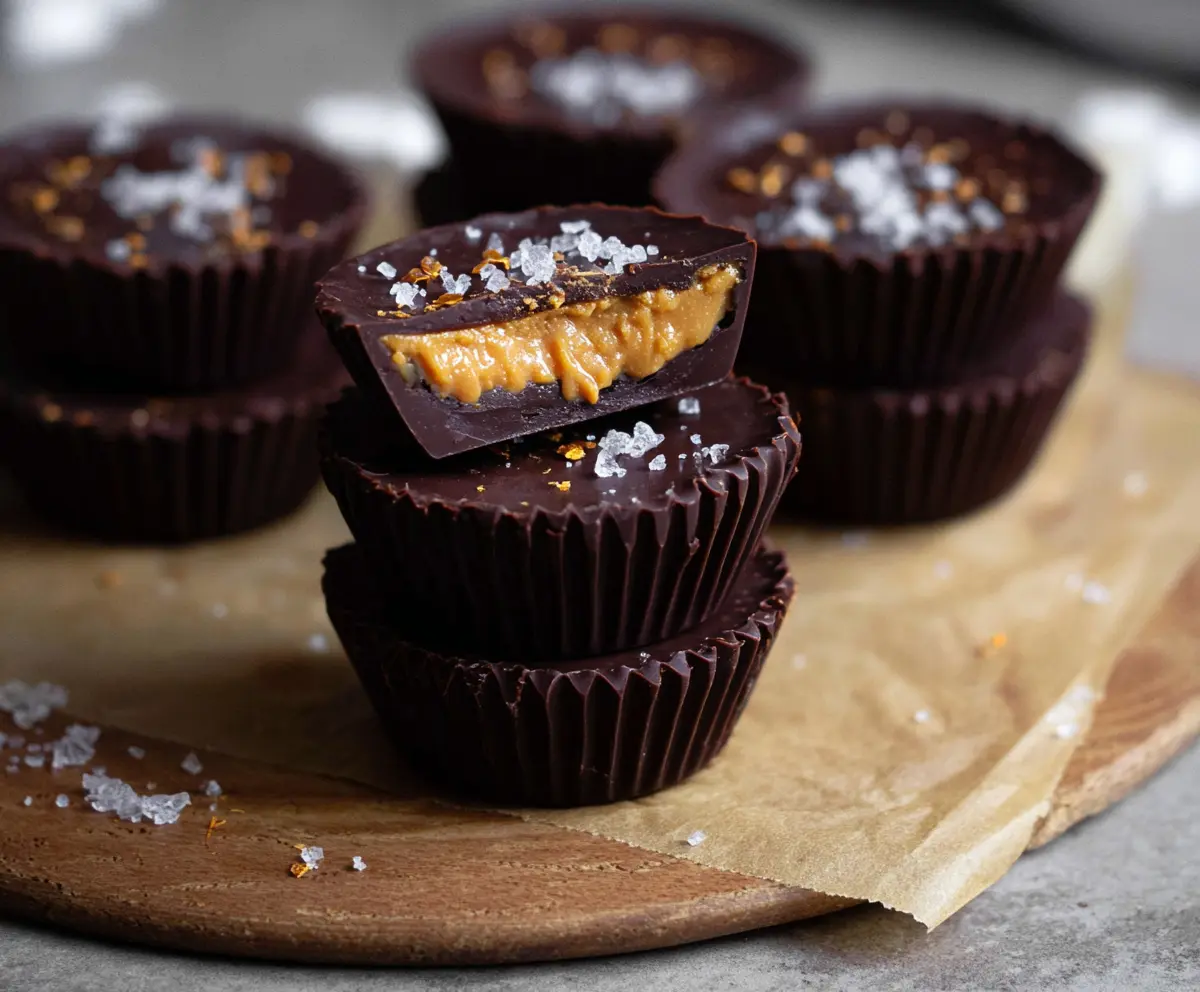
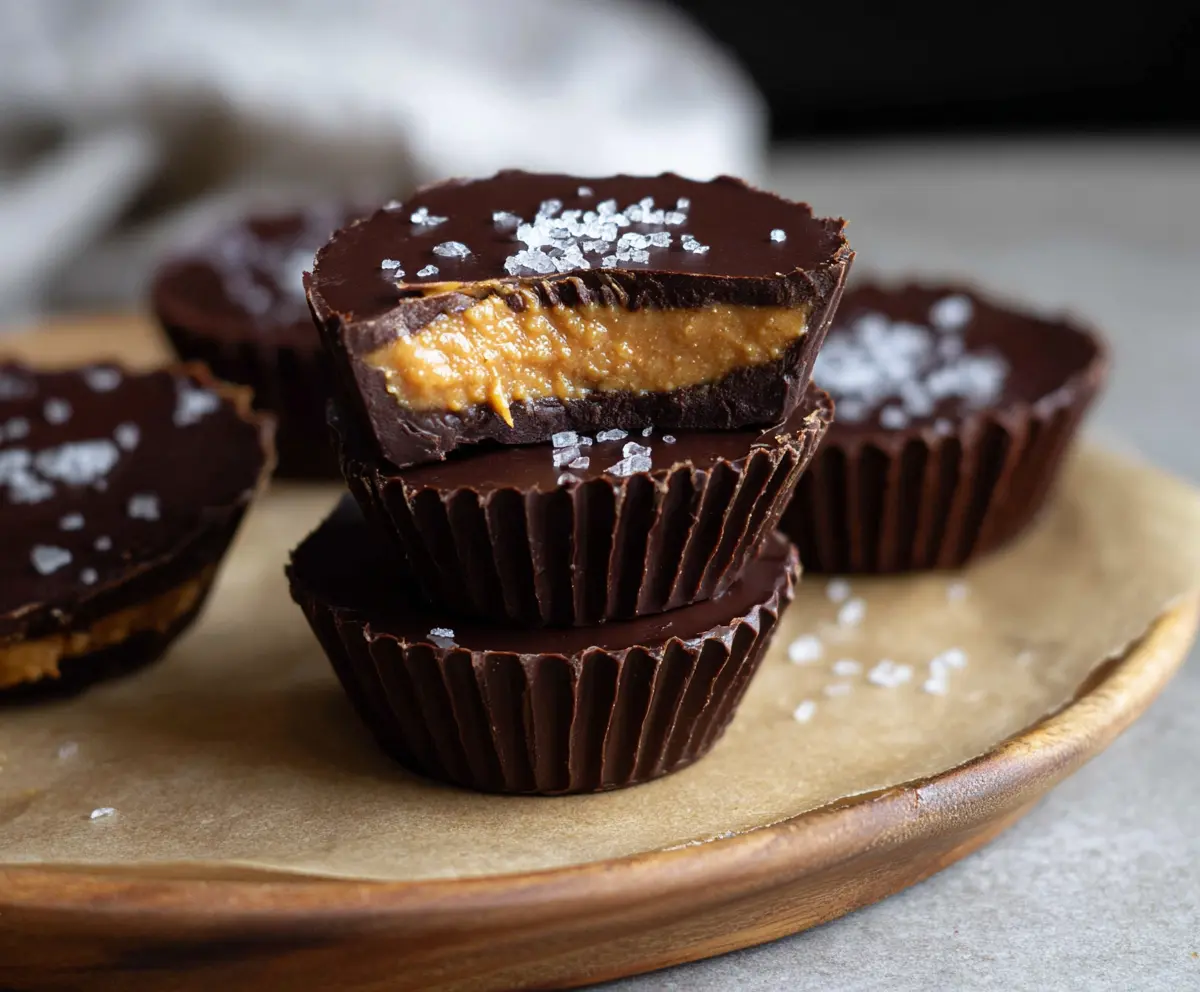
These Dark Chocolate Peanut Butter Cups are a treat that’s hard to resist! They have a rich dark chocolate shell filled with creamy peanut butter, making them perfect for a sweet snack.
Honestly, who can say no to chocolate and peanut butter? I usually make a batch and hide them away, but let’s be real, they never last long. 😋
I love how easy they are to whip up at home—just melt, mix, and layer. Plus, they’re great for sharing… if you’re feeling generous! 😉
Key Ingredients & Substitutions
Dark Chocolate: Use chocolate with at least 60-70% cocoa for a rich flavor. If you prefer a sweeter taste, you can opt for semi-sweet chocolate. For a dairy-free choice, go for dairy-free dark chocolate chips.
Peanut Butter: Creamy peanut butter is typically used, but crunchy peanut butter adds a nice texture. Allergic to peanuts? Almond butter or sunflower seed butter works well as substitutes!
Powdered Sugar: This helps sweeten the peanut butter filling. If you’re aiming to avoid sugar, you might use a sugar alternative like stevia or a sugar-free powdered sugar blend.
Coconut Oil: This is optional but helps make the peanut butter filling smooth. If you don’t have coconut oil, you could use any neutral oil or a bit of softened butter instead.
What’s the Best Way to Melt Chocolate for Your Cups?
Melted chocolate can be finicky, so here’s how to do it right:
- Use a microwave-safe bowl and heat the chocolate chips in 20-second bursts, stirring after each. This prevents burning.
- If using a double boiler, ensure the water doesn’t touch the bowl. Stir until melted and smooth. Remove from heat immediately.
This gentle melting method keeps the chocolate silky, ensuring it coats your cups perfectly!
How to Make Dark Chocolate Peanut Butter Cups
Ingredients You’ll Need:
- 1 1/2 cups dark chocolate chips or chopped dark chocolate (at least 60-70% cocoa)
- 1/2 cup creamy peanut butter (natural or regular based on preference)
- 2 tablespoons powdered sugar
- 1 teaspoon coconut oil or softened butter (optional, for smoother filling)
- Flaky sea salt for topping
Time Needed:
This recipe will take about 20 minutes to prepare and another 30 minutes to chill. Perfect for a quick treat you can enjoy later!
Step-by-Step Instructions:
1. Prepare the Tray:
Start by lining a mini muffin tin or small cupcake tray with paper liners. This step is crucial to keep your peanut butter cups intact and makes removing them much easier.
2. Melt the Chocolate:
Take 1 cup of dark chocolate chips and place them in a microwave-safe bowl. Melt the chocolate in the microwave, doing it in 20-second intervals. Make sure to stir well between each interval until the chocolate is completely melted and smooth. If you prefer, you can melt them over a double boiler on the stovetop.
3. Create the Chocolate Base:
Spoon about 1 teaspoon of the melted chocolate into each paper liner. Use the back of a spoon to spread the chocolate evenly across the bottom of each cup, creating a nice foundation for your filling.
4. Chill the Base:
Pop the tray into the freezer for about 10 minutes to let the chocolate base set up well. It’s essential for the layers to stay distinct.
5. Make the Peanut Butter Filling:
In a medium bowl, mix together the peanut butter, powdered sugar, and coconut oil (if you’re using it). Stir until the mixture is super smooth and creamy.
6. Assemble the Cups:
Once the chocolate base is firm, add about 1 teaspoon of the peanut butter mixture on top of each chocolate base. You can gently flatten the peanut butter layer but make sure to leave a little space at the top.
7. Add the Top Layer of Chocolate:
Melt the remaining 1/2 cup of chocolate chips like you did before. Pour this melted chocolate over the peanut butter layer in each cup, completely covering it. For a smooth finish and to get rid of air bubbles, tap the tray lightly on the counter.
8. Add Flaky Sea Salt:
Before the chocolate sets, sprinkle a pinch of flaky sea salt on top of each cup. This added touch enhances the flavor beautifully!
9. Chill to Set:
Refrigerate the tray for at least 30 minutes, letting the chocolate fully harden. This step ensures that your peanut butter cups are firm and ready to enjoy!
10. Enjoy Your Treats:
When the cups are set, gently remove them from the liners. Store the Dark Chocolate Peanut Butter Cups in an airtight container in the refrigerator. They’re best enjoyed chilled or slightly softened at room temperature!
Now, you have your delicious homemade dark chocolate peanut butter cups. Enjoy this rich and creamy treat with a delightful salty crunch on top!
Can I Use Milk Chocolate Instead of Dark Chocolate?
Absolutely! If you prefer a sweeter flavor, milk chocolate works well. Just keep in mind that it will alter the taste and richness of the final product.
How Long Can I Store These Peanut Butter Cups?
Store your Dark Chocolate Peanut Butter Cups in an airtight container in the refrigerator for up to 1 week. They can also be frozen for longer storage, just make sure to separate them with parchment paper to prevent sticking!
Can I Substitute Almond Butter for Peanut Butter?
Yes, almond butter is a great alternative if you’re looking for something nut-free or if you prefer its flavor. It will give the cups a slightly different taste but is equally delicious!
What Happens If the Chocolate Hardens Too Quickly?
If your chocolate hardens before you can pour it over the peanut butter layer, just pop it back in the microwave for a few seconds to soften it again. Stir well and it will be ready to use!