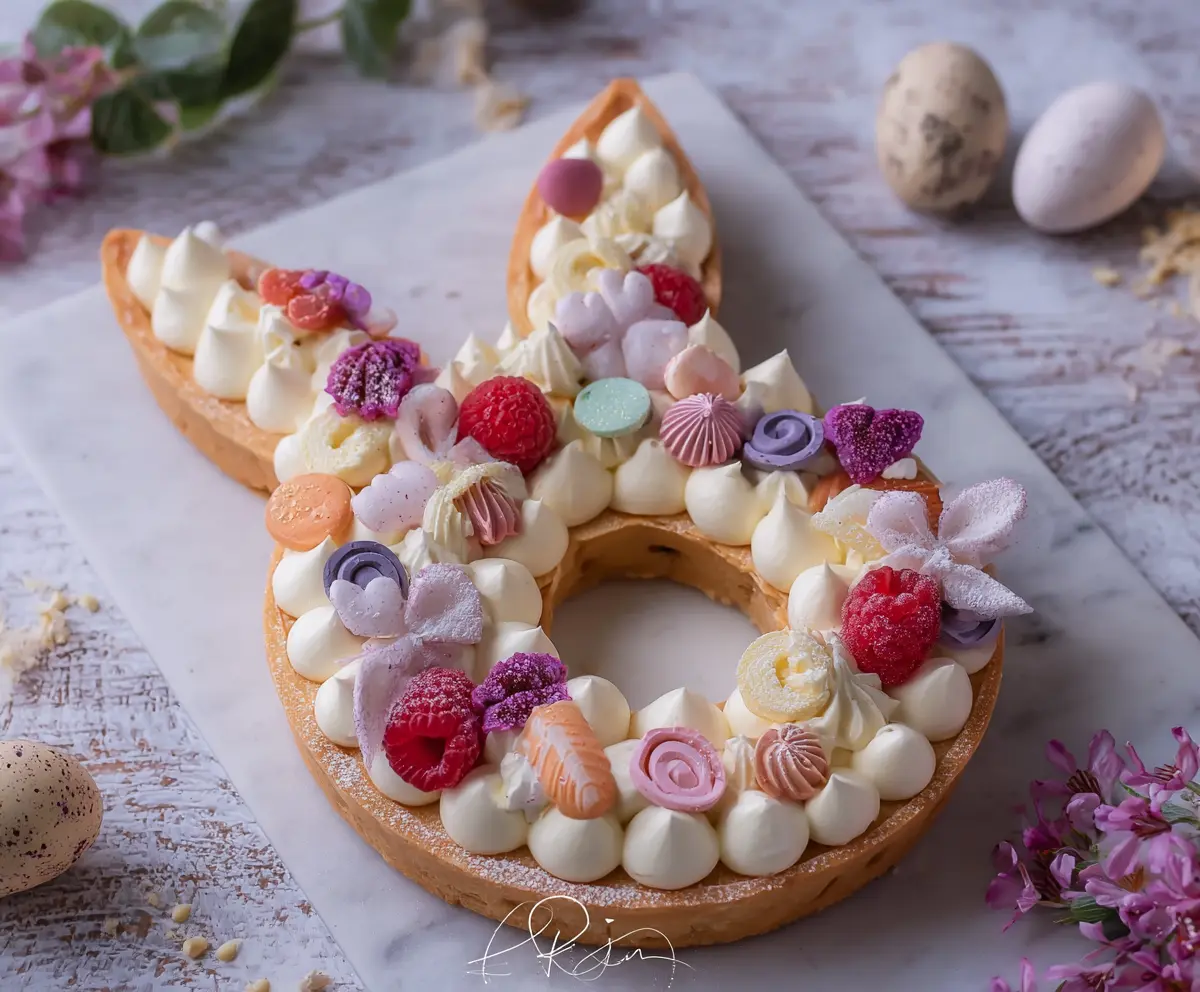
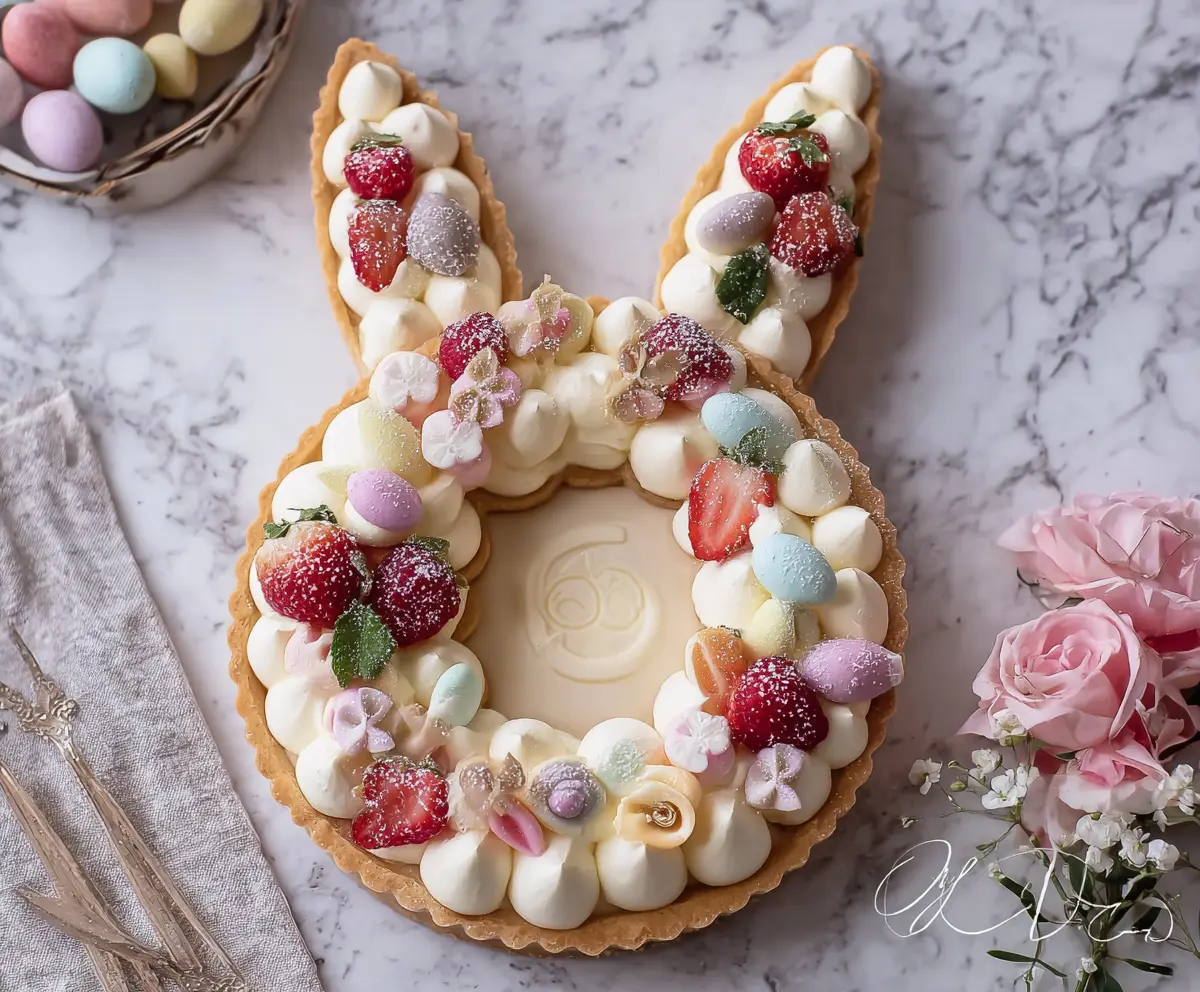
This fun and festive Easter Bunny Cream Tart is perfect for celebrating! With a buttery crust filled with a rich cream filling, it’s both sweet and delightful.
It’s so cute, it will charm everyone at the table! I giggle every time I see it—who can resist a bunny-shaped dessert? Enjoy it with family and friends for a true treat!
Key Ingredients & Substitutions
All-Purpose Flour: This is your go-to flour for a sturdy tart base. If you’re looking for a gluten-free option, almond flour or gluten-free all-purpose flour blends work well, though the texture may vary slightly.
Unsalted Butter: I always use unsalted butter for better control over the tart’s saltiness. If you’re dairy-free, you can substitute it with vegan butter or coconut oil, but the taste may change slightly.
Heavy Whipping Cream: This gives the filling its lusciousness. For a lighter version, you can use half-and-half or a plant-based cream, though the end result might be less rich.
Cream Cheese: Soften it well for the smoothest filling. Neufchâtel cheese is a great lower-fat alternative, while a dairy-free cream cheese can cater to vegan diets.
Meringue Kisses: These add a fun pop of flavor and color. If you can’t find them, consider using mini marshmallows or whipped cream dollops instead. They won’t have the same crunch but will still look cute!
What’s the Best Way to Achieve a Perfect Tart Base?
The tart base is crucial for flavor and texture. When making it, keep a few things in mind:
- Work quickly to keep the butter cold; this helps create a flaky crust. If the dough starts to warm up, chill it for a bit.
- Avoid overmixing the dough after adding the egg. This keeps the crust tender!
- Ensure your dough is evenly rolled out to avoid uneven baking, and remember, a slightly thicker edge can help keep fillings from oozing out.
How to Make Easter Bunny Cream Tart
Ingredients You’ll Need:
For the Tart Base (Cookie Crust):
- 2 ¼ cups all-purpose flour
- ¾ cup powdered sugar
- ¾ teaspoon salt
- 1 cup unsalted butter, chilled and cut into small cubes
- 1 large egg
For the Cream Filling:
- 1 cup (240 ml) heavy whipping cream, cold
- ¼ cup powdered sugar
- 1 teaspoon vanilla extract
- 8 oz (225 g) cream cheese, softened
For Decoration:
- Fresh raspberries (about 10-12)
- Various pastel-colored meringue kisses
- Edible flowers or sugar-coated flowers (white and purple shades)
- Colored chocolate discs or candy melts shaped into flowers and spirals
- Powdered sugar for dusting
How Much Time Will You Need?
This delightful tart takes about 1 hour of prep time, plus an additional 30 minutes to chill after assembly. Including baking and cooling time, you should set aside around 2 hours to make this beautiful Easter Bunny Cream Tart!
Step-by-Step Instructions:
1. Prepare the Tart Base:
Begin by using a food processor to combine the all-purpose flour, powdered sugar, and salt. Add the chilled butter cubes and pulse until the mixture looks like coarse crumbs, which is key for a flaky crust. Next, add in the egg and pulse just until everything is combined; it’s important not to overmix. Gather the dough into a ball, flatten it slightly, wrap it in plastic wrap, and place it in the fridge to chill for at least 1 hour.
2. Shape and Bake the Tart:
Preheat your oven to 350°F (175°C). Lightly flour a surface and roll out the chilled dough to about ¼ inch thick. Use a bunny-shaped stencil or a knife to cut out two bunny shapes from the dough. Carefully place these shapes on a parchment-lined baking sheet. Bake in the oven for 12-15 minutes, or until the edges are a lovely golden brown. Once done, let them cool completely on a wire rack.
3. Prepare the Cream Filling:
In a large mixing bowl, beat the softened cream cheese until it’s nice and smooth. In a separate bowl, whip the heavy cream with the powdered sugar and vanilla extract until you reach stiff peaks. Gently fold the whipped cream into the cream cheese mixture, being careful to mix until it’s fully combined and creamy.
4. Assemble the Tart:
Place one of the bunny-shaped tart bases on a serving platter. Fill a piping bag fitted with a large round tip with the cream filling. Pipe evenly spaced dollops of the filling across the surface of the tart base. If you like, you can place the second tart base on top, or you can keep it open-faced for a more whimsical look!
5. Decorate:
Now for the fun part! Arrange fresh raspberries evenly on top of the piped cream. Add your pastel-colored meringue kisses, sprinkle some delicate edible flowers, and incorporate small candy decorations like spirals and discs to make it festive. Finish with a light dusting of powdered sugar for an elegant touch!
6. Serve:
Chill the tart in the refrigerator for at least 30 minutes to let it firm up nicely. Once chilled, serve your stunning Easter Bunny Cream Tart and enjoy the delightful smiles it brings to your festive gathering!
This charming tart is perfect for Easter celebrations, featuring a crisp cookie base complemented by a smooth cream filling and artistic decorations. Happy baking!
Can I Use a Different Type of Flour for the Tart Base?
Yes, you can substitute all-purpose flour with gluten-free all-purpose flour or almond flour if needed. Just keep in mind that the texture may vary, and you might need to adjust the quantity slightly to get the right consistency.
How Can I Store Leftover Tart?
Store any leftover tart in an airtight container in the refrigerator for up to 3 days. The crust may soften slightly, but the flavors will remain delicious!
Can I Make the Cream Filling Ahead of Time?
Absolutely! You can prepare the cream filling a day in advance. Just store it in the refrigerator in an airtight container. When you’re ready to assemble, give it a quick stir before piping it onto the tart base.
Is There a Vegan Option for This Tart?
Yes! You can use vegan butter for the crust and a dairy-free cream cheese alternative for the filling. Additionally, coconut cream can be whipped as a substitute for the heavy cream, making the tart completely plant-based.