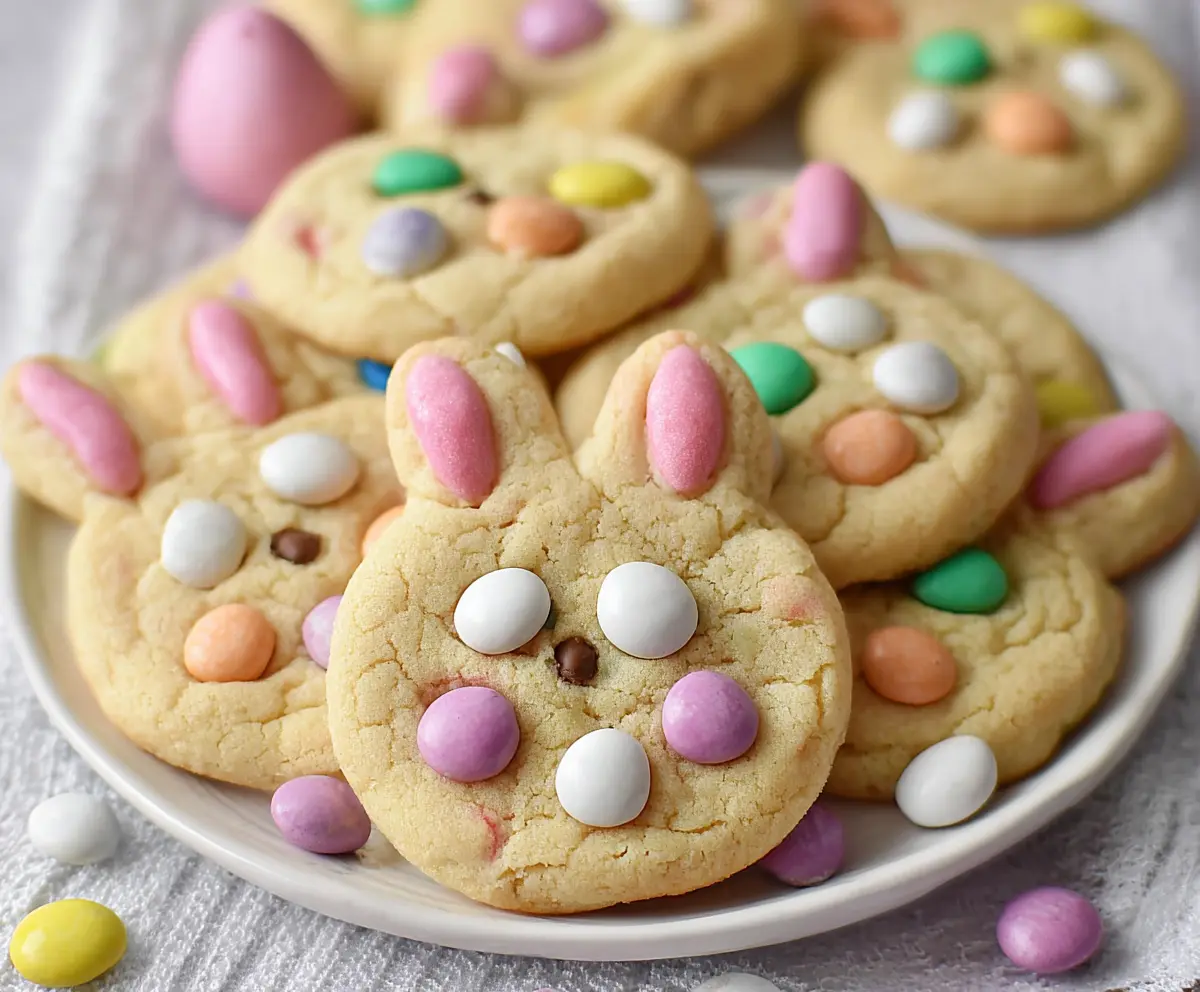
These cheerful Easter Bunny M&M’s Cookies are bursting with color and fun! Soft, chewy, and loaded with sweet M&M’s, they’re perfect for celebrating spring.
Making these cookies is a joy—I can’t help but smile seeing all those bunny faces! They’re great for sharing, but I usually keep a few for myself. Shh, don’t tell! 🐰
Key Ingredients & Substitutions
Butter: Use unsalted butter for better control over the cookie’s sweetness. If you need a dairy-free option, you can substitute with a plant-based butter. I prefer how the butter adds a rich flavor to the cookies.
Granulated Sugar & Brown Sugar: Both sugars contribute to the cookie’s texture. If you only have one type on hand, you can use just granulated sugar, though the cookies might be less chewy. I love using a mix for that perfect balance.
Easter-themed M&M’s: While this recipe calls for pastel M&M’s, feel free to use regular M&M’s or any chocolate candies you prefer. The colorful options are what make them festive!
Pink Candy-Coated Almonds or Jelly Beans: If you’re not a fan of almonds, try using gummy candies or other colorful treats for the ears. Just be sure they can be pressed into the dough.
How Can I Shape the Cookies Like Bunny Faces?
Shaping the cookies to look like bunny faces is simple and fun! Here’s a step-by-step guide:
- After scooping the dough, roll it into a ball.
- Gently flatten the ball to form a rounded shape, which will be the bunny’s face.
- To create ears, pinch the top of the cookie gently to form two points where you’ll place the candy ears.
- Press the candies into the designated areas carefully, so they hold well but don’t break the dough apart.
This shaping technique adds a playful touch, making these cookies even more delightful for kids and adults alike!

How to Make Easter Bunny M&M’s Cookies
Ingredients You’ll Need:
Basic Ingredients:
- 1 cup (226g) unsalted butter, softened
- 1 cup (200g) granulated sugar
- 1/2 cup (100g) light brown sugar, packed
- 2 large eggs
- 1 teaspoon vanilla extract
Dry Ingredients:
- 2 1/2 cups (315g) all-purpose flour
- 1 teaspoon baking powder
- 1/2 teaspoon baking soda
- 1/2 teaspoon salt
Decorative Ingredients:
- 1 cup Easter-themed M&M’s (white, pastel colors, etc.)
- Pink candy-coated almonds or jelly beans (for bunny ears)
- Mini chocolate chips (for bunny noses)
How Much Time Will You Need?
This cookie recipe takes about 15 minutes of preparation time and an additional 10-12 minutes for baking. Make sure to allow 5 minutes for cooling on the baking sheet before transferring them to a wire rack. In no time, you’ll have delightful bunny cookies ready for Easter!
Step-by-Step Instructions:
1. Preheat the Oven:
Start by preheating your oven to 350°F (175°C). While that’s happening, line your baking sheets with parchment paper so the cookies won’t stick.
2. Cream the Butter and Sugars:
In a big bowl, combine the softened butter, granulated sugar, and brown sugar. Using a mixer or a spoon, cream them together until the mixture is light and fluffy—this usually takes about 2-3 minutes. This step helps create a soft cookie!
3. Add Eggs and Vanilla:
Beat in the eggs one at a time, making sure they’re well combined before adding the next. Then, stir in the vanilla extract. Your mixture should look creamy and smooth.
4. Mix the Dry Ingredients:
In a separate bowl, whisk together the flour, baking powder, baking soda, and salt. This helps ensure that your cookies rise nicely when baking.
5. Combine Wet and Dry Mixtures:
Gradually add the dry ingredients to the wet mixture, mixing just until combined. Try not to overmix, or your cookies might turn out tough!
6. Add M&M’s to the Dough:
Gently fold in 1/2 cup of the Easter-themed M&M’s into your dough. This will give your cookies that fun colorful touch.
7. Shape the Cookies:
Using a cookie scoop or your hands, roll the dough into balls and place them onto your lined baking sheets. Flatten the balls slightly into shapes that resemble bunny faces.
8. Create Bunny Ears:
To make the cookies look like bunnies, pinch the top of each cookie to form two pointed “ears.”
9. Add Inner Ears:
Press two pink candy-coated almonds or jelly beans into each ear area for the bunny’s inner ears. This adds a cute detail!
10. Decorate Bunny Faces:
Using the remaining M&M’s, press them onto the cookie dough for the bunny face—white or pastel ones for the eyes and colorful ones for the cheeks. Place a mini chocolate chip in the center to make the nose.
11. Bake the Cookies:
Put the baking sheets in the preheated oven and bake for 10-12 minutes. Keep an eye on them; you want the edges set but the centers should remain soft.
12. Cool Your Cookies:
Once baked, let the cookies cool on the baking sheet for about 5 minutes. This makes them easier to transfer. Then, move them to a wire rack to cool completely.
13. Enjoy!
Serve these colorful, festive Easter Bunny M&M’s Cookies and watch them disappear. They’re perfect for sharing and bringing some joy to your holiday celebrations!
Can I Use Other Types of Candy for Decorations?
Absolutely! If you can’t find pink candy-coated almonds or jelly beans, feel free to use other candies like gummy bears or even chocolate candies for the ears. Just make sure they can be pressed into the dough without falling apart!
How Should I Store Leftover Cookies?
Store any leftover cookies in an airtight container at room temperature for up to 5 days. For longer storage, you can freeze them! Just place them in a freezer-safe bag separated by parchment paper to prevent sticking.
What Can I Do If the Dough Is Too Sticky?
If you find the cookie dough is too sticky, try chilling it in the refrigerator for 30 minutes. Chilling the dough can make it easier to handle when shaping the bunny faces!
Can I Make the Dough Ahead of Time?
Yes, you can make the dough a day in advance! Just wrap it tightly in plastic wrap and store it in the fridge. When ready to bake, allow it to come to room temperature for easier shaping before proceeding with the recipe.