These Graveyard Chocolate Pudding Cups are spooky fun! They’re made with rich chocolate pudding, crushed cookies for dirt, and gummy worms peeking out. Perfect for Halloween!
I love how easy they are to make! Just layer the ingredients in a cup, and you have a sweet treat that looks cute and tastes amazing. Kids will have a blast helping out! 🎃
Key Ingredients & Substitutions
Milk: Whole milk makes the pudding rich, but you can use any milk you prefer! Almond, soy, or oat milk work just as well for a dairy-free option.
Instant Chocolate Pudding Mix: This is the star of the show! If you’re looking for a homemade option, you can create a chocolate custard. But instant mix saves a lot of time! You can also use vanilla pudding and add cocoa powder for a twist.
Whipped Cream: You can use real whipped cream for more flavor, or go with store-bought whipped topping for convenience. If you need a dairy-free option, coconut whipped cream is a great substitute.
Oreo Cookies: The classic choice! For a gluten-free version, try using gluten-free chocolate sandwich cookies. Or, for a fun change, you can use chocolate graham crackers or even crushed chocolate chips.
Halloween Decorations: Get creative with your toppings! Instead of tombstone cookies, you can make chocolate-dipped marshmallows or use spooky gummies. The sprinkles can be any color or shape; get festive!
How Do I Layer the Pudding Cups Perfectly?
Layering your pudding cups is key for that graveyard look. Here’s how to do it right:
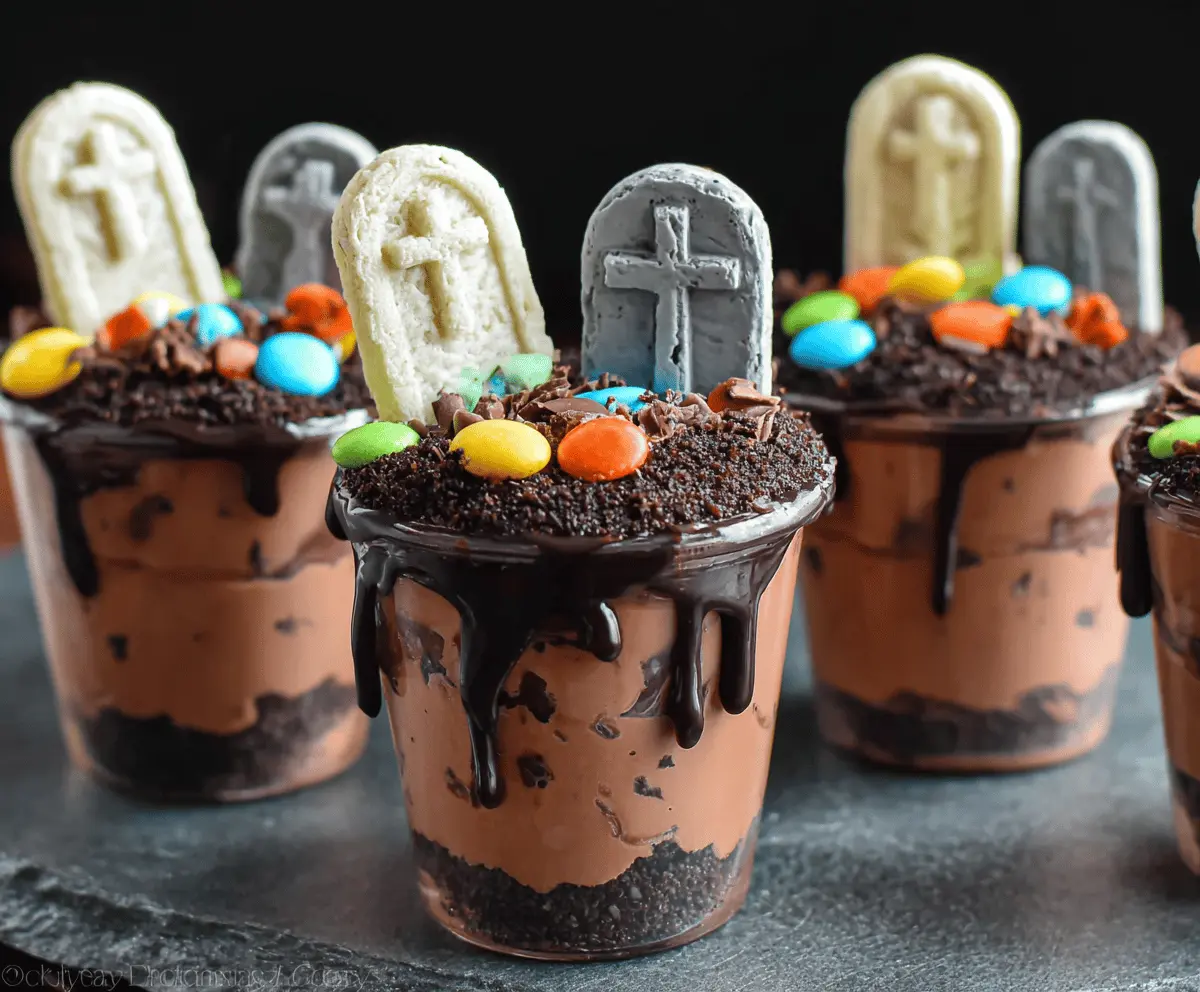
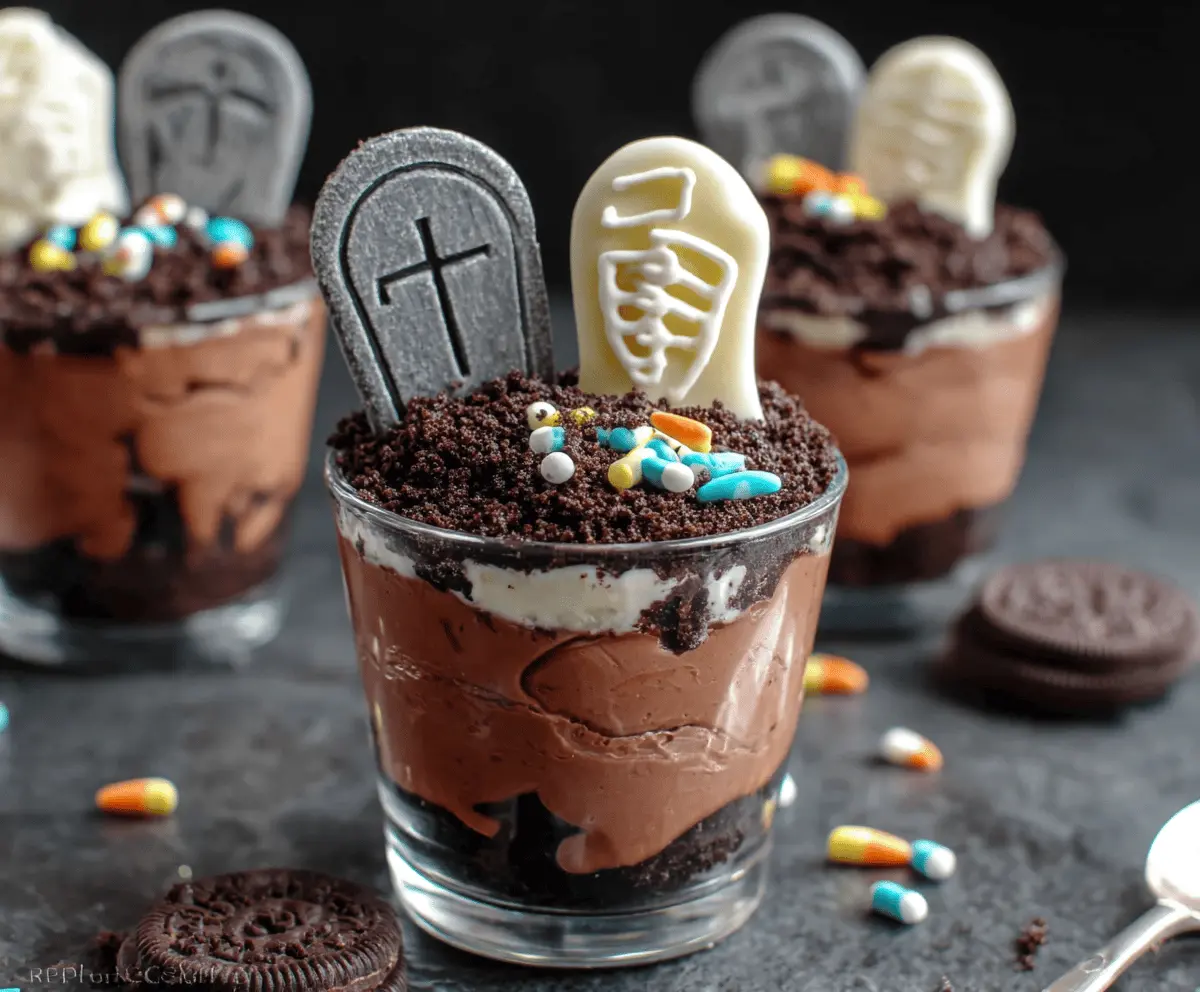
- Start with a solid base: Use crushed Oreos as the first layer for a sturdy “dirt” foundation.
- Spread the pudding gently: Use a spoon or piping bag—this helps keep layers neat!
- Control your whipped cream: Use a spatula to spread it evenly without mixing it into the pudding.
- Top it off well: Add more crushed Oreos for texture and flavor, then place your candy tombstones at an angle for a spooky effect.
Chilling the finished cups helps the layers set better, so don’t skip that step. Enjoy each delicious bite!
Graveyard Chocolate Pudding Cups
Ingredients You’ll Need:
- 2 cups milk (whole or your choice)
- 1 package (3.9 oz) instant chocolate pudding mix
- 1 cup whipped cream or whipped topping, divided
- 15-20 Oreo cookies (or similar chocolate sandwich cookies)
- Halloween-themed candy tombstones or cookies for decoration (chocolate or sugar cookies shaped like tombstones)
- Halloween candy sprinkles (e.g., candy pumpkins, bones, skulls)
How Much Time Will You Need?
This delightful dessert takes about 15 minutes of prep time, plus at least 1 hour to chill in the refrigerator. You’ll spend a little time mixing, layering, and decorating, which makes it perfect for a fun Halloween treat!
Step-by-Step Instructions:
1. Prepare the Chocolate Pudding:
In a mixing bowl, whisk together the instant chocolate pudding mix and the milk according to the package instructions. Beat until smooth and thickened, then pop it in the refrigerator for about 5 minutes to set up a bit more.
2. Crush the Oreos:
While the pudding is chilling, take the Oreo cookies and crush them finely. You can do this by placing them in a plastic bag and rolling over them with a rolling pin. Alternatively, you can use a food processor for a quick job. Set the crumbs aside for later use.
3. Mix the Whipped Cream:
Next, take half of the whipped cream and gently fold it into the chocolate pudding mixture. This will lighten the pudding, making it creamy and fluffy.
4. Assemble the Layers:
Now it’s time to layer! Take your serving cups and start with a layer of the crushed Oreos at the bottom to create a “dirt” base. Follow this with a generous spoonful or piping of the chocolate pudding on top of the Oreo crumbs.
5. Add More Whipped Cream:
Spread a thin layer of whipped cream over the pudding layer to add some sweetness and fluffiness. It helps to keep the layers distinct and pretty!
6. Top Off with More Crushed Oreos:
Sprinkle more crushed Oreos over the whipped cream layer to continue the “dirt” theme. Make sure it’s an even layer for that perfect graveyard look!
7. Decorate & Chill:
Now for the fun part—decorating! Carefully place your Halloween candy tombstones into the pudding cups, pressing them down gently so they stand upright. Sprinkle some of your colorful Halloween-themed candy sprinkles on top to finish the spooky look.
8. Serve and Enjoy:
Cover the cups and chill them in the refrigerator for at least 1 hour so the layers can set perfectly. When you’re ready to serve, take them out and enjoy the spooky, sweet graveyard treat!
This dessert is not only simple to make, but it also sparks creativity and is perfect for Halloween parties or a fun family activity. Enjoy the fright in every yummy bite!
Can I Use Dairy-Free Milk for the Pudding?
Absolutely! You can use almond, oat, or soy milk instead of regular milk for a dairy-free version. Just make sure you choose unsweetened varieties if you want to control the sweetness of the pudding.
How Long Can I Store Leftover Pudding Cups?
Leftover pudding cups can be stored in the refrigerator for up to 3 days. Just make sure to cover them with plastic wrap or a lid to keep them fresh. The layers might settle slightly, but they will still taste delicious!
Can I Make the Pudding Cups a Day Ahead?
Yes! You can prepare the layered cups in advance and refrigerate them overnight. This allows the flavors to meld nicely, and they’ll be chilled and ready to serve for your Halloween celebration!
How Can I Customize the Decorations?
Feel free to get creative with the decorations! Instead of tombstone cookies, you could use chocolate-covered marshmallows or spooky gummy candies. You can also swap out the sprinkles for Halloween-themed chocolates or edible glitter for an extra festive touch!