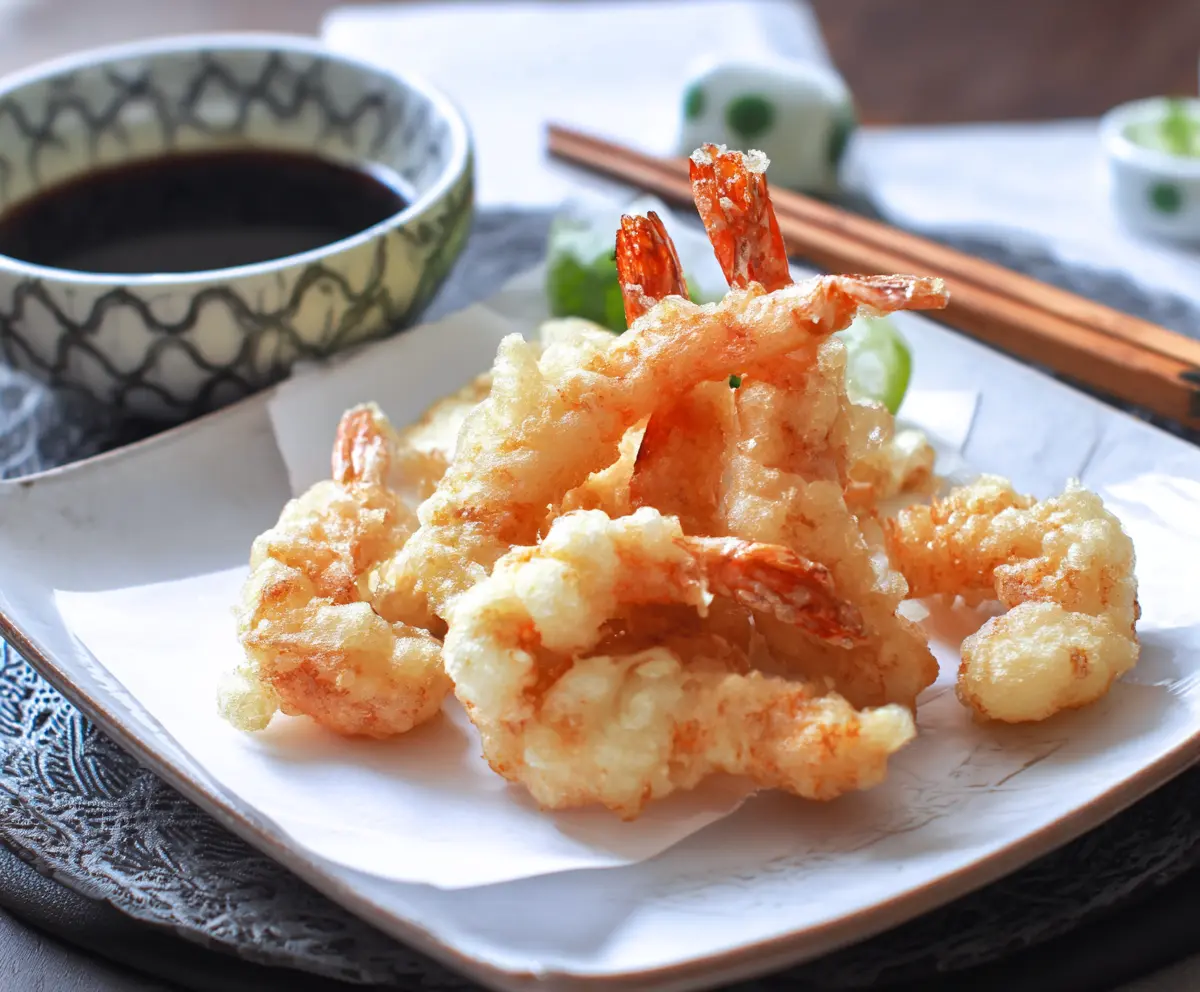
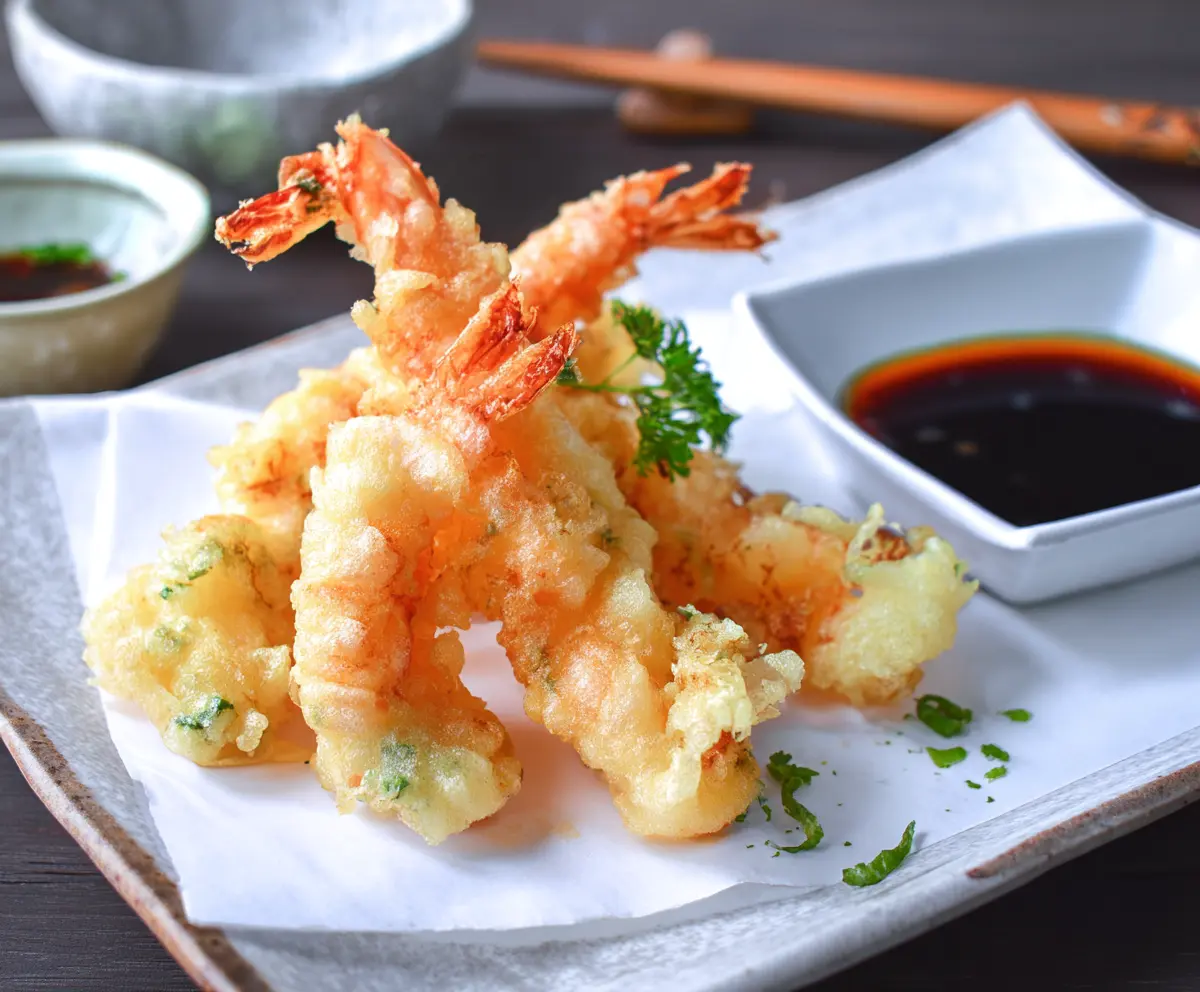
Japanese Shrimp Tempura is a crispy and light dish that features juicy shrimp coated in a thin, crunchy batter. It’s quick to make and oh-so-tasty!
Seriously, who doesn’t love that satisfying crunch? I could munch on these with a little dipping sauce all day! Just make sure to serve them hot for the best experience!
Key Ingredients & Substitutions
Shrimp: Use large shrimp for a nice bite; they fry well and look impressive. If you’re looking for alternatives, you can use other seafood like calamari or vegetables like sweet potatoes and zucchini for a veggie tempura!
Flour: All-purpose flour is the best choice for tempura because it creates a light batter. However, if you need gluten-free, try using rice flour or a gluten-free blend.
Cornstarch: This helps make the batter super crispy. If you’re out, try using potato starch or just stick to using all-purpose flour alone, but you’ll miss that extra crunch!
Sparkling Water: The bubbles are key for a light batter. If you don’t have sparkling water, ice-cold regular water works as a substitute, but you’ll lose some of that crispiness.
Dashi: This stock adds umami flavor to the sauce. You can easily replace it with chicken or vegetable broth, but you may want to add a pinch of seaweed for extra flavor.
How Do I Make Crunchy Tempura Batter?
The key to a perfect tempura batter is keeping it cold and lumpy! Here’s how to nail it:
- Start with cold ingredients: Mix your ice water and egg before adding them to your dry ingredients.
- Combine lightly: Stir the batter just until the ingredients are combined; it’s okay if there are lumps. Over-mixing toughens the batter, making it less crispy.
- Work quickly: Once the batter is made, use it right away to keep everything cold and maintain that light texture.
With these tips, you’ll have deliciously crispy shrimp tempura that’s sure to impress!
How to Make Japanese Shrimp Tempura
Ingredients You’ll Need:
For the Shrimp Tempura:
- 12 large shrimp, peeled and deveined, tails left on
- 1 cup all-purpose flour
- 1/2 cup cornstarch
- 1 large egg
- 1 cup ice-cold sparkling water or ice water
- Vegetable oil for deep frying (about 4 cups)
- 1/4 tsp baking powder (optional, for extra crispiness)
- Salt, to taste
- Lemon wedges (optional, for serving)
For the Dipping Sauce (Tentsuyu):
- 1/2 cup dashi stock (or substitute with 1/2 cup water + 1/2 tsp dashi powder)
- 2 tbsp soy sauce
- 2 tbsp mirin
- 1 tsp sugar
- Grated daikon radish (optional)
How Much Time Will You Need?
This recipe takes about 15 minutes of prep time and around 10 minutes of cooking time. Altogether, you’ll need about 25 minutes to have crispy shrimp tempura ready to serve!
Step-by-Step Instructions:
1. Prepare the Shrimp:
Start by rinsing the shrimp under cold water and then patting them dry using paper towels. Make a few shallow cuts on the underside of each shrimp to prevent them from curling while frying.
2. Make the Dipping Sauce:
In a small saucepan, combine the dashi stock, soy sauce, mirin, and sugar. Heat gently on the stove until the sugar is fully dissolved. Once it’s done, remove it from the heat and set the sauce aside. If you like, you can serve it with some grated daikon radish for an extra kick!
3. Heat the Oil:
In a deep pot or a deep fryer, heat the vegetable oil to 350°F (175°C). You want it hot enough to create that delightful crunch.
4. Prepare the Tempura Batter:
In a bowl, lightly beat the egg and then add the ice-cold sparkling water. In another bowl, sift together the flour, cornstarch, and optional baking powder. Gradually add the dry ingredients to the wet mixture, stirring very gently with chopsticks or a fork. The batter should remain a little lumpy, and don’t worry if there are some lumps—it’s better that way!
5. Coat the Shrimp:
Lightly dust each shrimp with a bit of plain flour first. Then dip them into the tempura batter, allowing any excess batter to drip off. This will help create that lovely crispy coating!
6. Fry the Shrimp:
Carefully place the battered shrimp into the hot oil. Make sure not to overcrowd the pot; fry in batches if necessary. Cook the shrimp for 2 to 3 minutes until the batter is puffed up and lightly golden. If needed, turn them gently halfway through cooking.
7. Drain:**
Once cooked, remove the shrimp from the oil and place them on a wire rack or paper towels to drain off any excess oil. This keeps them crispy!
8. Serve Immediately:
Arrange the shrimp tempura on a plate lined with paper towels and serve them hot with your prepared tentsuyu dipping sauce. A few lemon wedges on the side are a nice touch!
Enjoy the light, crispy texture and delicate flavor that defines authentic Japanese shrimp tempura. Happy cooking!
Can I Use Frozen Shrimp for This Recipe?
Yes, you can use frozen shrimp, but be sure to fully thaw them first. The best way is to leave them in the fridge overnight or place them in a sealed bag and submerge in cold water for quicker thawing. Pat them dry before you start cooking to ensure the batter adheres properly.
How Can I Make Tempura Batter Crispier?
For an extra crispy batter, ensure your sparkling water is ice-cold and try adding a teaspoon of baking powder to the dry ingredients. Additionally, avoid over-mixing the batter; it should be lumpy to achieve that light texture.
What’s the Best Way to Store Leftovers?
If you have leftover tempura, store it in an airtight container in the fridge, where it will last for up to 2 days. To reheat, place it in a preheated oven at 375°F (190°C) for about 10 minutes until it’s warmed through and crispy again, rather than using the microwave which can make it soggy.
Can I Make Tempura with Vegetables Instead of Shrimp?
Absolutely! Vegetables like sweet potatoes, broccoli, bell peppers, and zucchini work great. Just slice them thinly for even cooking. Note that cooking times will vary based on the type of vegetable used; typically, you’ll fry them for about 2-4 minutes until golden and crispy.