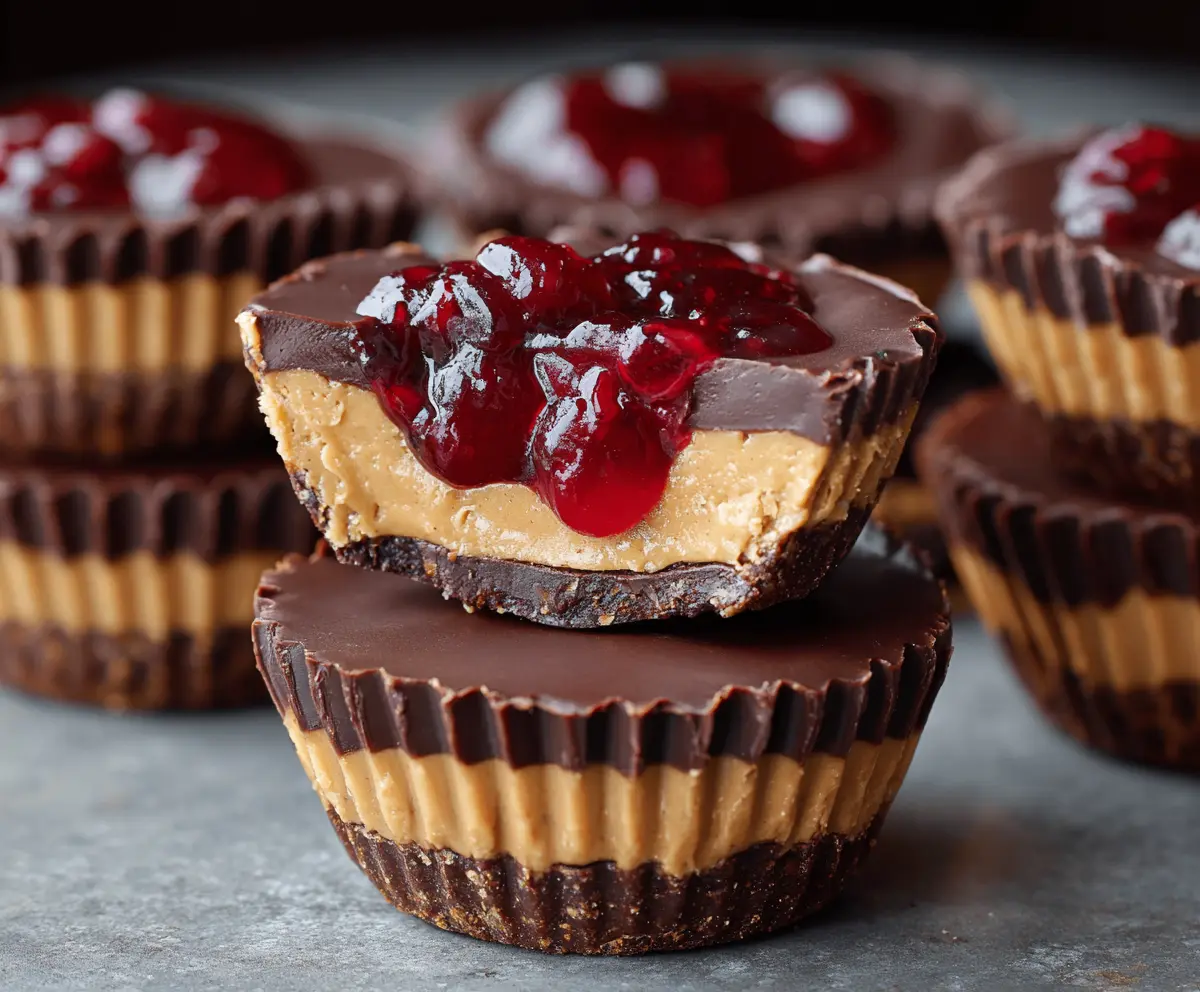
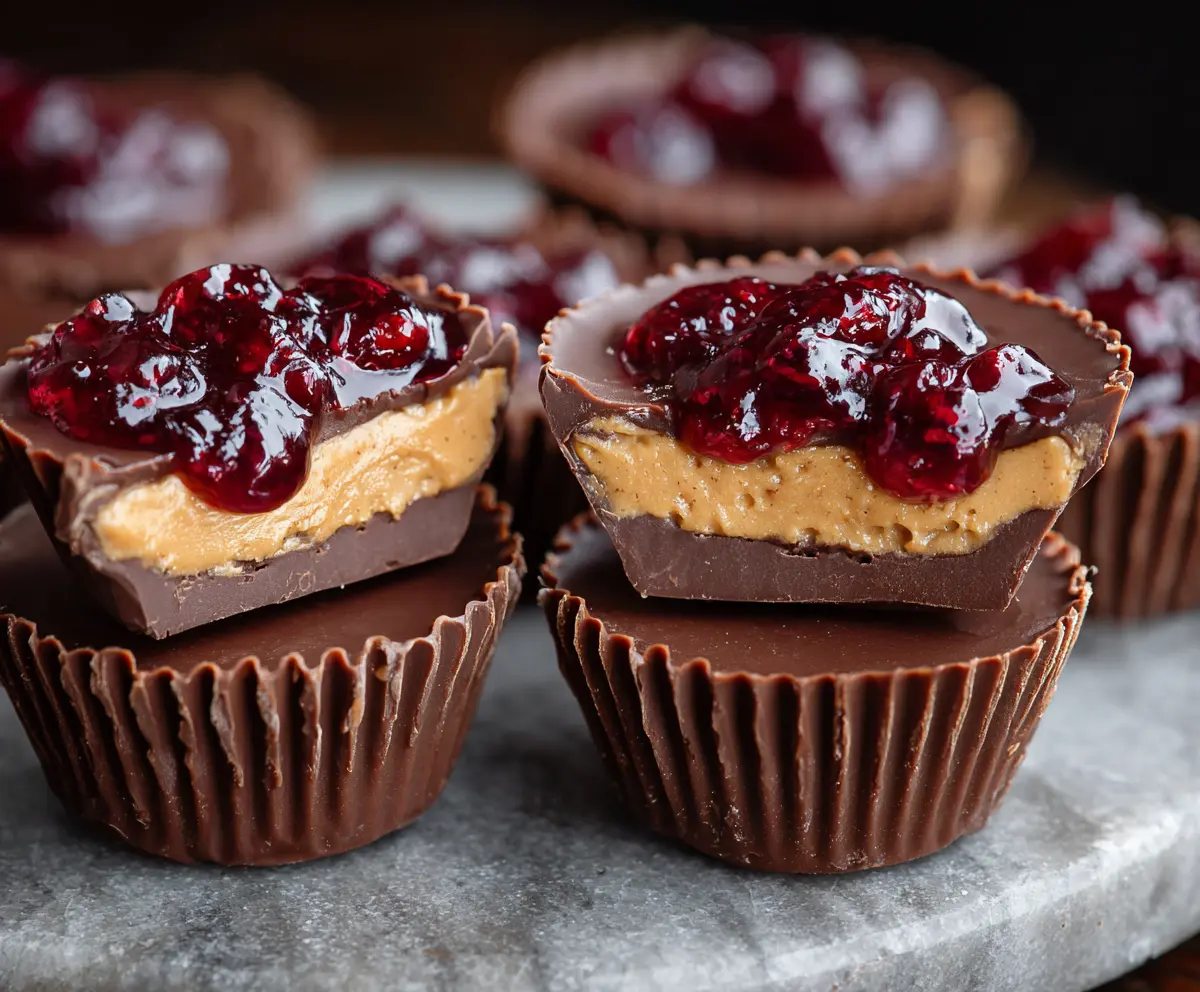
These Peanut Butter and Jelly Cups are like tiny, tasty desserts that brighten your day! With a crunchy base, creamy peanut butter, and sweet jelly, they’re perfect for a quick treat.
Honestly, I can’t resist these little cups. They remind me of classic sandwiches but take them to a whole new level—who doesn’t love a good peanut butter and jelly moment? 🥜🍇
Key Ingredients & Substitutions
Chocolate Cookies: You can use crushed chocolate cookies or chocolate graham crackers for the crust. If you prefer a gluten-free option, try gluten-free cookies. Personally, my favorite are Oreos, as they add a nice richness to the crust.
Creamy Peanut Butter: Creamy peanut butter creates that smooth filling. If you’re after a healthier version, natural peanut butter works too but might be a bit runny. Almond or other nut butters are great substitutes for different flavors!
Semi-Sweet Chocolate Chips: These provide a rich chocolate layer. Dark chocolate can be used for a bolder taste, or you can go for milk chocolate for sweetness. White chocolate is also a fun twist!
Jelly: The classic choice is strawberry or grape jelly, but feel free to replace it with your favorite jam or fruit preserves. I love using raspberry jam for a more tart kick!
How Do I Ensure My Cups Set Perfectly?
To achieve cups that hold their shape and have great texture, follow the setting times carefully! Here are some tips:
- Make sure each layer is fully chilled before adding the next layer. This helps each flavor segment stay distinct.
- When melting chocolate, stir often to prevent burning. The chocolate should be smooth, not too hot to handle.
- Let the final jelly layer set in the fridge for at least 30 minutes—this is crucial for a nice finish!
How to Make Peanut Butter And Jelly Cups
Ingredients You’ll Need:
For the Crust:
- 1 cup crushed chocolate cookies or chocolate graham crackers
- 3 tbsp melted butter
For the Peanut Butter Filling:
- 1 cup creamy peanut butter
- 1/2 cup powdered sugar
- 1/4 cup unsalted butter, softened
- 1 tsp vanilla extract
For the Chocolate Topping:
- 1 1/2 cups semi-sweet chocolate chips
- 2 tbsp coconut oil or vegetable oil
For the Jelly Topping:
- 1/3 cup strawberry or grape jelly (or your favorite jelly)
How Much Time Will You Need?
This delicious treat will take you about 20 minutes of prep time and another 1 hour for chilling, so in total, about 1 hour and 20 minutes before they are ready to enjoy. Don’t worry; most of this time is just waiting while the layers set in the fridge!
Step-by-Step Instructions:
1. Preparing the Crust Base:
Start by mixing the crushed chocolate cookies with the melted butter in a bowl until the mixture is well combined. Next, spoon about 1 tablespoon into each cupcake liner placed in a muffin tin. Press the mixture down firmly to create a solid base. Now, place the whole tray in the freezer to set while you prepare your next layer.
2. Making the Peanut Butter Filling:
In a separate mixing bowl, combine the creamy peanut butter, powdered sugar, softened butter, and vanilla extract. Use a hand mixer or a spatula to blend everything together until it’s smooth and creamy. This filling is going to be so tasty!
3. Adding the Peanut Butter Layer:
Now, take the muffin tin out of the freezer. Spoon the peanut butter mixture evenly over each crust base, smoothing the top gently with a knife or spatula. Return the tin to the freezer for about 15-20 minutes to make sure the filling firms up nicely.
4. Melting the Chocolate Topping:
While the peanut butter layer is setting, grab a microwave-safe bowl and combine the chocolate chips with coconut oil. Microwave this mixture in 30-second intervals, stirring in between, until it becomes fully melted and smooth.
5. Adding the Chocolate Layer:
Once the peanut butter layer is set, pour the melted chocolate over the top of the peanut butter layer, making sure to cover it evenly. Gently tap the pan on the counter to help settle the chocolate. It should look lovely already!
6. Adding the Jelly Topping:
Now it’s time to top it off! Carefully spoon a small dollop of jelly over each chocolate layer. You can swirl it in for a pretty look, or just leave it as a glossy topping for a classic finish.
7. Chilling to Set:
Place the muffin tin back in the fridge or freezer for at least 30 minutes to allow the chocolate and jelly to set completely. This is where they transform into yummy cups!
8. Serve Up Your Treats:
Once everything is firm and ready, gently remove the cups from the liners. Serve them chilled or at room temperature, and enjoy each delicious bite of these Peanut Butter and Jelly Cups!
These treats combine classic flavors into a fun and easy-to-eat dessert—perfect for parties, snacks, or a sweet treat at home!
Can I Use Different Types of Jelly?
Absolutely! While strawberry and grape jelly are classic choices, feel free to use your favorite jam or preserve. Raspberry or blueberry jams can add a delightful twist and unique flavor to your cups!
How Do I Store Leftovers?
Store any leftover Peanut Butter and Jelly Cups in an airtight container in the fridge for up to a week. They can also be frozen for longer storage—just make sure to separate layers with parchment paper to avoid sticking.
Can I Make These Cups Ahead of Time?
Definitely! These cups can be made a day or two ahead of time. Just ensure they are stored in the refrigerator to keep them fresh and set.
What If the Chocolate Layer Isn’t Smooth?
If your chocolate layer isn’t smooth, it could be due to overheating or not stirring enough. Simply microwave it in 10-second intervals, stirring until fully melted and glossy. Adding a bit more coconut oil can also help achieve a smoother texture.