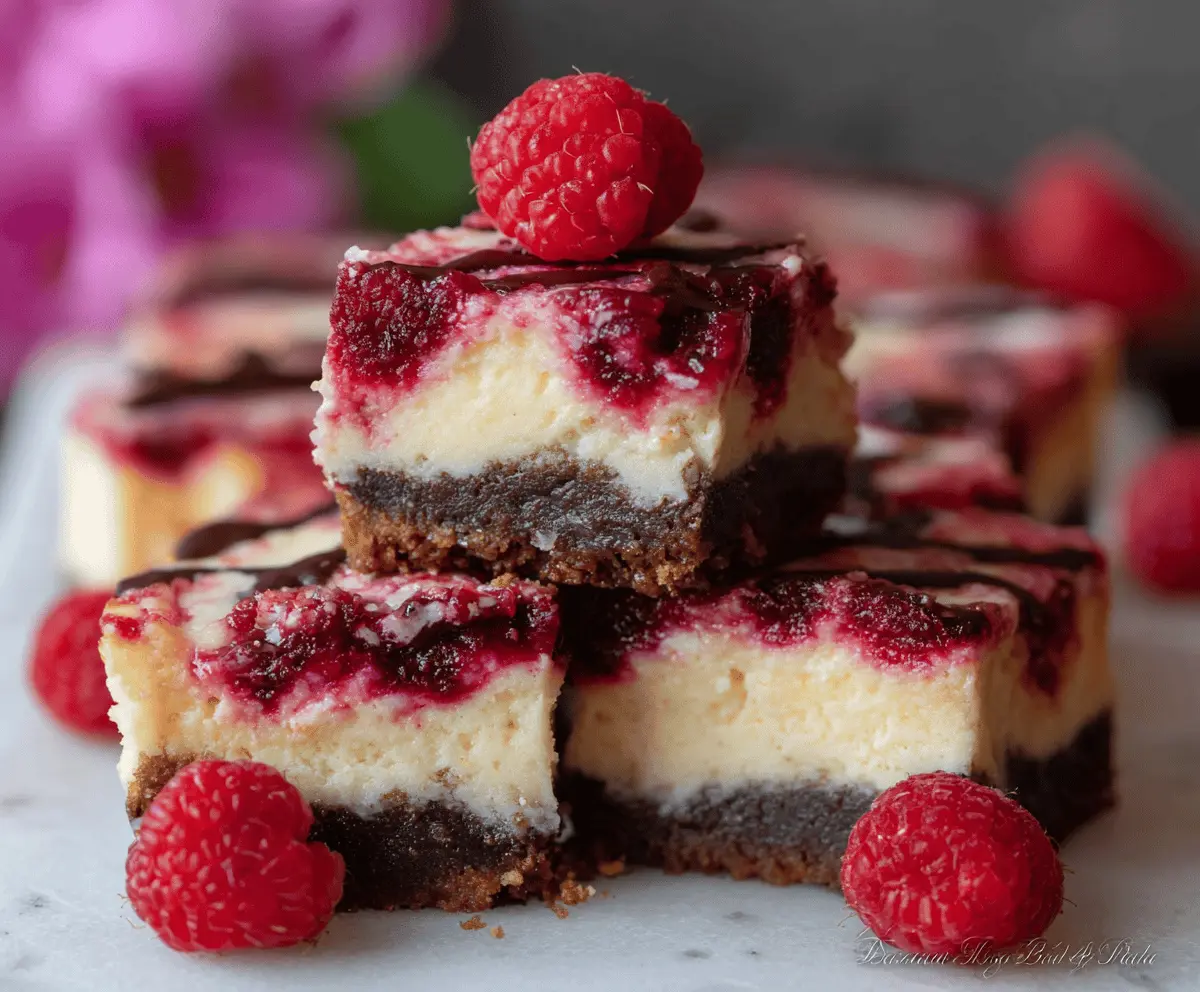
These Raspberry Cheesecake Bars are a sweet and tangy treat. With a creamy cheesecake layer atop a buttery crust, every bite is a little piece of happiness!
Let’s be real, who can resist that bright raspberry swirl? I always save some for later, but it never makes it! 😋
I love how easy these bars are to share. After a quick bake and cool, you can cut them into perfect portions. They’re a hit at any gathering—or just at home with a cozy movie!
Key Ingredients & Substitutions
Graham cracker crumbs: This is the base of the crust and brings a touch of sweetness. If you don’t have them, you can use crushed digestive biscuits or vanilla wafer cookies.
Cocoa powder: It adds a rich chocolate flavor to the crust. If you prefer a non-chocolate option, just skip it and use plain graham crackers instead for a classic base.
Cream cheese: This is essential for that creamy filling. If you need a lighter option, you can use Neufchâtel cheese, which has less fat and works well too.
Fresh or frozen raspberries: Both work beautifully! If you can’t find raspberries, you could substitute with strawberries or blueberries for a different yet delicious flavor.
How Do I Get the Swirl Just Right?
Creating that beautiful raspberry swirl is not just for looks; it adds wonderful flavor too! Here’s how to get it just right:
- Make sure the raspberry sauce is cool enough before adding it to the cheesecake filling to avoid melting the cream cheese.
- When you drop the raspberry sauce onto the cheesecake layer, do it in small spoonfuls.
- Use a knife or skewer to gently swirl. Don’t overdo it—just a few swirls to keep that marbled look!
Your goal is to create patterns without mixing it too much. This adds both visual appeal and delightful bites of raspberry flavor with each slice!

Raspberry Cheesecake Bars
Ingredients You’ll Need:
For the Crust:
- 2 cups graham cracker crumbs (about 12 full sheets)
- 1/2 cup unsweetened cocoa powder
- 1/2 cup granulated sugar
- 1/2 teaspoon salt
- 3/4 cup unsalted butter, melted
For the Cheesecake Filling:
- 16 oz (450g) cream cheese, softened
- 3/4 cup granulated sugar
- 2 large eggs
- 1 teaspoon vanilla extract
- 1/2 cup sour cream
For the Raspberry Swirl:
- 1 1/2 cups fresh or frozen raspberries
- 1/4 cup granulated sugar
- 1 teaspoon cornstarch
- 1 tablespoon water
For Garnish (Optional):
- Fresh raspberries
- Chocolate drizzle (melted dark or semi-sweet chocolate)
How Much Time Will You Need?
This delightful recipe takes about 15 minutes of active preparation time and 40-45 minutes of baking time. Don’t forget to chill the bars for at least 4 hours or overnight for the best texture and flavor. In total, you’re looking at around 5 hours, including chilling time.
Step-by-Step Instructions:
1. Prepare the Oven and Pan:
Start by preheating your oven to 325°F (163°C). Grab a 9×9-inch square baking pan and line it with parchment paper. Leave some extra paper hanging over the sides; this will make it easier to lift out the bars later!
2. Make the Crust:
In a medium bowl, combine the graham cracker crumbs, cocoa powder, sugar, and salt. Pour in the melted butter and stir until all the crumbs are evenly moistened. Press this mixture firmly into the bottom of your prepared pan to create an even crust layer. Pop it in the oven and bake for 10 minutes. Once done, take it out and let it cool slightly.
3. Make the Raspberry Swirl:
In a small saucepan over medium heat, combine the raspberries, sugar, cornstarch, and water. Stir often as it cooks for about 5-7 minutes until it thickens and turns jam-like. If you prefer, you can strain it through a fine mesh sieve to remove the seeds. Let the raspberry sauce cool to room temperature.
4. Prepare the Cheesecake Filling:
In a large mixing bowl, beat the softened cream cheese with an electric mixer until it’s smooth and creamy. Add the sugar and blend well. Next, add the eggs one by one, mixing well after each addition. Then, mix in the vanilla extract and sour cream until everything is smooth. But be careful not to overmix!
5. Assemble the Bars:
Pour that luscious cheesecake filling over your cooled crust and smooth the top with a spatula. Then, drop spoonfuls of the raspberry sauce onto the cheesecake layer. Use a knife or skewer to gently swirl the raspberry sauce into the cheesecake filling to create that lovely marbled effect.
6. Bake:
Slide your assembled bars into the oven and bake for about 40-45 minutes. Keep an eye on them; the edges should be set, but the center can still jiggle a bit. Once done, take them out and let them cool on a wire rack for at least an hour.
7. Chill:
After the bars have cooled, refrigerate them for at least 4 hours or overnight. This helps them set perfectly and develop those amazing flavors!
8. Serve:
Once chilled and set, use the parchment paper to lift the bars out of the pan. Cut them into squares and garnish each with a fresh raspberry. Drizzle melted chocolate on top if you’d like a little extra sweetness! Serve these delicious bars cold and enjoy every bite!
These Raspberry Cheesecake Bars have a rich chocolate crust, creamy cheesecake center, and a vibrant raspberry swirl on top — a perfect balance of sweet, tart, and luscious textures! Enjoy!
Can I Use Different Berries for the Swirl?
Absolutely! While raspberries provide a lovely tartness, you can swap them out for strawberries, blueberries, or blackberries. Just make sure to adjust the sugar based on the sweetness of the berries you choose!
How Do I Store Leftovers?
Store any leftover Raspberry Cheesecake Bars in an airtight container in the refrigerator for up to 5 days. To maintain freshness, it’s best to layer parchment paper between the bars to prevent sticking.
Can I Freeze These Bars?
Yes, you can freeze these cheesecake bars! Just make sure they are tightly wrapped in plastic wrap or aluminum foil, then placed in an airtight container. When ready to enjoy, thaw in the refrigerator for several hours or overnight.
What Should I Do If My Cheesecake Cracks?
If you see cracks forming during baking, it could be due to overmixing or baking at too high a temperature. To prevent this, avoid overmixing the filling, and ensure your oven temperature is accurate. Cracks can still taste delicious, so don’t worry too much—they’ll still look great when served!