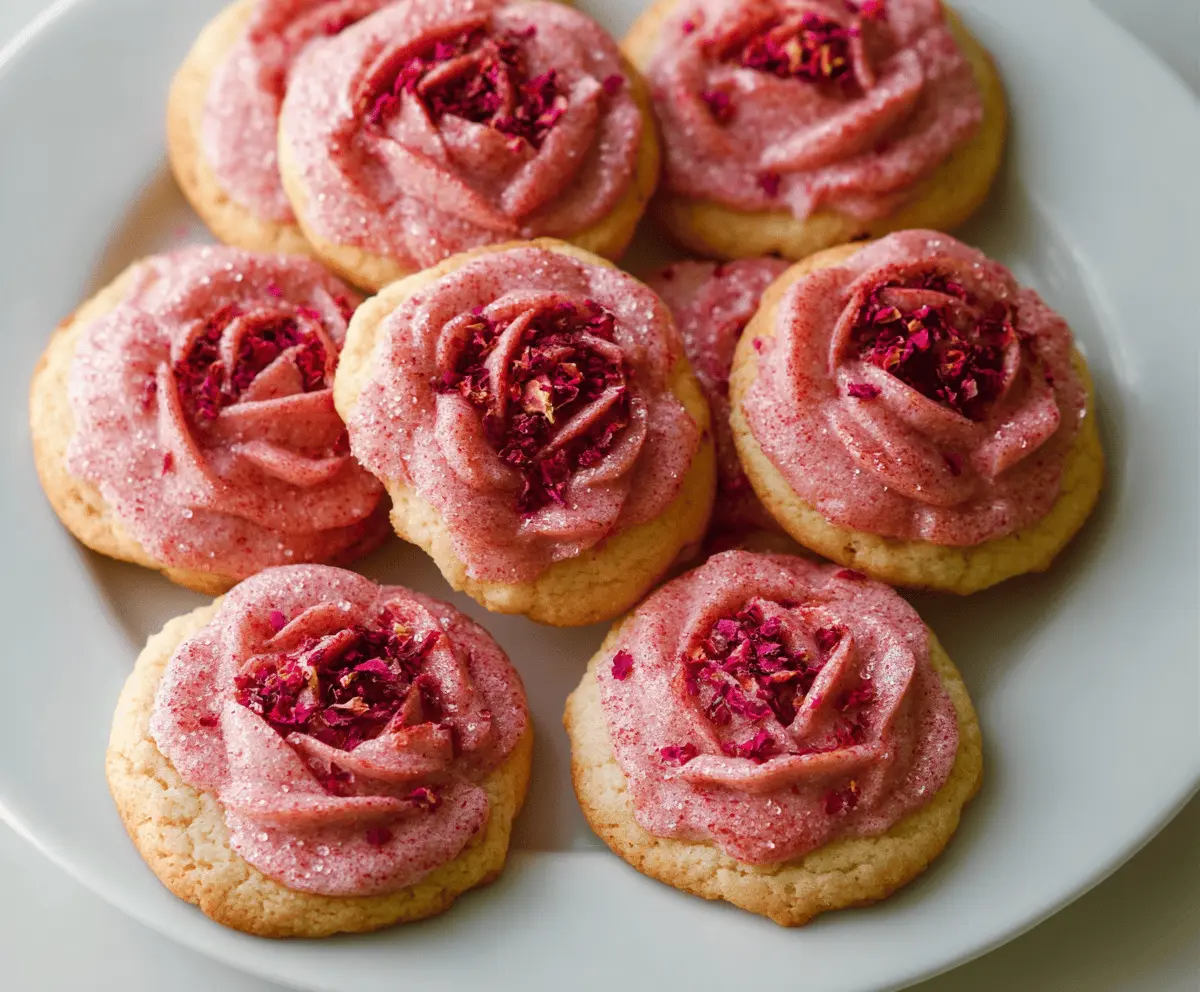
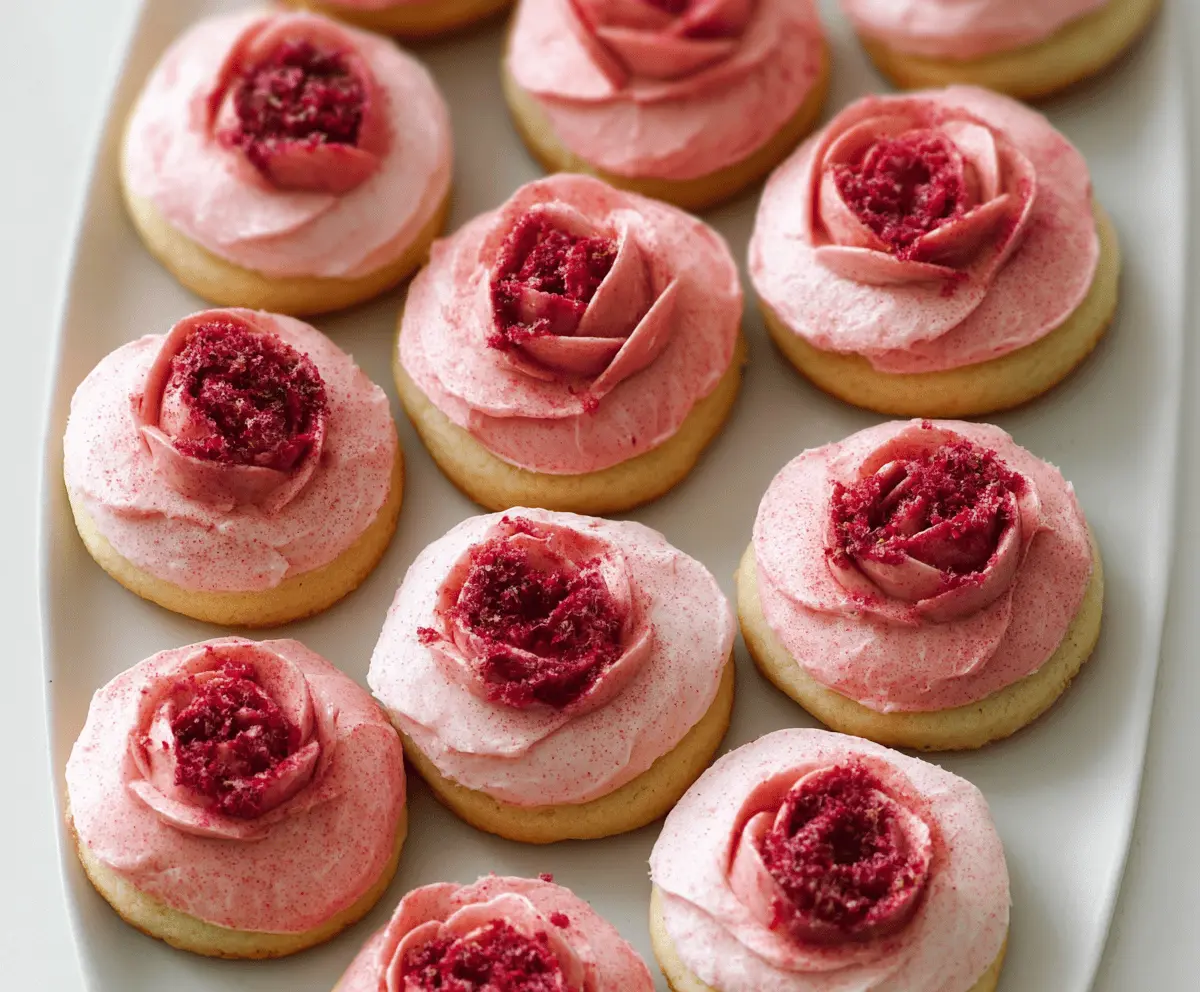
These Raspberry Rose Cookies are a sweet treat that combines the fruity taste of raspberries with a hint of floral rose flavor. They’re soft, pretty, and perfect for any occasion!
I love how colorful and fragrant these cookies are! They make a lovely gift or a special touch for tea time. Just be careful; you might want to eat them all at once! 😄
Key Ingredients & Substitutions
All-Purpose Flour: This forms the base of your cookies, giving them structure. If you need a gluten-free option, try using a 1:1 gluten-free flour blend.
Raspberry Puree: Fresh raspberries are best, but you can use frozen raspberries too. Just thaw them and blend! If fresh raspberries aren’t available, consider using other berries like strawberries or blueberries.
Rose Water: This lovely ingredient adds a floral note. If it’s hard to find, you can substitute with a few drops of vanilla extract for a different flavor profile, though it won’t have the same floral quality.
Dried Rose Petals: They are great for garnish, adding a pretty touch. If you can’t find them, crushed freeze-dried raspberries also work and add a nice texture. Just make sure they’re food-safe!
How Can I Get My Cookies Just Right?
Making perfectly soft and fluffy cookies can be tricky, but here are some tips!
- Be sure to measure flour properly. Too much can lead to dry cookies. Spoon flour into a measuring cup and level it off.
- Don’t skip the creaming step. It’s important to beat the butter and sugar until light and fluffy for a nice texture.
- When baking, keep an eye on the cookies. They should be lightly golden on the edges but still soft in the center when you take them out.
Following these steps can help ensure your Raspberry Rose Cookies come out delicious every time! Enjoy baking!
Raspberry Rose Cookies
Ingredients You’ll Need:
For the Cookies:
- 2 1/2 cups all-purpose flour
- 1/2 teaspoon baking powder
- 1/4 teaspoon salt
- 3/4 cup unsalted butter, softened
- 1 cup granulated sugar
- 1 large egg
- 1 teaspoon vanilla extract
- 1 tablespoon milk
For the Raspberry Rose Frosting:
- 1/2 cup unsalted butter, softened
- 2 cups powdered sugar, sifted
- 2 tablespoons raspberry puree (blend fresh or thawed raspberries, strain seeds)
- 1/2 teaspoon rose water (adjust to taste)
- 1 to 2 tablespoons heavy cream or milk (to adjust consistency)
- Pink or red food coloring (optional, for more vivid color)
For Garnish:
- Dried rose petals or crushed freeze-dried raspberries
- A sprinkle of sanding sugar (optional)
How Much Time Will You Need?
This recipe takes about 15 minutes to prepare the cookie dough and frosting, and then an additional 10-12 minutes to bake the cookies. You’ll want to allow about 15 minutes for the frosting to set before serving. In total, set aside approximately 45 minutes to an hour to complete everything.
Step-by-Step Instructions:
1. Prepare the Cookies:
First, preheat your oven to 350°F (175°C). Line your baking sheets with parchment paper for easy cleanup. In a medium bowl, whisk together the flour, baking powder, and salt until nicely combined. In a separate large bowl, beat the softened butter and granulated sugar together until the mixture is light and fluffy—this should take about 3-4 minutes. Now, add in the egg, vanilla extract, and milk, mixing until everything is well combined. Gradually stir in the dry ingredients until a dough forms. Scoop tablespoon-sized amounts of dough onto the prepared baking sheets, leaving about 2 inches of space between each one. Bake for 10-12 minutes until the edges are lightly golden. Once they’re done, remove them from the oven and let them cool completely on a wire rack.
2. Make the Raspberry Rose Frosting:
While the cookies are cooling, you can make the frosting! In a bowl, beat the softened butter until it’s creamy. Gradually add the sifted powdered sugar, mixing well after each addition. Next, stir in the raspberry puree and rose water. If your frosting seems too thick, add heavy cream or milk one tablespoon at a time until you reach a lovely, spreadable consistency. For a fun pop of color, consider adding a few drops of pink or red food coloring.
3. Decorate the Cookies:
Once your cookies are completely cool, it’s time to add the frosting! Use a piping bag fitted with a petal or star tip to pipe the raspberry rose frosting onto each cookie. Start in the center and swirl outwards to create a beautiful rose pattern. For an extra touch, garnish each cookie with dried rose petals or a sprinkle of crushed freeze-dried raspberries. If you have sanding sugar, you can use it to add a little sparkle on top.
4. Serve and Store:
Let your frosted cookies set for about 15 minutes before serving to allow the frosting to firm up a bit. Store any leftover cookies in an airtight container at room temperature for up to 3 days, or refrigerate them to keep them fresh for a bit longer.
Enjoy these delicate, floral-inspired Raspberry Rose Cookies with a nice cup of tea, or wrap them up as a beautiful gift for someone special! Happy baking!
Can I Substitute the Rose Water in the Frosting?
Yes! If you can’t find rose water, you can use a few drops of vanilla extract instead. While it will change the flavor profile a bit, it will still be delicious.
How Do I Make the Raspberry Puree?
Simply blend fresh or thawed frozen raspberries until smooth, then strain the mixture to remove the seeds. You’ll need about 1/4 cup of raspberries to make 2 tablespoons of puree.
How Should I Store the Cookies?
Store your Raspberry Rose Cookies in an airtight container at room temperature for up to 3 days. If you want them to last longer, you can refrigerate them for about a week. Allow them to come to room temperature before enjoying!
Can I Freeze the Cookies?
Absolutely! You can freeze the unbaked cookie dough for up to 3 months. Just scoop the dough onto a baking sheet, freeze until solid, then transfer to a freezer bag. When you’re ready to bake, no need to thaw; just add a couple of extra minutes to the baking time!