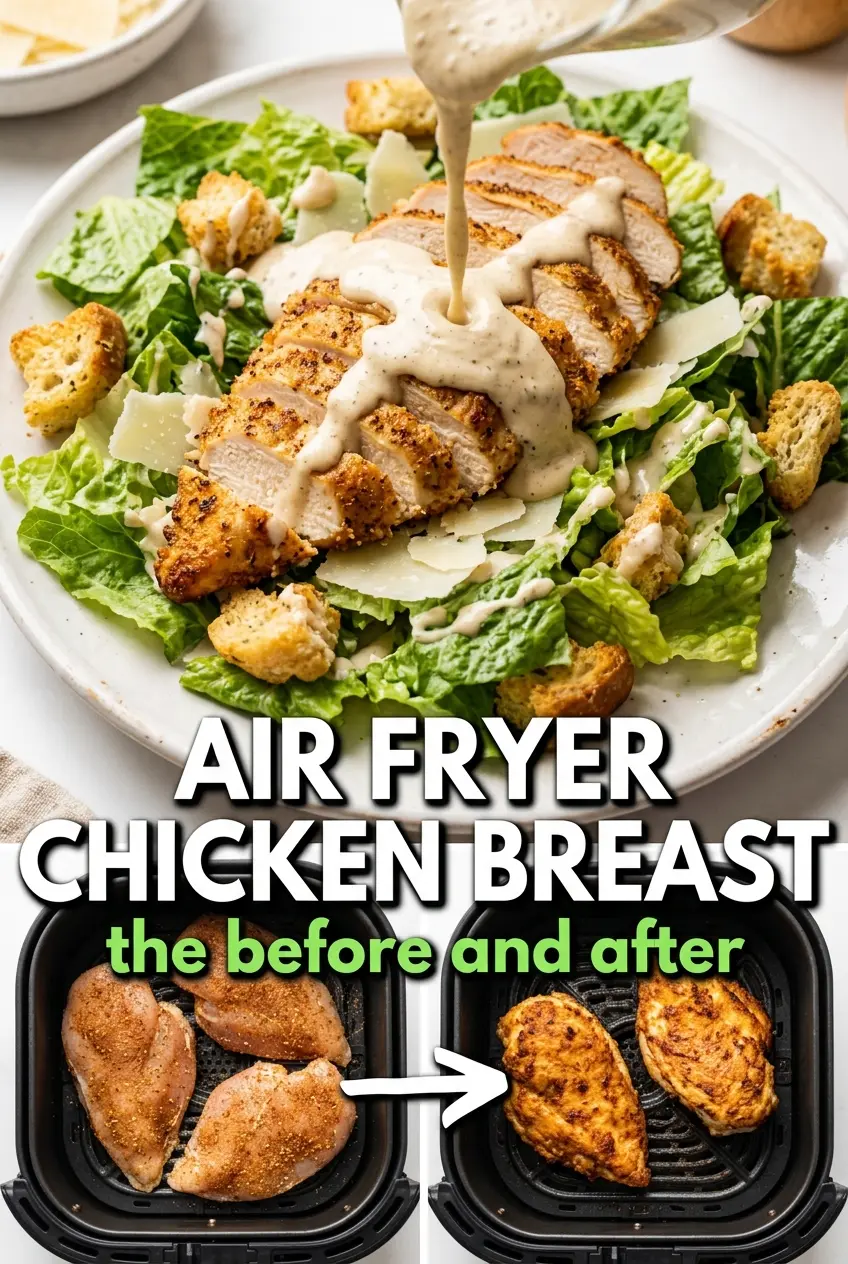
Air fryer chicken breasts turn out with a browned, lightly crisped exterior and a juicy center when the seasoning is kept simple and the thickness is even. The biggest win here is speed without sacrificing texture: you get that carved-chicken look and clean, savory flavor in under 20 minutes, not the dry, pale version that too often happens with boneless breasts.
The trick is all in the prep. Pounding the chicken to an even 3/4-inch thickness keeps the thin ends from drying out before the thickest part is done, and a light coating of oil helps the spice mix cling while the air fryer does its fast, dry heat work. I also like smoked paprika here because it gives the surface a deeper color and a little warmth without making the seasoning taste heavy.
Below, I’m walking through the part that matters most: how to get a golden crust before the center overcooks, plus the small temperature and resting details that keep the juices where they belong.
I finally got juicy chicken breasts from the air fryer instead of that dry, stringy texture I usually end up with. Pounding them evenly made a huge difference, and the seasoning browned beautifully without burning.
Like these air fryer chicken breasts? Save them for the nights when you need a fast, juicy main dish with a browned crust and almost no cleanup.
The Reason Air Fryer Chicken Breasts Stay Juicy Instead of Drying Out
Chicken breasts dry out when the outside finishes far ahead of the middle, and that usually happens when the pieces aren’t even. The air fryer moves hot air fast, which is great for browning, but it also punishes thick, uneven chicken by overcooking the thin ends before the center gets a chance to catch up. Pounding the breasts to the same thickness solves that problem before it starts.
The other thing that matters is stopping at temperature, not just time. Pull the chicken when the thickest part hits 165°F and let it rest for five minutes so the juices settle back in. If you slice too soon, that moisture runs onto the plate instead of staying in the meat.
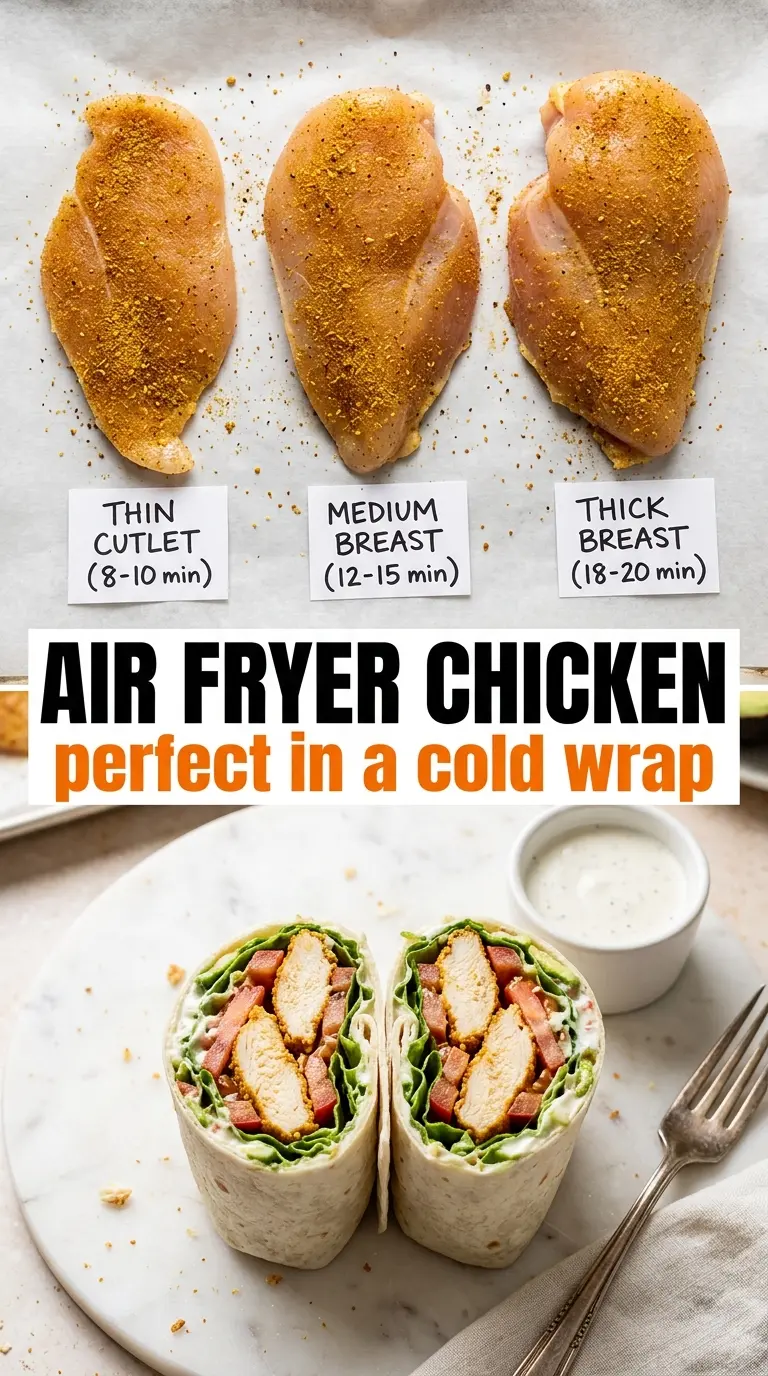
- Even thickness — This is the difference between juicy chicken and dry edges. If one side is much thicker, cover it with parchment or plastic wrap and pound gently until the whole breast is close to 3/4-inch thick.
- Oil — You only need enough to coat the surface and help the spices stick. It also helps the top brown instead of looking dusty and dry.
- Smoked paprika — This gives the chicken that golden, almost roasted look and adds depth without needing a long marinade. Regular paprika works, but you’ll lose a little of that warm, smoky edge.
What Each Spice Is Doing on the Chicken
- Garlic powder and onion powder — These build the savory base without adding moisture that can slow browning. Fresh garlic can scorch in the air fryer, so the powdered version is the better tool here.
- Italian seasoning — This gives the chicken a balanced herb note that reads like an all-purpose dinner, not a one-note spice rub. Dried herbs are the right choice because they cling well and don’t burn as quickly as chopped fresh herbs.
- Salt and black pepper — Salt seasons the meat all the way through, not just the surface, and pepper gives the crust a little bite. If your chicken tastes flat, it’s usually because the seasoning stayed on top instead of being rubbed in evenly.
- Lemon and parsley — These don’t cook with the chicken for a reason. The lemon wakes up the finished dish, and the parsley adds freshness right at the end when the savory seasoning is already in place.
The Short Cooking Window That Gives You a Golden Crust
Preheating the Air Fryer
Get the air fryer fully hot at 390°F before the chicken goes in. That first blast of heat starts browning the surface right away, which helps the seasoning set into a crust instead of steaming against a cool basket. If you skip preheating, the chicken still cooks, but it usually comes out paler and less appealing.
Seasoning for Even Coverage
Brush both sides with oil, then rub on the spice mix so every bit of surface is coated. You want a thin, even layer, not clumps of seasoning sitting in patches, because clumps can darken too fast while bare spots stay dull. The chicken should look lightly stained and glossy before it goes into the basket.
Flipping at the Right Moment
Cook the chicken for about 8 to 9 minutes, then flip it once. That mid-cook turn helps both sides brown evenly and keeps the underside from staying soggy where it sits against the basket. If the basket is crowded, the chicken steams instead of browns, so leave space between the breasts.
Resting Before Slicing
When the internal temperature hits 165°F, move the chicken to a plate and let it rest for 5 minutes. This is the part people rush, and it matters because slicing too soon sends the juices running out onto the cutting board. Rested chicken slices cleaner and stays moist all the way through.
How to Adjust These Air Fryer Chicken Breasts for Different Dinners
Make it dairy-free and gluten-free as written
This recipe already fits both needs without changes. The seasoning blend and oil do all the work, so there’s no breading, flour, or dairy to replace.
Use chicken cutlets for a faster cook
If your chicken breasts are very large, slice them into cutlets or pound them thinner. They’ll cook in less time and brown more quickly, but they’ll also dry out faster if you walk away, so start checking early.
Swap the seasoning profile without changing the method
You can change the spices and keep the same timing and temperature. Try chili powder and cumin for a warmer profile, or use lemon pepper for a brighter finish. The method stays the same because the browning and doneness depend on thickness, not the seasoning blend.
Storage and Reheating
- Refrigerator: Store leftovers in an airtight container for up to 4 days. The chicken stays usable for lunches, though the crust softens a little in the fridge.
- Freezer: Freeze sliced or whole breasts for up to 2 months. Wrap tightly and thaw in the refrigerator so the texture doesn’t turn watery.
- Reheating: Warm in the air fryer at 350°F for 3 to 5 minutes, just until heated through. The common mistake is blasting it too long, which dries out the outer layer before the center is warm.
Questions I Get Asked About This Recipe
Air Fryer Chicken Breasts
Ingredients
Equipment
Method
- Preheat your air fryer to 390°F so it’s fully hot before the chicken goes in. Set up for even cooking by keeping airflow clear around the basket or tray.
- Pound the chicken breasts to an even 3/4-inch thickness if needed for uniform cooking. Aim for consistent thickness so the center cooks at the same rate as the outside.
- Brush both sides of the chicken with olive oil to help the seasoning adhere and promote browning. Use a light, even coating without pooling.
- Mix together garlic powder, onion powder, smoked paprika, Italian seasoning, salt, and cracked black pepper, then rub evenly over both sides of the chicken. Make sure all edges are coated for the most fragrant crust.
- Air fry at 390°F for 16-18 minutes, flipping halfway through, until the internal temperature reaches 165°F and the outside is golden. If your breasts are thicker, add 1-2 minutes and recheck the temperature.
- Rest the chicken for 5 minutes before slicing to help juices redistribute. This keeps the interior tender instead of watery.
- Garnish with fresh parsley and lemon wedges right before serving. Slice to show the juicy, pale interior against the golden exterior.