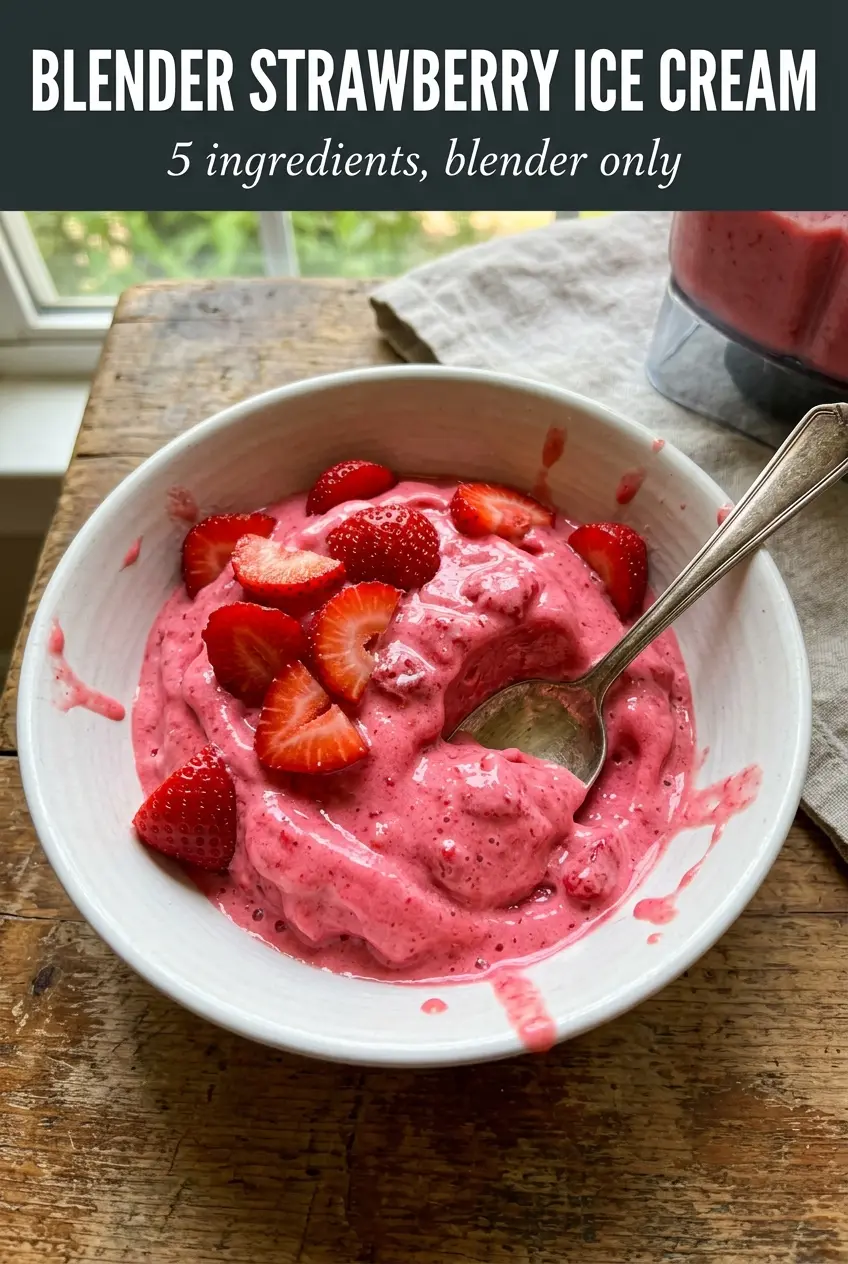
Blender strawberry ice cream lands with that soft, scoopable texture that feels a lot more indulgent than the ingredient list suggests. The strawberries stay bright and fresh-tasting, the banana gives it body, and the cream keeps it from reading like a frozen smoothie. What comes out of the blender is vivid pink, cold, and smooth enough to eat straight away as soft serve.
The key is using fruit that’s frozen solid but not impossible to blend. A few minutes on the counter takes the hard edge off, which helps the blender catch everything before you end up with a stuck blade and a gritty mix. The banana adds natural sweetness and that custardy texture people expect from ice cream, while the honey or maple syrup keeps the flavor rounded instead of sharp.
Below, I’ve included the small technique details that matter most, plus a couple of smart swaps if you want to keep it dairy-free or make the texture firmer for scooping later.
The texture was shockingly creamy for something that started with frozen fruit. I left it in the freezer for about an hour and it scooped like real ice cream, not icy at all.
Like this blender strawberry ice cream? Save it for the days when you want a frozen dessert that’s creamy, pink, and ready in minutes.
The Part That Keeps It Creamy Instead of Icy
Frozen fruit desserts go wrong when there’s too much water and not enough fat or body. Strawberries alone can blend up thin and slushy, which tastes fine but doesn’t eat like ice cream. The banana changes that fast. It brings thickness, sweetness, and a texture that mimics a soft custard once it’s fully blended.
The other mistake is rushing the blend. A high-powered blender can handle the job, but it needs a little help. Letting the fruit sit for a few minutes softens the surface just enough that the blades can start moving. If the mixture stalls, stop and scrape the sides instead of adding more liquid right away, because extra cream can push it past thick and into milkshake territory.
What Each Ingredient Is Doing in the Blender

- Frozen strawberries — These are the backbone of the flavor and color. Fresh strawberries won’t give you the same instant thick texture, so freeze them first if you want the dessert to hold up.
- Frozen banana — This is what makes the mixture feel like ice cream instead of sorbet. If you don’t want banana flavor, you can swap in more strawberries and a bit more cream, but the texture won’t be quite as plush.
- Heavy cream or coconut cream — Heavy cream gives the richest result, while coconut cream keeps the recipe dairy-free and still adds enough fat for a smooth finish. Use the thick part from the can, not the watery liquid.
- Honey or maple syrup — This rounds out the tart berries and helps the blender move the mixture. If your strawberries are very sweet, you can reduce it a touch, but don’t skip it entirely unless your fruit is exceptionally ripe.
- Vanilla extract and salt — Vanilla softens the fruitiness in the best way, and the salt keeps the flavor from tasting flat. Even a pinch makes the strawberries taste brighter.
Blending It Until It Tastes Like Ice Cream, Not Frozen Fruit
Letting the fruit relax first
Take the strawberries and banana out of the freezer and let them sit for about 5 minutes. That tiny head start matters because rock-hard fruit can jam the blender before the blades get purchase. You want the outside just slightly softened, not thawed.
Starting the blend without overloading the blades
Add the fruit, cream, sweetener, vanilla, and salt to the blender and start on high. If your blender has a tamper, use it to push the fruit toward the blades. If it doesn’t, stop and scrape down the sides once or twice. The mixture should move from crumbly chunks to a thick, glossy swirl.
Watching for the soft-serve stage
Stop blending when everything looks completely smooth and the mixture has that dense, airy soft-serve texture. If it starts looking watery, it’s usually because too much liquid was added to help it move. Resist that urge unless the blades are truly stuck.
Serving it now or firming it up later
Spoon it into bowls right away for the creamiest texture. For scoopable ice cream, pack it into a freezer-safe container and freeze for 1 to 2 hours. Any longer and it firms up more, which is fine, but you’ll want to let it sit on the counter for a few minutes before scooping.
Ways to Adjust It Without Losing the Good Texture
Dairy-Free Coconut Version
Use coconut cream instead of heavy cream. It keeps the dessert rich and smooth, with a light coconut note that works well with strawberries. The result is still creamy, but a little firmer once frozen.
No-Banana Strawberry Blend
Replace the banana with an extra cup of frozen strawberries and add just enough extra cream to get the blender moving. You’ll lose some of the custardy body, but the strawberry flavor becomes sharper and more direct.
Sweeter, More Dessert-Like Finish
Add the full amount of honey or maple syrup and a tiny extra splash of vanilla. This pushes the recipe away from fruit bowl territory and closer to a classic ice cream shop flavor, especially if your berries are tart.
Make-It-Ahead Scoopable Texture
After blending, transfer it to a shallow freezer container and press a piece of parchment directly on the surface before freezing. That helps reduce ice crystals and keeps the top from drying out.
Storage and Reheating
- Refrigerator: This one doesn’t hold well in the fridge; it melts into a smoothie-like texture within minutes.
- Freezer: Freeze in a covered container for up to 1 week. It will firm up hard, so let it sit out before scooping.
- Reheating: There’s no reheating here. For best texture, thaw at room temperature for 5 to 10 minutes until the edges soften just enough to scoop.
Questions I Get Asked About This Recipe
Blender Strawberry Ice Cream (No Churn, 3-Ingredient Style)
Ingredients
Equipment
Method
- Let the frozen strawberries and frozen banana sit at room temperature for 5 minutes to soften slightly, helping the blender process them smoothly.
- Add the softened frozen strawberries, frozen banana, heavy cream or coconut cream, honey or maple syrup, vanilla extract, and salt to a high-powered blender.
- Blend on high for about 2 minutes, stopping to scrape down the sides as needed, until completely smooth and creamy with a thick, vibrantly pink texture.
- Serve immediately as soft serve straight from the blender for a smooth, scoop-like texture without waiting.
- For a scoopable texture, transfer to a freezer container and freeze for 1-2 hours until firm.