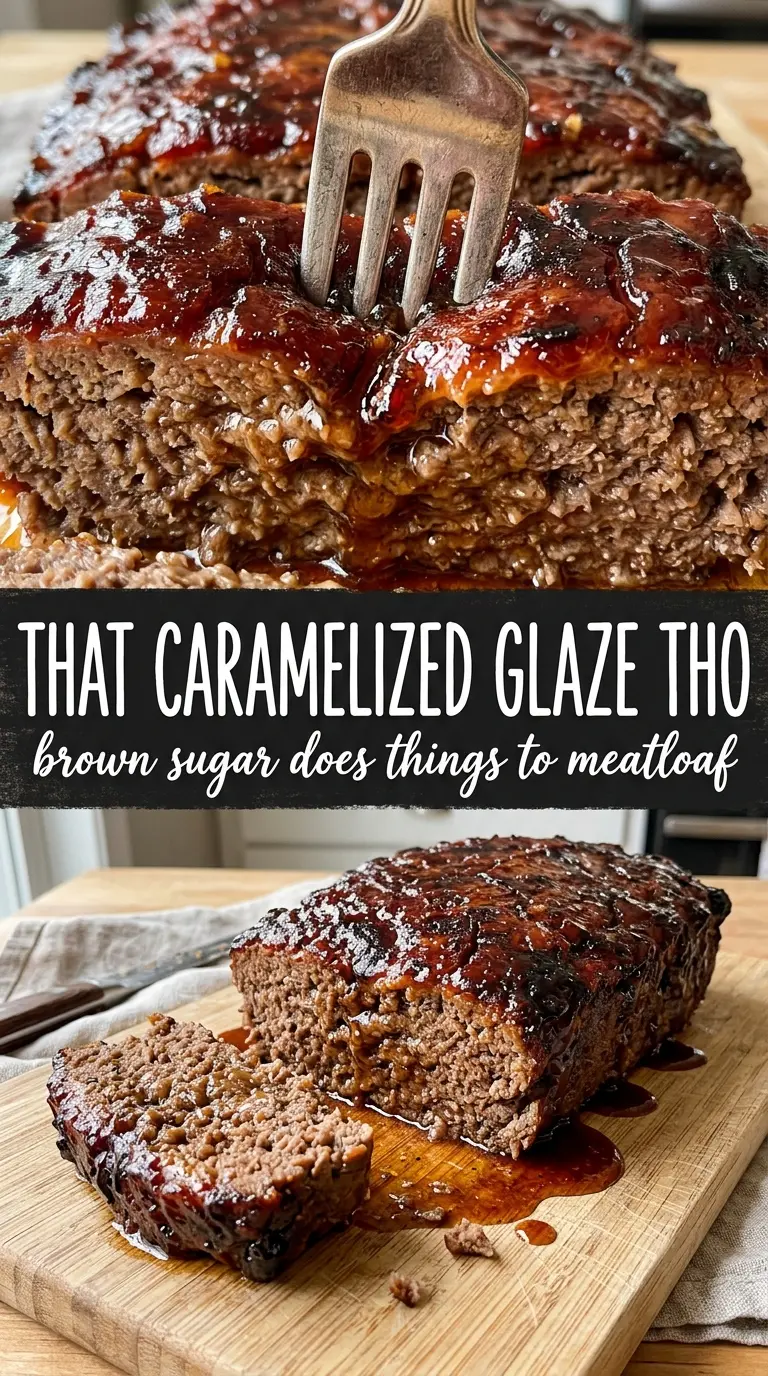
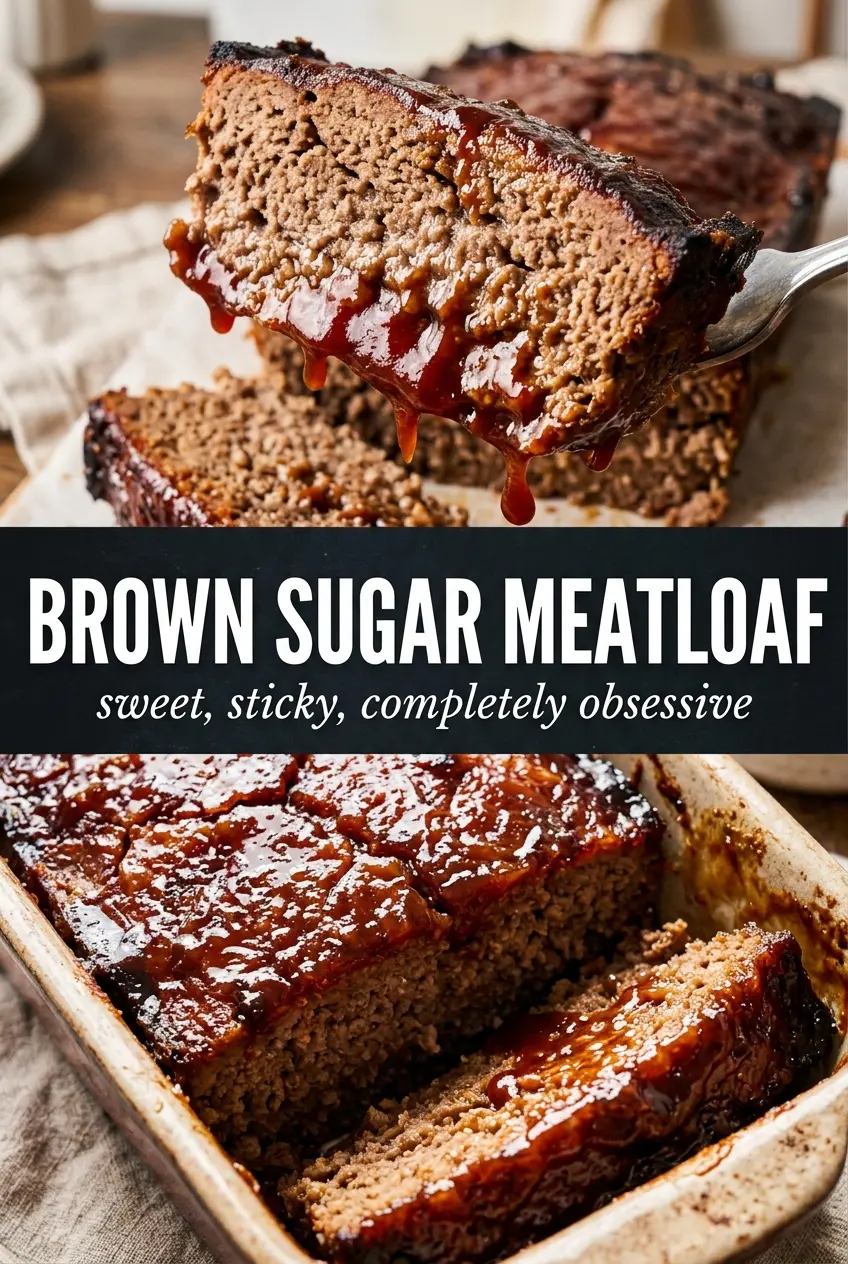
Brown sugar meatloaf earns its place in the rotation when the top turns sticky and crackled and the slices hold together without tasting dense. The glaze bakes down into a deep amber layer that clings to each piece, while the meat stays tender instead of turning dry and crumbly. It’s the kind of dinner that looks humble coming out of the oven and disappears fast once it hits the table.
The trick is balance. A little milk, breadcrumbs, and egg keep the loaf soft, but grated onion and Worcestershire give it enough savory backbone that the sweet glaze doesn’t take over. Spreading the glaze in two stages matters too: the first layer soaks in and starts the caramelization, and the second layer gives you that glossy finish without burning.
Below, I’ve included the one timing detail that keeps the glaze from turning bitter, plus a few simple swaps if you need to work with what’s already in the pantry.
The glaze caramelized into this crackly layer and the meatloaf stayed moist all the way through. I used the second glaze pass near the end and it made the top sticky instead of just sweet.
Save this brown sugar meatloaf for the nights when you want a sticky glaze, tender slices, and a classic comfort-food dinner that bakes up with almost no fuss.
The Glaze Won’t Burn If You Add It in Two Rounds
Meatloaf glaze is where a lot of good loaves go wrong. If you spread all of the brown sugar-ketchup mixture on at the start, the sugar has too much time over direct oven heat and the top can darken before the center finishes cooking. This version fixes that by using half the glaze first, then the rest near the end when the loaf is already mostly set.
That late second layer does two jobs at once: it gives you a thicker, shinier finish and keeps the glaze tasting sweet and tangy instead of scorched. The rest time matters too. Meatloaf slices cleaner after ten minutes, and the juices settle back into the loaf instead of running across the board.
What the Onion, Milk, and Worcestershire Are Really Doing
- Ground beef — Use 80/20 if you can. Leaner beef can work, but it tends to bake up drier and less rich, especially once the loaf is sliced. If you use extra-lean beef, don’t skip the milk and eggs; they matter more there.
- Breadcrumbs — These hold onto moisture and give the loaf its sliceable structure. Plain breadcrumbs are ideal, but crushed crackers or panko both work. Panko makes a slightly lighter texture, while cracker crumbs give a softer, more old-school finish.
- Grated onion — Grating is the part that changes the whole loaf. You get onion flavor without harsh chunks, and the released onion juice helps keep the meat tender. If you only have diced onion, cook it first so it softens before it goes into the mix.
- Worcestershire sauce — This is the savory backbone that keeps the glaze from tasting one-note sweet. It brings depth that ketchup alone can’t replace. If you don’t have it, a splash of soy sauce plus a little extra vinegar gets you closer than skipping it entirely.
- Dijon mustard and apple cider vinegar — These sharpen the glaze so the brown sugar tastes caramelized instead of candy-sweet. Dijon also helps the glaze emulsify into a smooth spreadable layer. Yellow mustard works in a pinch, but the flavor is flatter.
Mix the Meat Just Enough and Let the Oven Do the Rest
Building the Meatloaf Base
Combine the beef, breadcrumbs, eggs, milk, onion, garlic, Worcestershire, thyme, salt, and pepper in a large bowl and mix just until everything looks evenly distributed. Overmixing makes the loaf tight and springy instead of tender, because the meat proteins start to seize up. The mixture should feel cohesive but still soft enough to press into the pan without packing it like a brick.
Pressing and Shaping the Loaf
Transfer the mixture to a greased loaf pan and smooth the top with the back of a spoon or your hand. Press it gently enough that it holds together, but not so firmly that all the air gets knocked out. A loosely packed loaf cooks more evenly and stays juicy in the center.
Glazing in Two Layers
Mix the ketchup, brown sugar, Dijon, and vinegar until smooth, then spread half over the loaf before it goes into the oven. Bake until the top starts to set and the edges look a little darker, then spread on the remaining glaze. That second application should go on smoothly; if it tears the surface, the loaf was packed too tightly or the glaze is too thick, in which case stir in a teaspoon of water.
Knowing When It’s Done
Bake until the internal temperature reaches 160°F and the glaze looks caramelized and sticky around the edges. The center should feel firm but still have a little give when pressed lightly. Pull it out at temperature, not by time alone, because oven hot spots and loaf pan sizes can shift the finish by several minutes.
Make It a Little More Savory
Add a tablespoon of tomato paste to the meat mixture or increase the Worcestershire by another teaspoon. That deepens the background flavor and reins in the sweetness of the glaze without changing the texture.
Gluten-Free Version
Use certified gluten-free breadcrumbs and check that your Worcestershire sauce is gluten-free. The loaf bakes up the same, though some gluten-free crumbs absorb less liquid, so watch the texture — it should still be moist, not wet.
Dairy-Free Swap
Replace the milk with unsweetened non-dairy milk or beef broth. Broth gives a little more savory depth, while unsweetened almond or oat milk keeps the texture close to the original without adding noticeable flavor.
Storage and Reheating
- Refrigerator: Store leftovers in an airtight container for up to 4 days. The glaze will firm up in the fridge, which is normal.
- Freezer: Meatloaf freezes well. Wrap individual slices or the whole cooled loaf tightly, then freeze for up to 2 months. Thaw overnight in the refrigerator before reheating.
- Reheating: Reheat covered in a 325°F oven with a splash of water or broth in the pan so the slices don’t dry out. The most common mistake is blasting it in the microwave until the edges turn tough while the center is still cold.
Questions I Get Asked About This Recipe
Brown Sugar Meatloaf
Ingredients
Equipment
Method
- Preheat the oven to 350°F and grease a loaf pan. Keep it ready so the loaf pan is hot and ready to bake right after mixing.
- Combine ground beef, breadcrumbs, eggs, whole milk, grated small onion, minced garlic, Worcestershire sauce, dried thyme, and salt and pepper in a mixing bowl. Mix until evenly combined so the loaf bakes with a uniform texture.
- Press the meat mixture into the loaf pan and smooth the top. Flattening helps the glaze stay in place and caramelize evenly.
- Mix ketchup, packed brown sugar, Dijon mustard, and apple cider vinegar until smooth. This creates the thick sweet-tangy coating that will crackle as it bakes.
- Spread half of the glaze over the meatloaf. Use the back of a spoon to seal the edges for a deeper amber crust.
- Bake for 50 minutes at 350°F. Bake until the glaze looks slightly set and glossy, with early caramel tones.
- Spread the remaining glaze over the top of the meatloaf. Aim for an even layer so the surface crackles and caramelizes uniformly.
- Bake 15–20 more minutes at 350°F until the internal temperature reaches 160°F. The glaze should turn deep amber and appear crackled and caramelized at the edges.
- Rest the meatloaf for 10 minutes before slicing. This sets the juices so each slice holds together instead of crumbling.