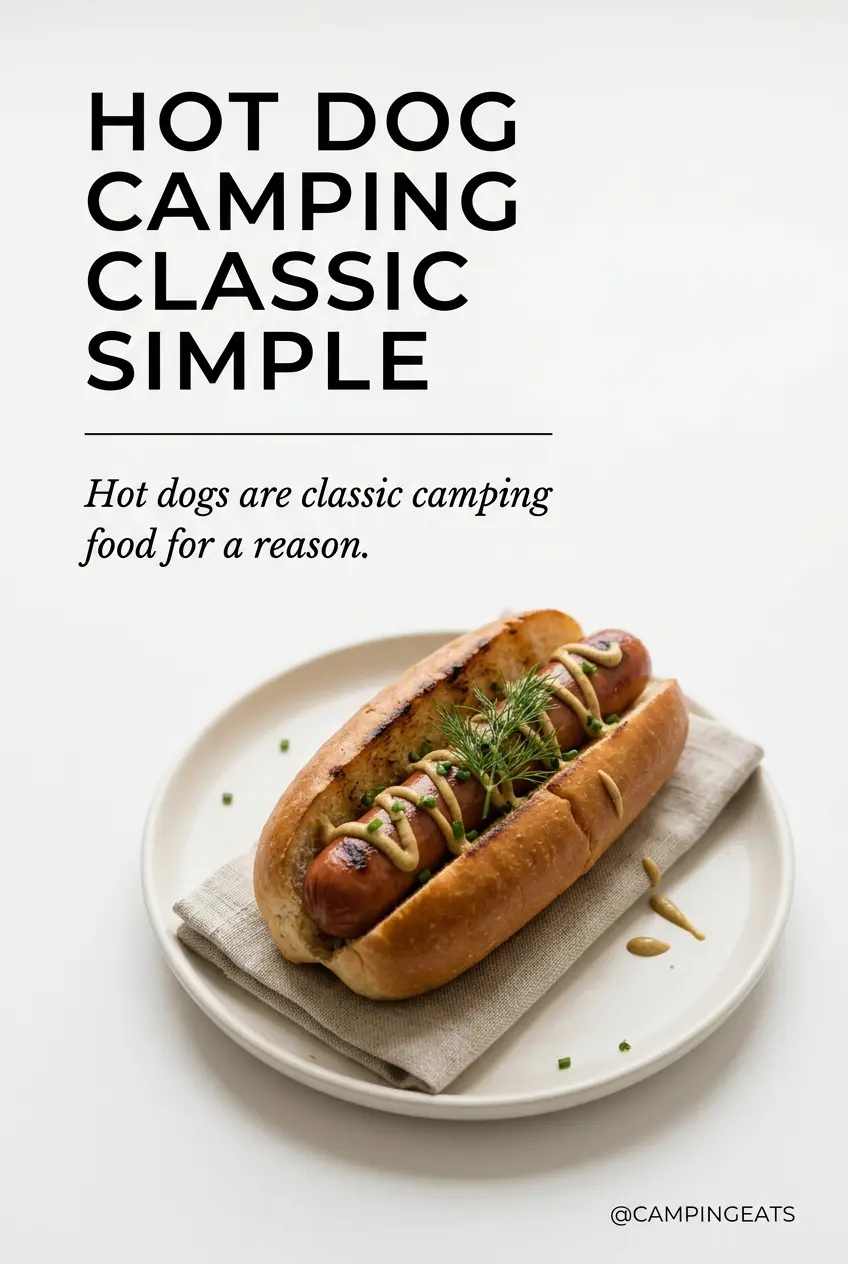
Hot dogs over a campfire hit a different kind of satisfying. The skin blisters, the fat inside turns juicy, and the edges pick up that smoky char that tastes like you earned dinner. When they’re done right, they’re crisp in spots, hot all the way through, and miles better than the pale, boiled versions people settle for at home.
The trick is rotating them often and keeping them close enough to the heat to brown, but not so close that the outside splits before the center warms. Coals give you more control than a roaring flame, though flames still work if you stay with them and keep turning. A quick toast on the buns matters too, because a warm bun holds the hot dog together instead of going soft and soggy the second you add condiments.
Below, I’ve included the little details that make campfire hot dogs cook evenly, plus a few ways to build them out if your crew wants toppings beyond the basics.
Rotating them over the coals instead of leaving them in the flame made all the difference. Ours browned evenly, the buns toasted fast, and nobody had a split hot dog.
Camping hot dogs cook fast, char evenly, and are even better when you add a quick bun toast and your favorite toppings.
Why These Hot Dogs Brown Evenly Instead of Burning in Spots
The biggest mistake with campfire hot dogs is parking them in open flames and waiting. Flames move fast and hit unevenly, which gives you one black side and one pale side, plus a split casing if the heat is too aggressive. What you want is steady turning over coals or a gentler flame edge, where the hot dog can slowly blister, render, and pick up color all around.
Lengthwise skewering helps because it keeps the hot dog from rolling around on the stick. It also gives you a little more control when you rotate it. If the hot dog starts to drip heavily or swell until the skin tightens, move it a little farther from the hottest part of the fire. That’s the signal the outside is cooking faster than the inside.
- Coals — The most even heat source here. They brown the casing without torching it, and they’re the best choice if you want that classic roasted finish.
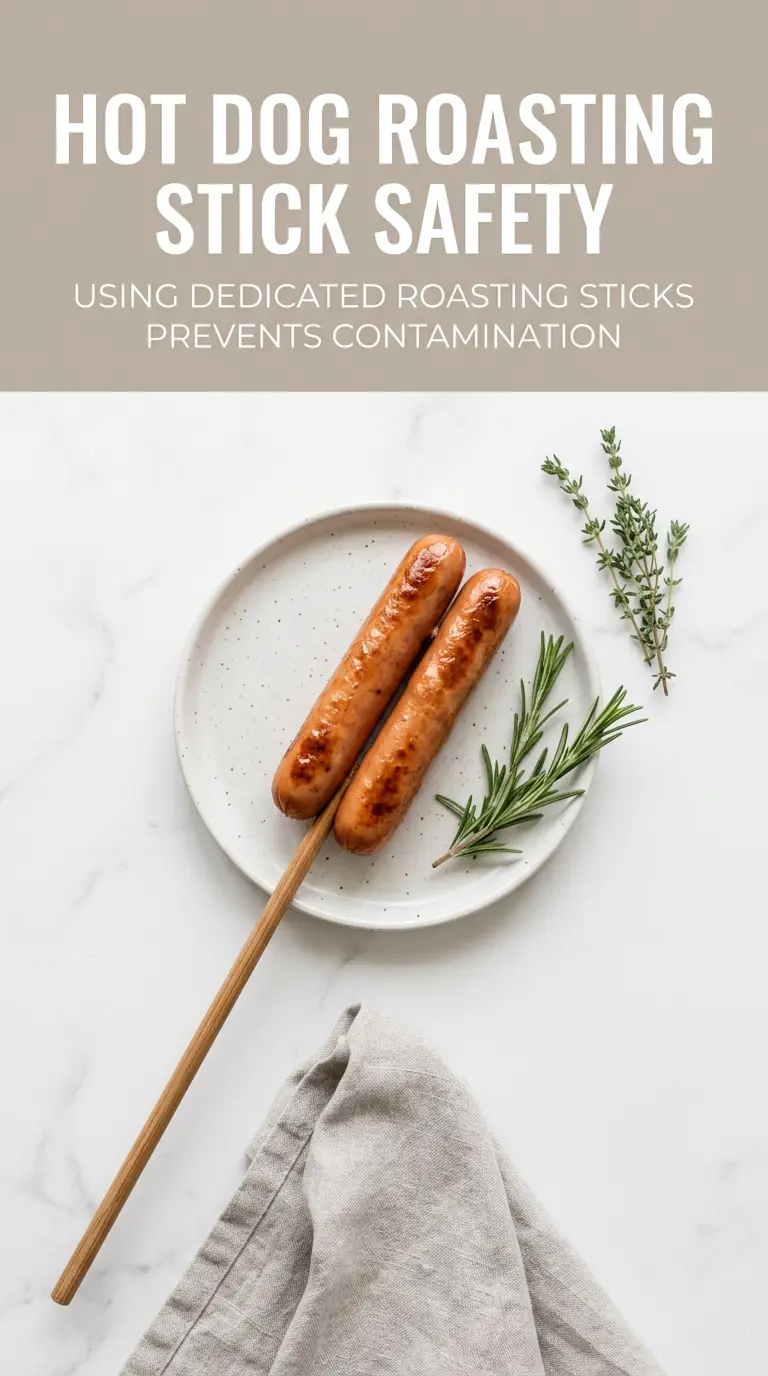
- Roasting sticks or long forks — A long handle keeps your hands away from the heat and makes steady turning easier. Thin sticks work best because they let you feel the hot dog’s balance.
- Hot dog buns — Soft buns are fine, but sturdier ones hold up better to toasted edges and toppings like chili or sauerkraut. Day-old buns can work if you warm them briefly first.
What the Condiments and Toppings Are Actually Doing Here
Hot dogs already bring salt and smoke, so the toppings are there to add contrast. Ketchup gives sweetness, mustard brings sharpness, relish adds crunch and acidity, and the optional toppings turn a simple campfire snack into something closer to a loaded meal. Don’t overload every dog the same way. A hot dog with chili wants a dry bun toast and maybe a little onion. One with sauerkraut benefits from mustard, not ketchup, because the acid needs something to stand against.
If you’re feeding a crowd, keep the toppings in separate bowls and let people build their own. That matters more outdoors than it would in a kitchen, because once the hot dogs are done, they need to be served immediately while the casing is still snappy and the buns are warm.
- Ketchup, mustard, and relish — The basic trio gives you sweet, sharp, and tangy in one pass. Use them sparingly at first; campfire hot dogs get messy fast.
- Chili — Best when it’s thick. Thin chili turns the bun soggy before everyone gets a chance to eat.
- Sauerkraut or jalapeños — These bring acidity and bite, which cuts through the richness of the hot dog and keeps the whole thing from tasting flat.
- Shredded cheese and diced onions — Cheese softens from the heat of the dog, while onions add crunch. Both are best added right after grilling, before the hot dog cools.
Getting the Fire, the Turn, and the Toast Right
Skewer the Hot Dogs Lengthwise
Push each hot dog lengthwise onto a roasting stick or long fork so it stays stable while you cook. That setup keeps the casing from spinning out of control and helps the hot dog heat evenly from the center out. If the skewer only catches the tip, the dog will wobble and brown unevenly.
Roast With Constant Movement
Hold the hot dogs over flames or coals and rotate them often for 8 to 10 minutes. You’re looking for a hot dog that’s heated through, lightly blistered, and marked with small charred spots all around. If the skin starts to split, the heat is too strong or the dog is sitting too still in one place.
Toast the Buns Last
Slide the buns near the fire for just a moment until they’re warm and lightly crisp at the edges. A toasted bun gives you structure and a little extra flavor, but it burns fast, so don’t walk away. If the buns are already warm from the cooler or the truck, they may only need a few seconds.
Build and Serve Right Away
Place each hot dog in a bun and add the condiments and toppings while everything is still hot. The texture falls off quickly once the hot dog cools, and the bun softens as soon as it absorbs steam. This is the kind of meal that waits for nobody.
How to Adapt Camping Hot Dogs for Different Eaters and Different Campsites
Dairy-Free and Gluten-Free Plates
Hot dogs themselves are often dairy-free, but the bun and toppings can change that fast. Use gluten-free buns if needed, and check labels on the hot dogs and condiments. The cooking method doesn’t change at all, which is why this is an easy campfire meal to tailor without losing the charred, smoky finish.
Make Them Into Chili Dogs
Warm the chili before you leave home and carry it in a sealed container or insulated pot. Spoon a thick layer over the hot dog after roasting, then finish with cheese and onions. The extra topping makes the bun softer faster, so toast it a little more than you would for a plain dog.
Safer Roasting Over Coals Instead of Flames
If your fire is lively and hard to control, wait for a bed of glowing coals. They’re calmer and much easier to cook over, especially if you’re feeding kids or beginners. You’ll get better browning and fewer burnt patches, which matters more than speed here.
Storage and Reheating
- Refrigerator: Store cooked hot dogs and buns separately for up to 3 days. The buns soften fast, so wrap them well if you want to keep them usable.
- Freezer: Cooked hot dogs freeze well, but buns don’t thaw with good texture. Freeze the hot dogs only, then thaw overnight in the refrigerator before reheating.
- Reheating: Warm the hot dogs in a skillet or over gentle heat until hot through, then toast fresh buns if you have them. The common mistake is blasting them over high heat, which makes the casing split before the center is warm.
Answers to the Questions Worth Asking
Camping Hot Dogs
Ingredients
Equipment
Method
- Skewer each hot dog lengthwise on a roasting stick or long fork. Keep them spaced so they sit evenly over the fire.
- Hold the hot dogs over campfire flames or coals, rotating frequently for 8-10 minutes until heated through and slightly charred. Look for blistered, browned spots all over.
- Toast buns briefly over the fire if desired. Pull them when the tops are lightly warmed and the edges look toasted.
- Place hot dogs in buns and add desired condiments and toppings. Serve immediately while hot for best texture.