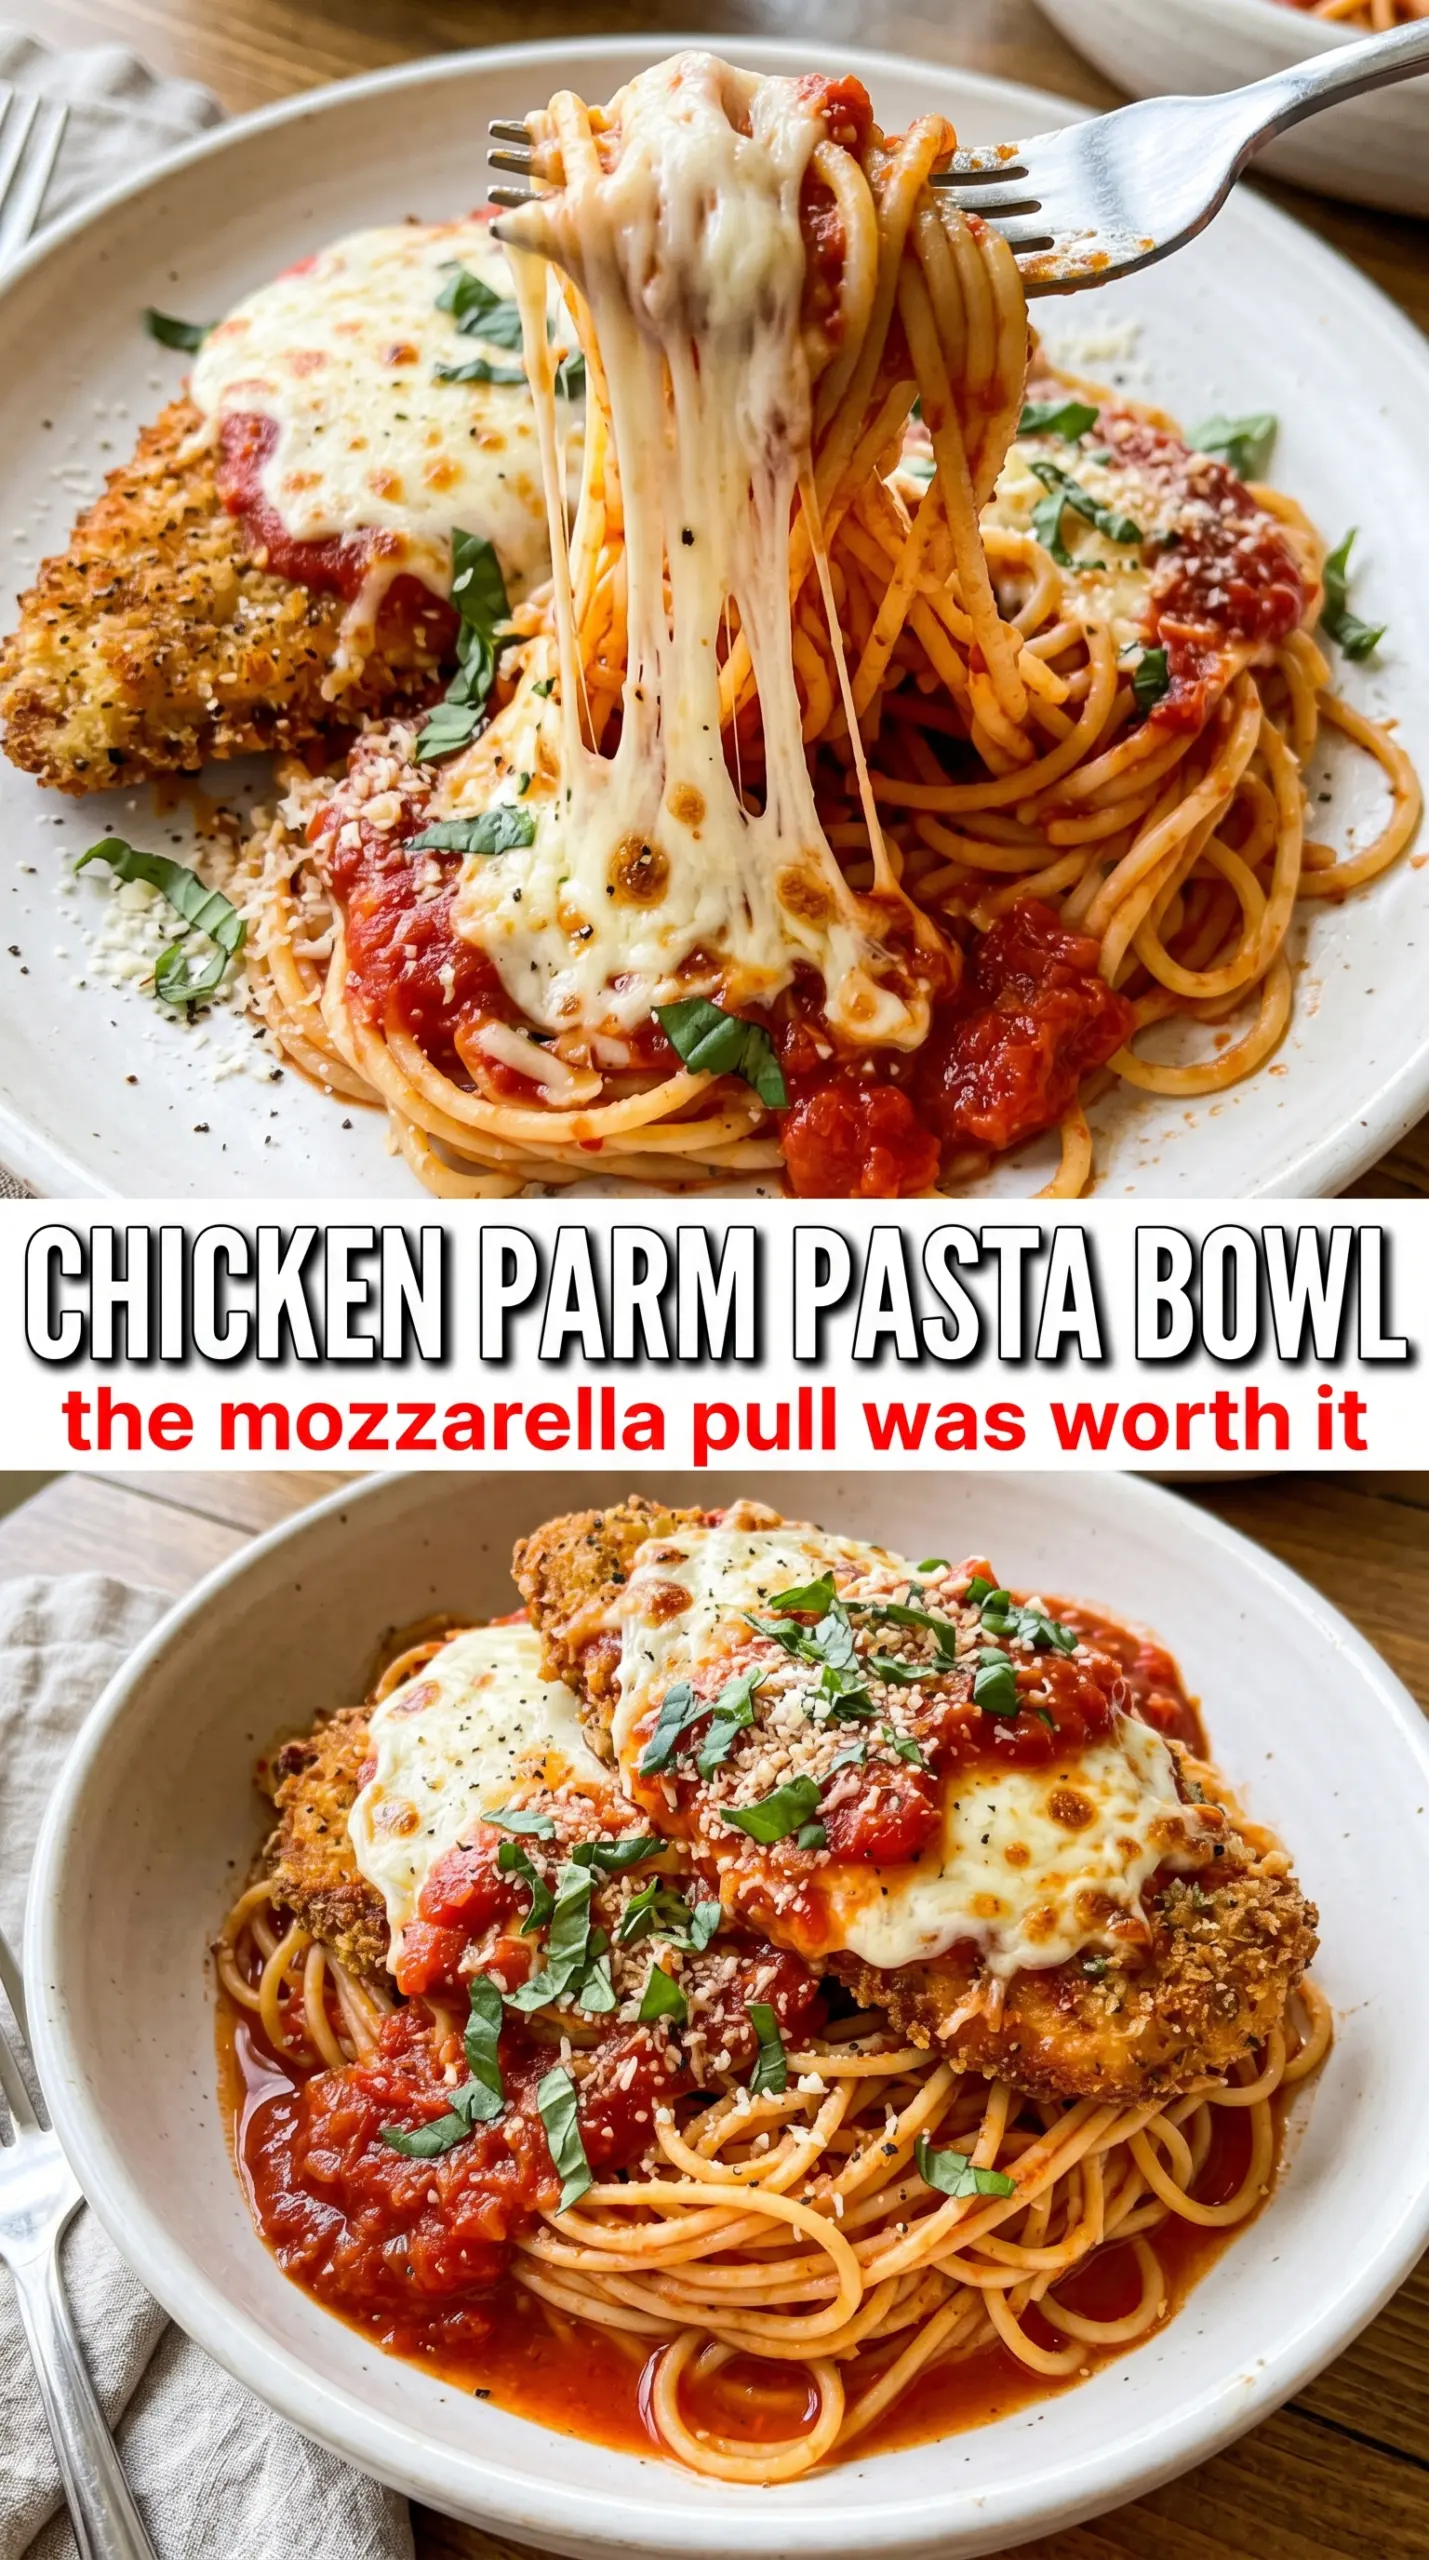
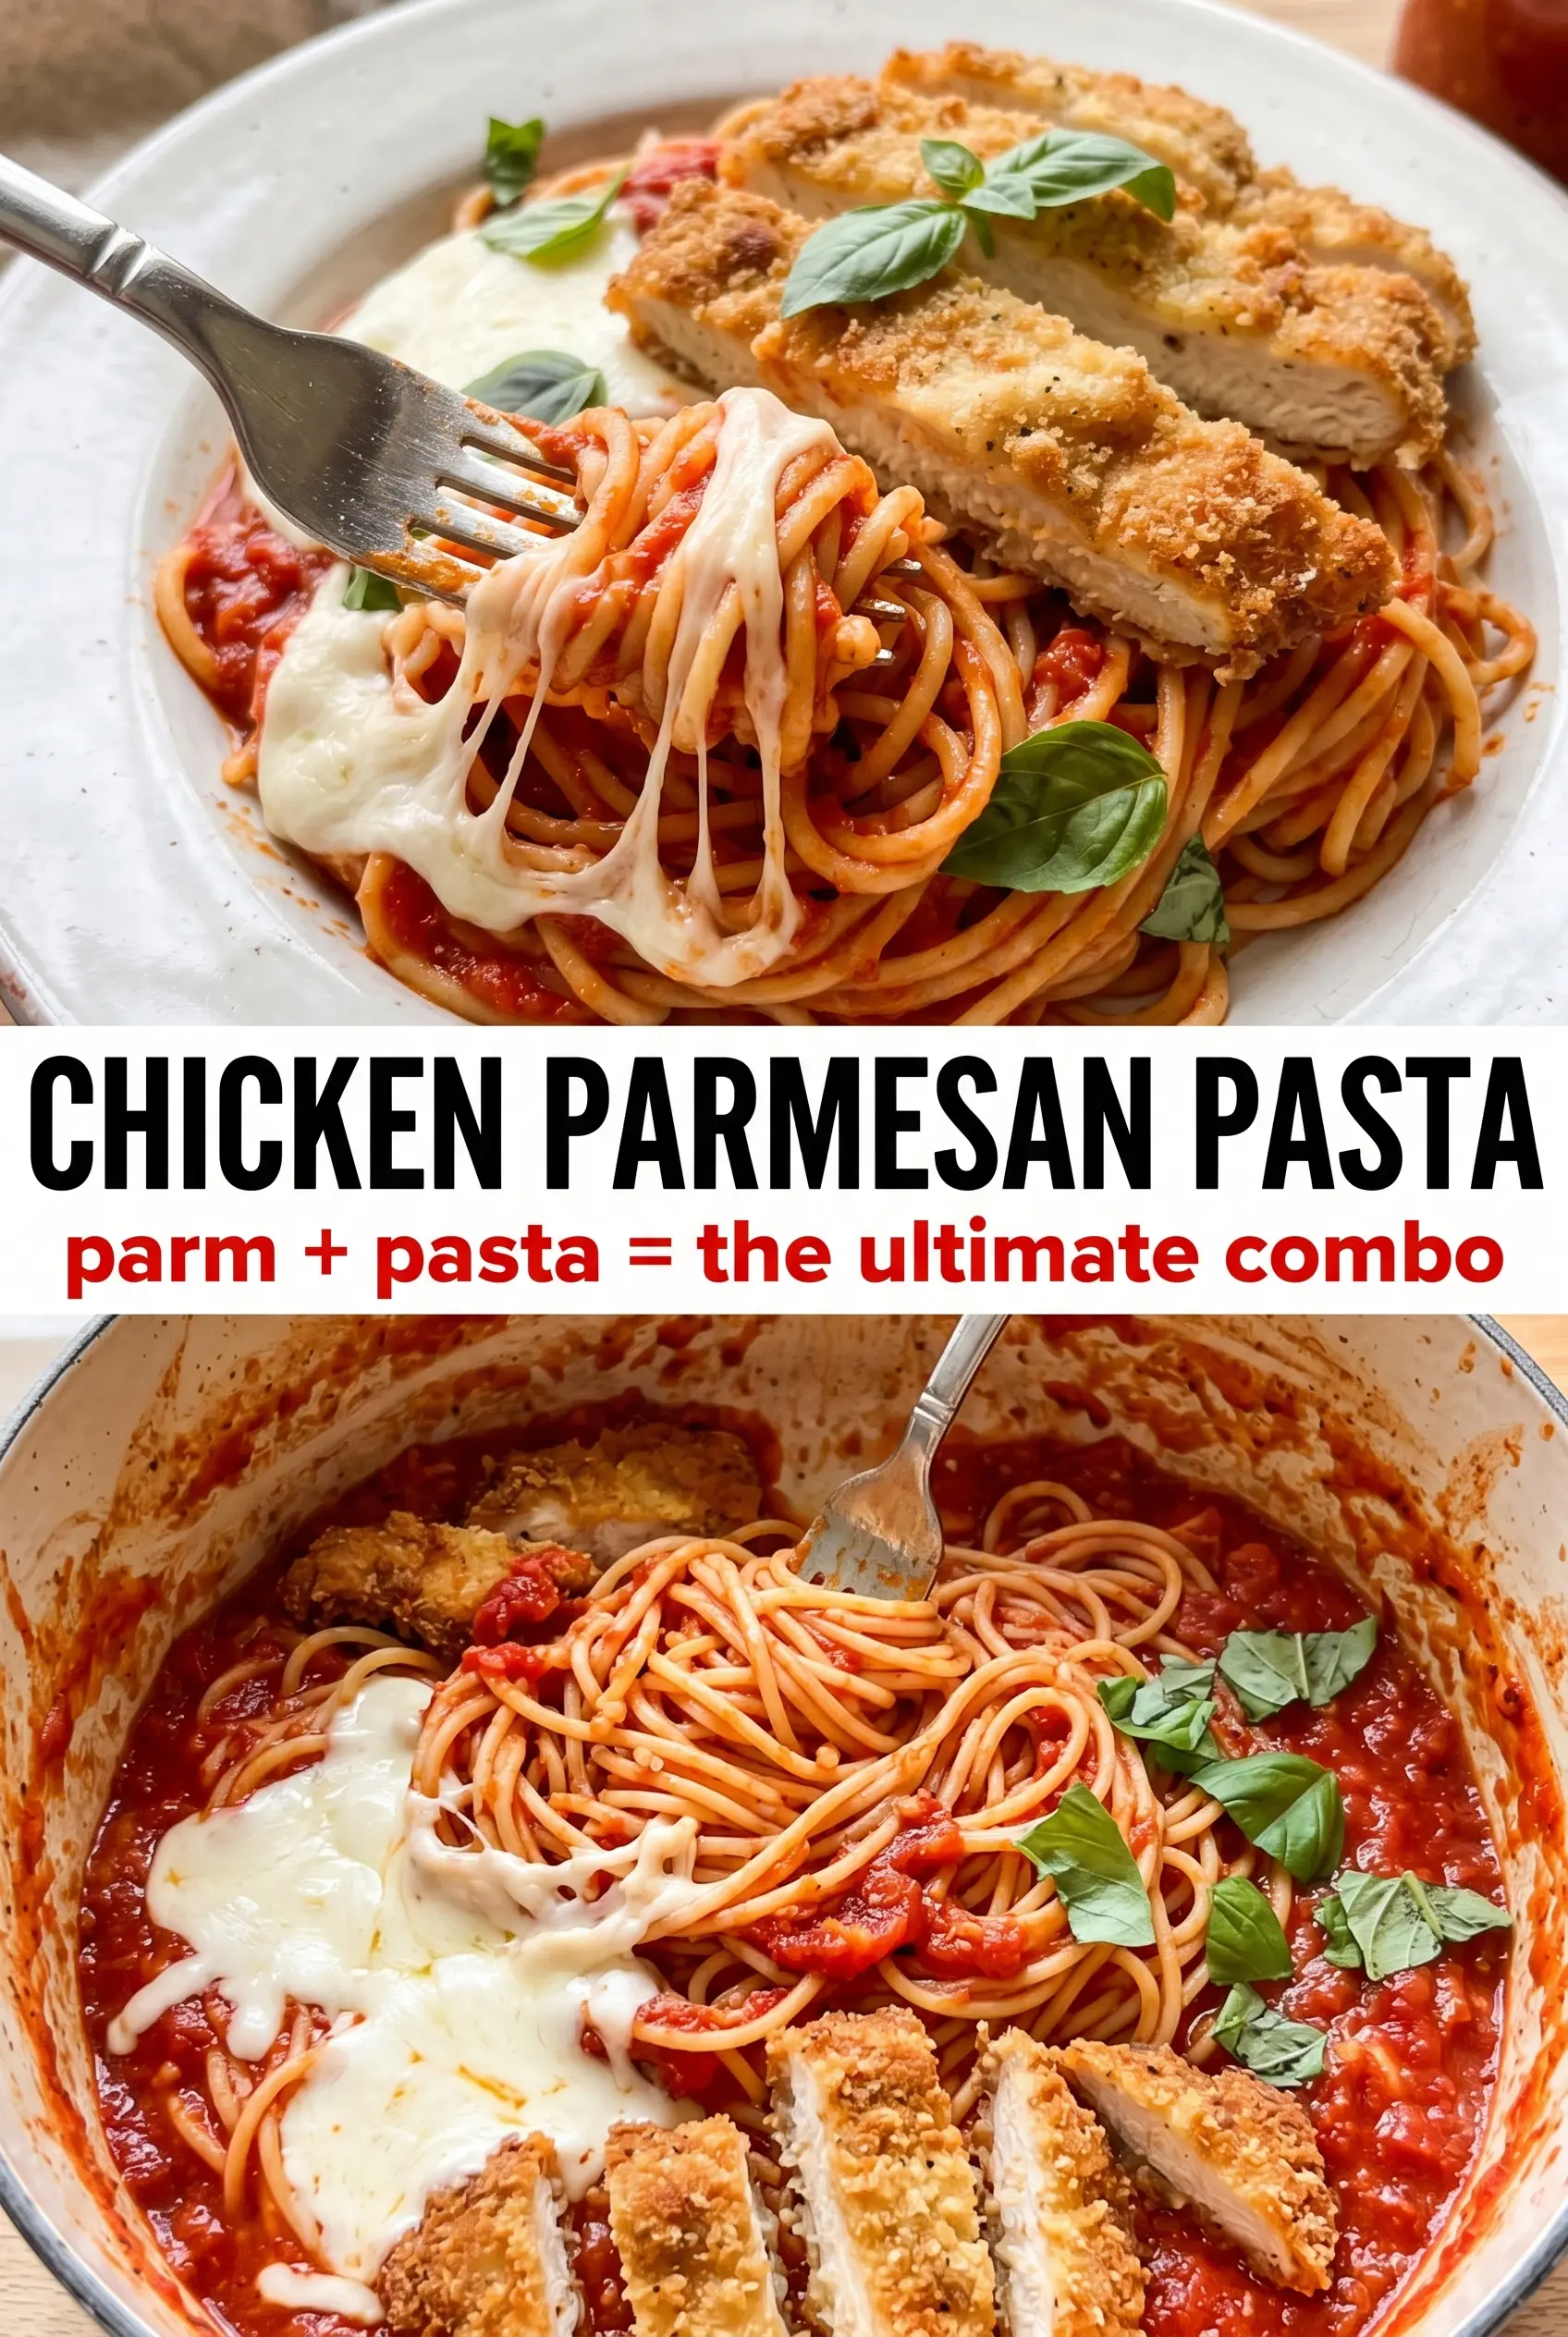
Penne tossed in marinara, topped with crispy chicken, and buried under melted mozzarella is the kind of dinner that disappears fast because it hits every comfort-food note at once. The pasta stays saucy, the chicken keeps its crunch under the cheese, and each forkful gives you the same salty, tangy, creamy balance that makes chicken Parmesan a regular order at restaurants.
What makes this version work is the sequence. The chicken gets fully browned before it ever goes near the oven, so it brings texture to the finished dish instead of turning soft in the sauce. The pasta is coated with marinara before baking, which keeps it from drying out while the cheese melts over the top. That extra Parmesan in the breading and again on top gives the whole pan a sharper, more savory finish.
Below you’ll find the small details that keep the coating crisp, the sauce from getting watery, and the cheese from turning greasy. If you’ve ever had baked pasta where the breading went soggy, the method here fixes that.
The chicken stayed crisp on top even after baking, and the pasta underneath soaked up the sauce without turning mushy. I used a little extra basil at the end and it tasted like a proper chicken parm casserole.
Like this chicken Parmesan pasta? Save it to Pinterest for nights when you want crispy chicken, saucy penne, and bubbling mozzarella in one pan.
The Part That Keeps the Chicken Crispy Under All That Cheese
The biggest mistake in chicken Parmesan pasta is treating the chicken like it can only be crisp once. It can’t. If the pieces go into the oven pale or underbrowned, the cheese and sauce will steam them into a soft coating. You want a real golden crust from the skillet first, because that crust holds up under the mozzarella and gives you texture in the finished bake.
Cooking the pasta separately also matters. Penne should be just tender before it gets mixed with sauce, since it will keep cooking in the oven. If it starts out too soft, the dish goes from hearty to heavy fast. The sauce should coat the noodles, not pool at the bottom of the pan.
- Pan-fried chicken — This is where the flavor and crunch come from. Use medium-high heat and don’t crowd the pan, or the breading will steam instead of brown.
- Marinara sauce — A good jarred sauce works fine here, but it should be thick enough to cling to the pasta. Thin sauce can make the whole dish loose and watery.
- Parmesan in the breading — It adds a nutty, salty edge that plain breadcrumbs can’t give you. Grate it finely so it blends into the coating instead of falling off.
- Mozzarella — Shredded mozzarella melts evenly and gives you that classic pull. Fresh mozzarella is wetter and can make the top soupy unless you dry it very well first.
What Each Layer Is Doing Before It Hits the Oven
- Chicken breasts — Cutting them into bite-sized pieces helps them cook quickly and stay easy to eat with the pasta. If the pieces are too large, the breading can brown before the center is done.
- Flour, egg, and breadcrumbs — This three-part coating gives the chicken structure and helps the Parmesan stick. Skip one layer and the crust won’t cling as well.
- Italian breadcrumbs — They bring built-in seasoning and a finer crumb than panko, which works better for this style of dish. If you only have plain breadcrumbs, add Italian seasoning and a pinch of garlic powder.
- Cooked penne — Penne is sturdy enough to hold the sauce and nestle under the chicken without collapsing. Any short pasta with ridges will work, but avoid delicate shapes that soften too quickly.
Building the Chicken Parm Bake So Nothing Turns Soft
Coating the Chicken Evenly
Start by setting up the flour, egg, and breadcrumb mixture in separate bowls so the coating stays dry and tidy. Pat the chicken pieces dry first; if they’re damp, the flour turns pasty and the breading slips off in the pan. Press the crumbs onto each piece so the surface looks fully covered, not dusty. That extra pressure helps the crust stay put after frying and baking.
Getting the Golden Sear
Heat the olive oil until it shimmers before adding the chicken. If the oil isn’t hot enough, the breading absorbs it and turns heavy. Cook in batches so every piece has room to brown, and flip only when the first side releases easily and shows a deep golden color. The chicken should be cooked through at this stage, because the oven is for melting cheese and bringing everything together, not finishing raw poultry.
Assembling the Pasta Layer
Toss the cooked penne with marinara until every noodle is coated, then spread it into the baking dish in an even layer. This keeps dry spots from showing up under the cheese. Place the chicken on top instead of stirring it in, because you want the crust exposed where it can stay textured. If the pasta looks dry before baking, add a splash more sauce now rather than hoping the oven will fix it.
Melting the Cheese Without Greasing It Out
Scatter the mozzarella and Parmesan evenly over the top, then bake just until the cheese has melted and the edges are bubbling. Keep an eye on the surface during the last few minutes; you want light browning, not a dark, oily layer. If the cheese looks separated, the heat was too high or the bake went too long. Pull it as soon as the top is glossy and the sauce is bubbling at the edges.
How to Adapt This Dish for Different Kitchens and Schedules
Make It Gluten-Free
Use a gluten-free flour blend and gluten-free breadcrumbs, then keep the rest of the method the same. The crust will be a little more delicate, so let the chicken brown fully before flipping it. Gluten-free pasta also works, but pull it from the boiling water when it still has a little bite or it will soften too much in the bake.
Use Thighs Instead of Breasts
Boneless chicken thighs bring more richness and stay juicier, especially if you’re worried about overcooking. Cut them into similar bite-sized pieces and cook until the coating is deep golden and the centers are done. The flavor is a little fuller, and the texture stays softer than breast meat.
Add Heat Without Breaking the Balance
Stir red pepper flakes into the marinara or add a pinch to the breadcrumb mixture. That gives the dish a little lift without changing the structure. Don’t overdo it; too much heat can fight with the cheese and make the sauce taste sharp instead of round.
Storage and Reheating
- Refrigerator: Store leftovers in an airtight container for up to 4 days. The coating softens a bit, but the flavor holds up well.
- Freezer: It freezes best before baking. Assemble the pasta and chicken, wrap tightly, and freeze for up to 2 months. Thaw in the refrigerator before baking so the center heats evenly.
- Reheating: Reheat in a 350°F oven, covered loosely with foil, until hot in the center. The microwave works in a pinch, but it softens the breading quickly, so the oven gives you a better chance of keeping some texture.
Questions I Get Asked About This Recipe
Chicken Parmesan Pasta
Ingredients
Equipment
Method
- Dredge the chicken pieces in flour, then dip them in the beaten eggs. Coat each piece thoroughly so it clings for crisp browning.
- Combine Italian breadcrumbs with 1/2 cup grated Parmesan, then press the chicken into the breadcrumb mixture. Make sure the coating is even on all sides for a golden crust.
- Heat olive oil in a pan over medium-high heat, then pan-fry chicken for 3-4 minutes per side until golden and cooked through. Transfer to paper towels to drain excess oil.
- Toss the cooked penne with marinara sauce, then pour into a greased 9x13 baking dish. Spread into an even layer so every bite has sauce.
- Arrange the crispy chicken pieces over the pasta. Cover the surface so the dish bakes with pockets of crunchy topping.
- Top with shredded mozzarella and the remaining grated Parmesan. Ensure the cheese covers the chicken and pasta areas for a bubbling, browned finish.
- Bake at 375°F for 20-22 minutes until the cheese is melted and golden. Garnish with fresh basil immediately after baking, so the aroma stays bright.