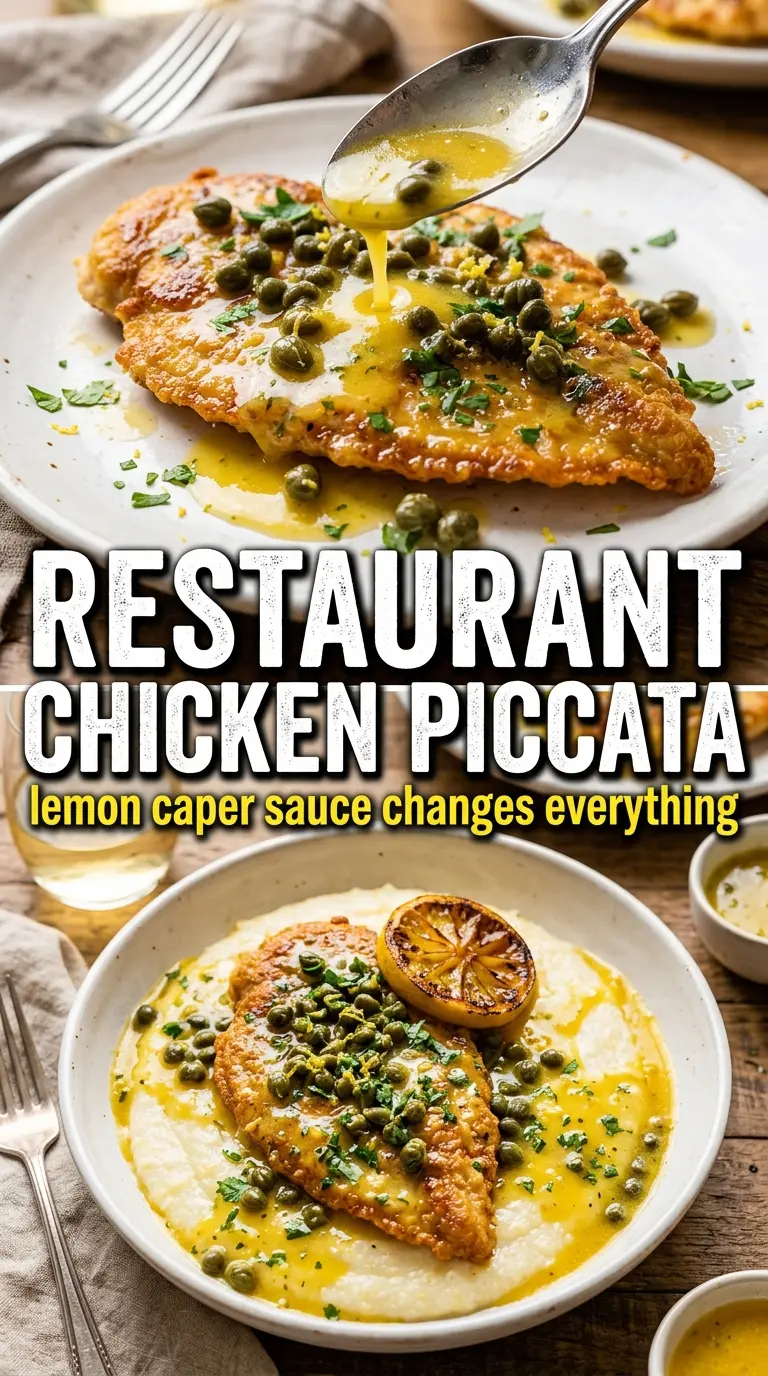
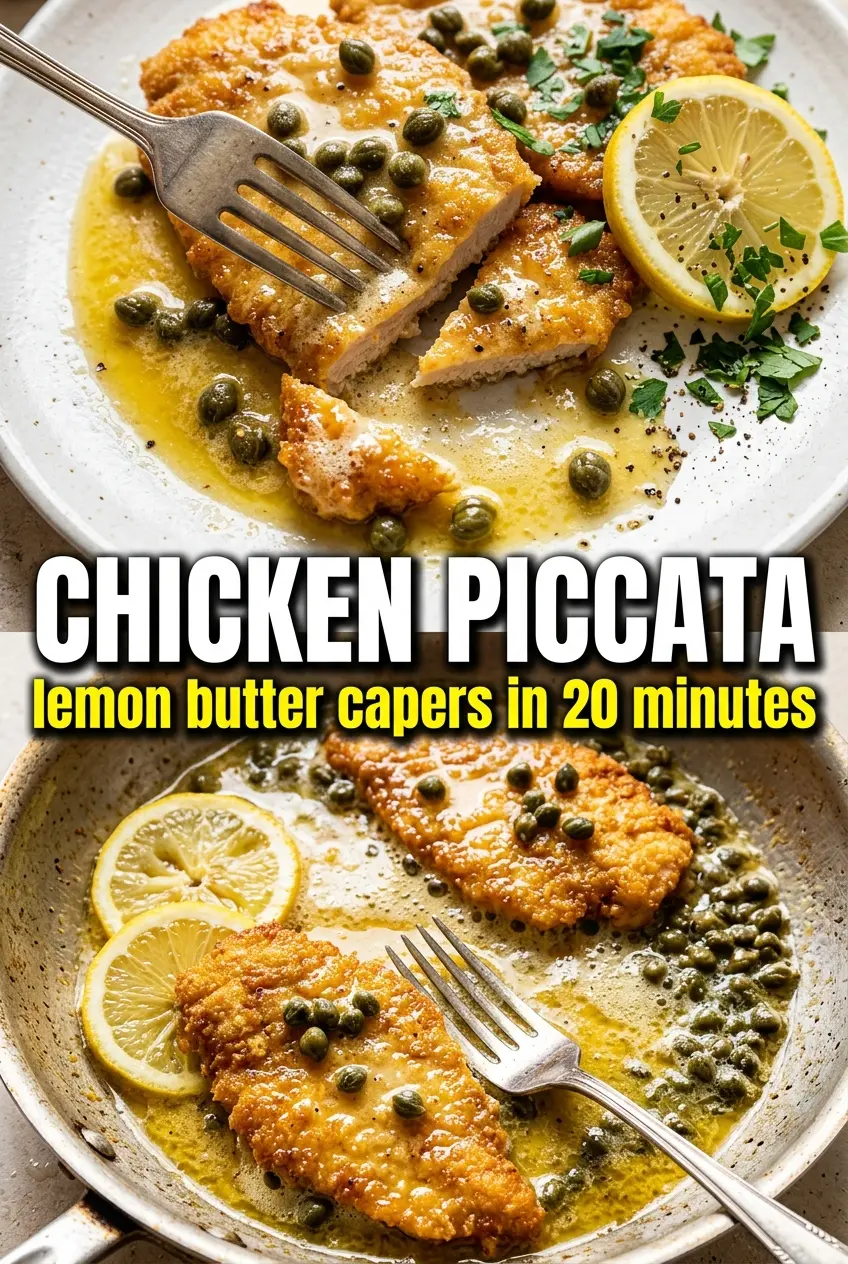
Chicken piccata lives or dies by the sauce, and this version gets the balance right: bright lemon, briny capers, and a glossy butter finish that clings to every cutlet instead of sliding off the plate. The chicken stays crisp at the edges because it’s dredged lightly, not buried in flour, so the pan sauce can still reach the browned bits left behind in the skillet.
The trick is to cook the chicken in batches and build the sauce in the same pan. That keeps the flavor deep and the sauce quick, because the wine loosens the fond, the broth gives it body, and the cold butter at the end smooths out the sharp edges without making it heavy. If you’ve ever had piccata that tasted flat or turned greasy, the problem was usually rushed heat or too much flour.
Below, I’m walking through the part that matters most: how to keep the cutlets tender, how to reduce the sauce without scorching it, and what to swap if you need a dairy-free version.
The sauce thickened up beautifully and stayed silky when I whisked in the butter off the heat. My chicken cutlets browned fast and stayed tender, and the lemon-caper flavor was spot on.
Keep this chicken piccata handy for a fast skillet dinner with crisp cutlets and a bright lemon-caper pan sauce.
The Cutlets Need to Be Thin Before They Hit the Pan
The most common mistake with chicken piccata is starting with cutlets that are too thick. When the chicken is uneven, the outside goes dark before the center cooks, and you end up either overcooking the meat or under-reducing the sauce while you wait. Halving the breasts horizontally gives you quicker browning, more surface area for the flour, and a texture that stays tender instead of stringy.
The flour coating should look dusty, not pasty. A heavy dredge turns the sauce cloudy and can make the crust gummy once it hits the liquid. A thin, even coat helps the chicken brown fast and gives the pan drippings enough structure to turn into a sauce without feeling heavy.
What Each Ingredient Is Actually Doing in This Pan Sauce
- Chicken breasts — Halving them into thin cutlets is what makes the dish cook fast and stay juicy. If you start with thicker pieces, the sauce will be finished before the chicken is.
- All-purpose flour — This is just enough to help the chicken brown and slightly thicken the pan sauce. Almond flour won’t give the same crisp coating or the same silkiness in the sauce.
- Dry white wine — Wine adds sharpness and depth that broth alone can’t match. If you don’t cook with alcohol, use extra broth plus a small splash more lemon juice, but the sauce will taste a little less layered.
- Capers — They’re the briny contrast that makes piccata taste like piccata. Rinse them only if they taste very salty; otherwise, drained is enough.
- Cold butter — Swirled in at the end, it turns the sauce glossy and round instead of harsh. Add it off the heat so the sauce stays emulsified instead of breaking.
- Lemon slices and juice — The juice gives the sauce its brightness, while the slices perfume it as they simmer. Fresh lemon matters here; bottled juice tastes flatter and can make the whole pan taste one-note.
Cooking the Chicken in a Way That Keeps the Sauce Clean and Silky
Dredging Without Overcoating
Season the chicken first, then dust it lightly in flour and shake off every loose bit. You’re aiming for a thin film, not a breading. If the flour clumps, it will burn in the skillet and leave the sauce gritty. A light coating browns evenly and leaves just enough residue in the pan to help the sauce thicken naturally.
Browning in Batches
Heat the oil and butter until the butter foams, then lay the cutlets in without crowding the pan. Crowding drops the temperature, and instead of a crust you get pale, steamed chicken. Three to four minutes per side is usually enough for thin cutlets, and you’re looking for a deep golden edge and meat that feels just firm in the center. Pull them out as soon as they’re cooked through; they’ll finish warming in the sauce later.
Building the Sauce in the Same Pan
Once the chicken is out, add the garlic briefly, then pour in the wine and scrape the bottom well. That browned layer is the flavor base, and it should dissolve into the liquid within seconds. After the broth, lemon juice, capers, and lemon slices go in, let the sauce simmer until it’s reduced by about a third. If it’s still watery, keep going; if it reduces too far, it will taste sharp instead of balanced.
Finishing With Butter Off the Heat
Turn off the burner before adding the last butter. High heat is what breaks a lemon-butter sauce, not the lemon itself. Swirl in the cold butter until the sauce looks glossy and lightly thickened, then return the chicken and spoon the sauce over each piece. That last step coats the cutlets without overcooking them, and the sauce stays smooth instead of oily.
How to Adapt Chicken Piccata Without Losing What Makes It Work
Dairy-Free Piccata
Use olive oil for all the cooking fat and finish the sauce with a small drizzle of extra olive oil instead of butter. You’ll lose a little of the classic gloss, but the sauce still stays bright and sharp. Keep the heat low when you finish it so the emulsion doesn’t split.
Gluten-Free Version
Swap the all-purpose flour for a light coating of cornstarch or a 1:1 gluten-free flour blend. Cornstarch gives a thinner crust and a slightly glossier sauce, while a gluten-free blend behaves more like regular flour. Shake off the excess either way so the pan sauce stays smooth.
No-Wine Substitution
Replace the wine with extra chicken broth and add a little more lemon juice to keep the sauce lively. You won’t get the same depth, because wine brings acidity and complexity that broth alone can’t fully replace, but the dish still works. Let the broth reduce a minute or two longer so the flavor doesn’t taste thin.
Make It a Little Richer
Serve the chicken over linguine or mashed potatoes to catch every drop of sauce. The piccata itself stays the same, but the starch softens the sharp lemon and turns it into a fuller meal. Just spoon the sauce over the top right before serving so the cutlets keep their crisp edges.
Storage and Reheating
- Refrigerator: Store in an airtight container for up to 3 days. The chicken stays fine, but the crust softens in the sauce.
- Freezer: It freezes, but the sauce can separate a little when thawed. Freeze the chicken and sauce together only if you’re okay with a less silky finish.
- Reheating: Warm gently in a covered skillet over low heat with a splash of broth. Don’t boil it, or the butter in the sauce will break and the chicken will turn tough.
Answers to the Questions Worth Asking
Chicken Piccata
Ingredients
Equipment
Method
- Season the chicken cutlets with salt and pepper, then dredge lightly in all-purpose flour, shaking off the excess. Cutlets should look lightly dusted with no thick coating.
- Heat olive oil and 2 tablespoons butter in a large skillet over medium-high heat. The butter should foam lightly as the oil shimmers.
- Cook the chicken in batches for 3-4 minutes per side, until golden and cooked through, then remove and set aside. The edges should be crisp and the center should no longer look raw.
- Add the minced garlic and cook for 30 seconds. It should smell fragrant without browning.
- Pour in the dry white wine and scrape up the browned bits from the skillet. The sizzling liquid should pick up the fond.
- Simmer for 2 minutes. The wine should reduce slightly and look more glossy.
- Add the chicken broth, fresh lemon juice, capers, and thin lemon slices, then simmer for 4-5 minutes until the sauce reduces by a third. The sauce should thicken and taste bright-tangy.
- Remove the skillet from the heat and swirl in the remaining 2 tablespoons cold butter until the sauce is glossy. The finish should look smooth and shiny, not greasy.
- Return the chicken to the skillet and spoon the sauce over each cutlet. Each fillet should be coated with visible pooled sauce.
- Garnish with chopped fresh parsley. Finish with a fresh green sprinkle for contrast.