Chocolate Peanut Butter Pumpkins hit that sweet spot between candy and cookie: a soft peanut butter center with a hint of pumpkin spice, wrapped in a smooth orange shell and finished with a pretzel stem. They look festive on a platter, but the real payoff is the contrast — creamy filling, crisp coating, and just enough salt from the pretzel to keep each bite from feeling one-note.
The part that makes these work is moisture control. Pumpkin puree adds great flavor, but it brings water with it, and that extra moisture can turn the filling loose and sticky fast. Blotting the puree dry before mixing keeps the texture firm enough to shape, chill, and dip cleanly. The second thing that matters is chilling in stages: first to firm the filling, then again after shaping so the pumpkins hold their ridges instead of sliding flat in the coating.
Below, I’ve included the tricks that keep the coating smooth, how to get the pumpkin shape without special molds, and what to do if you want to make them ahead for a party tray or gift box.
I was worried the pumpkin puree would make the filling too soft, but after chilling it held its shape perfectly and dipped cleanly. The pretzel stem and little green leaf made them look bakery-made, and the peanut butter center stayed smooth instead of grainy.
Save these Chocolate Peanut Butter Pumpkins for an easy no-bake dessert with a creamy center, crisp coating, and the cutest pretzel stems.
The Part Most Pumpkin Candies Get Wrong
Most pumpkin-shaped candies fail for one of two reasons: the filling is too wet, or the coating is too warm when it hits the chilled center. Either problem gives you lumpy shells, flattened ridges, or a filling that starts to ooze before you finish dipping. This version avoids both by drying the pumpkin puree first and chilling the mixture long enough for the peanut butter to firm back up.
The shape also matters more than people expect. If you try to roll these straight from the bowl, they’ll look like blobs once they’re coated. A short freeze after shaping gives you enough structure to press in ridges and keep the pumpkin silhouette after dipping.
- Blotted pumpkin puree — This is the difference between a moldable filling and a sticky mess. Press the puree between paper towels until it looks noticeably drier before you mix it in.
- Powdered sugar — It sweetens and stiffens at the same time, which helps the pumpkins hold their form. Granulated sugar won’t give you the same smooth, fudge-like texture.
- Pretzel sticks — They add the stem look and a salty crunch that cuts the sweetness. Add them after dipping so they don’t soften or break while you shape the pumpkins.
What Each Ingredient Is Actually Doing Here
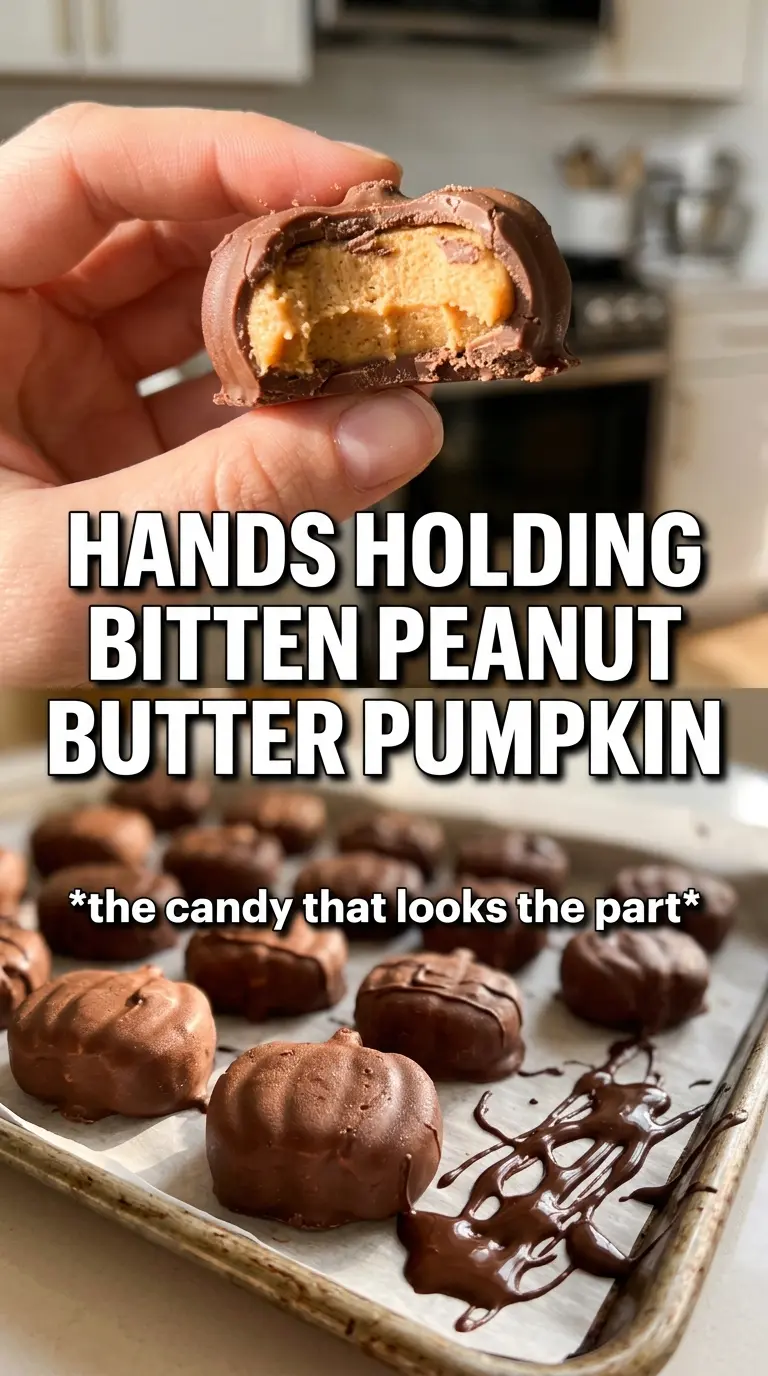
- Creamy peanut butter — Use a standard creamy peanut butter for the smoothest filling. Natural peanut butter can work, but it often makes the mixture looser and a little oily unless you stir it very well and chill it longer.
- Blotted pumpkin puree — Pumpkin adds the flavor and color note that makes these taste like more than plain peanut butter candies, but only if the excess water comes out first. If you skip the blotting step, the filling can get soft enough that the shapes slump.
- Powdered sugar — This gives the filling body and that soft truffle-like bite. Add it gradually so you can stop at a texture that holds together when pressed but still tastes creamy, not dry.
- Pumpkin pie spice and cinnamon — These deepen the pumpkin note without making the filling taste like pie filling. If you only have one or the other, use cinnamon plus a pinch of nutmeg and ginger for a close stand-in.
- Orange candy melts or milk chocolate with orange coloring — Candy melts are the easiest route because they set smoothly and don’t need tempering. If you use chocolate, add color sparingly; too much liquid coloring can seize the coating.
- Pretzel sticks and green candy — These are mostly for the look, but they also add texture and a little salt. Add them while the coating is still tacky so they actually stay put.
The Chill Time That Makes Dipping Possible
Building the Filling
Beat the peanut butter, blotted pumpkin, powdered sugar, pumpkin pie spice, and cinnamon until the mixture turns smooth and holds together like a soft dough. If it looks greasy or wet, it needs more powdered sugar or more time in the fridge, not more stirring. The goal is a mixture you can scoop and shape without it sticking to your hands in a thick paste.
Shaping the Pumpkin Ridges
Refrigerate the mixture for 30 minutes, then scoop tablespoon-sized portions and shape them into little pumpkins. Press shallow ridges around the sides with a toothpick or your fingers; don’t carve too deeply or the pumpkins can crack when you dip them. Freeze them for 20 minutes so the surface firms up enough to survive the coating.
Coating Without Losing the Shape
Melt the orange candy coating until it’s smooth and fluid, then dip each chilled pumpkin one at a time. Tap off the excess gently; if the coating is too thick, it hides the ridges and pools around the base. Press in the pretzel stem before the shell sets, then finish with the green candy leaf and refrigerate until firm.
How to Make These Fit a Different Occasion
Dairy-Free Version
Use dairy-free chocolate or dairy-free candy melts for the coating and keep the filling as written, since peanut butter and pumpkin are already dairy-free. The texture stays close to the original, though some dairy-free coatings set a little softer, so chill the finished pumpkins until fully firm before serving.
No Candy Melts on Hand
Use white chocolate or milk chocolate tinted with orange oil-based color, not regular liquid food coloring. Candy melts are easier because they’re designed to set firm, while regular chocolate needs a little more care to stay smooth and glossy.
Extra-Small Party Bites
Portion the filling with a teaspoon instead of a tablespoon and shorten the freezing time a bit. The result is more like bite-sized candy pumpkins, which works well for dessert trays, but they’re easier to overcoat, so let the excess drip off before setting them down.
Storage and Reheating
- Refrigerator: Store in an airtight container for up to 5 days. The coating may pick up a little condensation if they sit out too long, so keep them chilled until serving.
- Freezer: These freeze well. Freeze in a single layer, then transfer to a container with parchment between layers; thaw in the refrigerator so the coating doesn’t sweat.
- Reheating: No reheating needed. Let them sit at room temperature for 10 to 15 minutes before serving so the filling softens slightly, but don’t leave them out long enough for the coating to get tacky.
Answers to the Questions Worth Asking
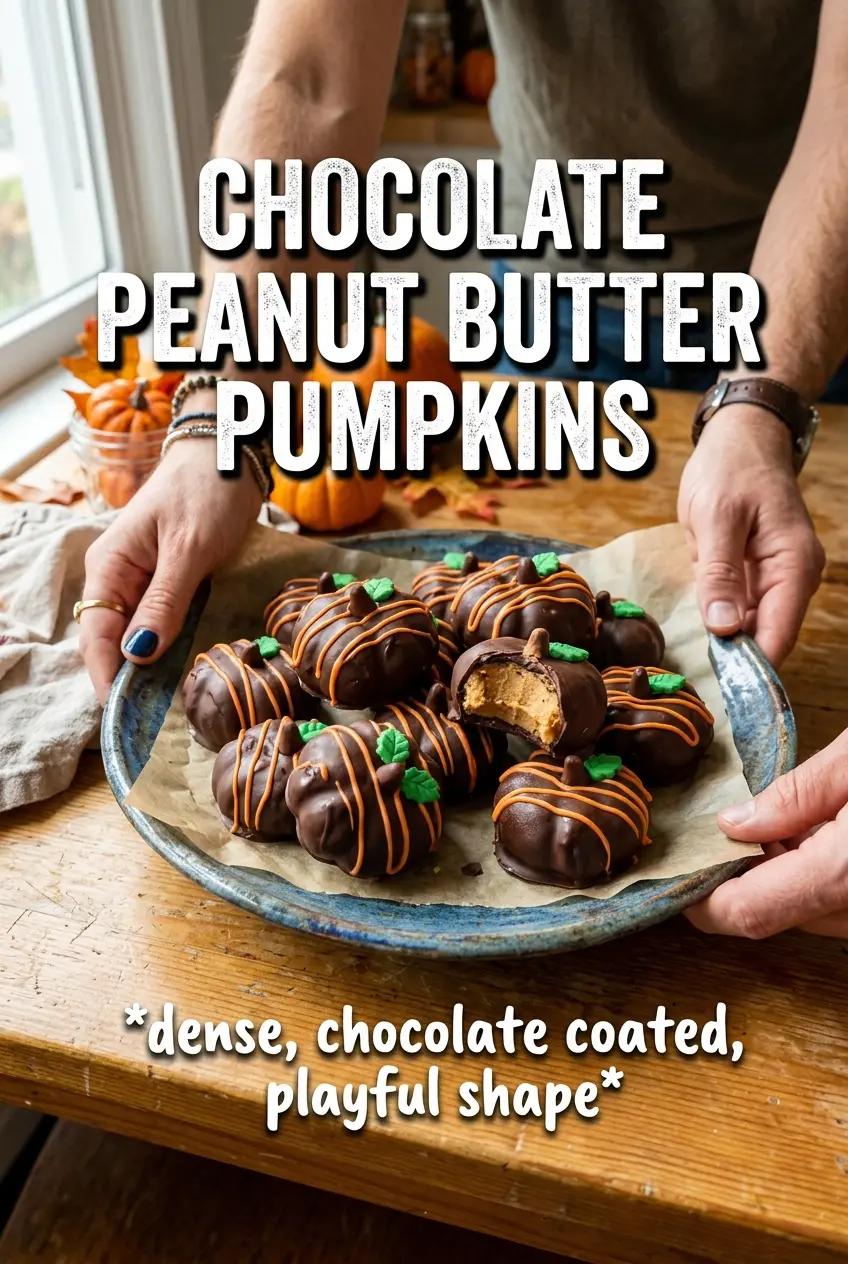
Chocolate Peanut Butter Pumpkins
Ingredients
Equipment
Method
- Blot pumpkin puree very dry. Beat creamy peanut butter and blotted pumpkin puree with powdered sugar, pumpkin pie spice, and cinnamon until smooth and thick enough to hold its shape.
- Refrigerate the filling for 30 minutes to firm it. Shape tablespoon-sized portions into pumpkin shapes, then create the ridges with a toothpick or your fingers.
- Freeze the shaped pumpkins for 20 minutes to set their form before coating.
- Melt the orange candy melts (or milk chocolate) until smooth, then tint with orange food coloring as needed. Dip each pumpkin, tapping to remove excess coating before it sets.
- Press a pretzel stick into the top of each pumpkin as a stem before the coating fully sets. Add a small green candy leaf, then refrigerate until the coating and decorations are firm.