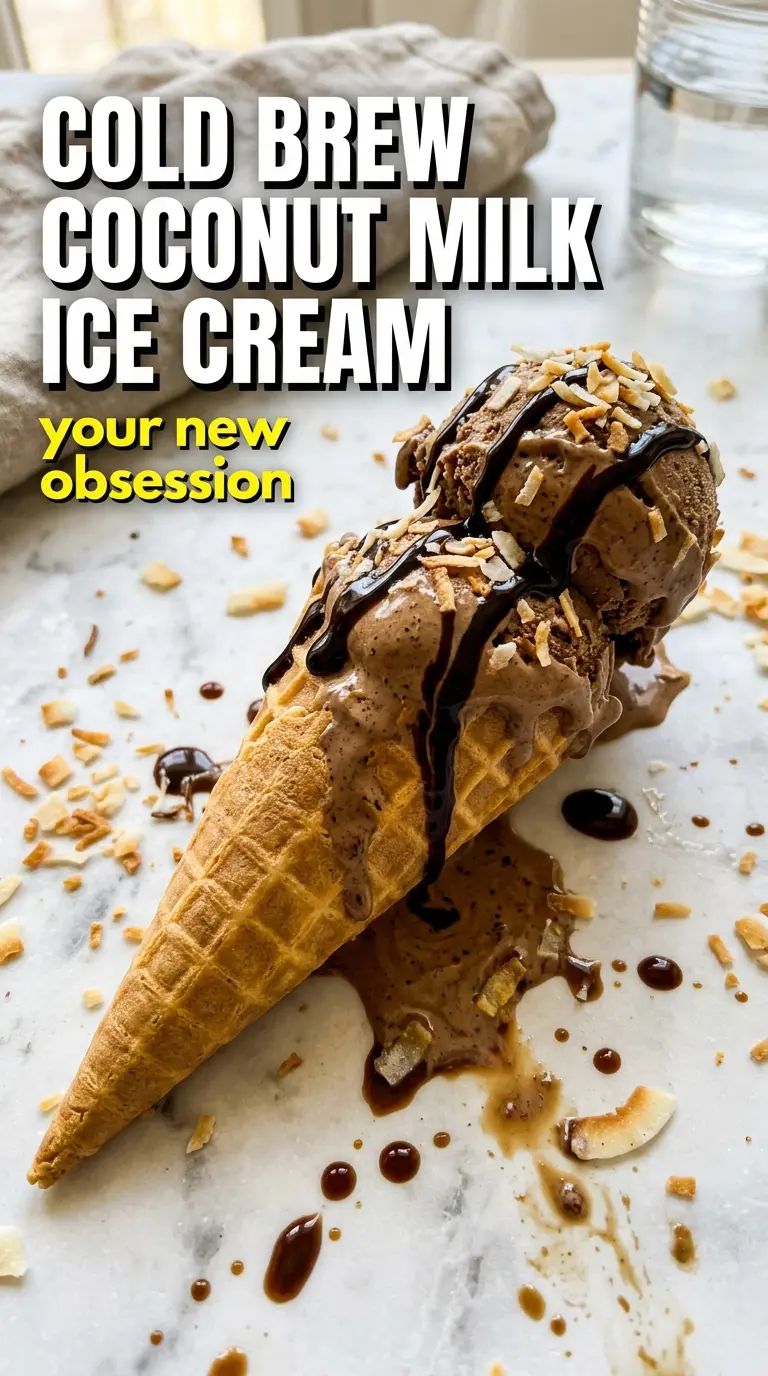
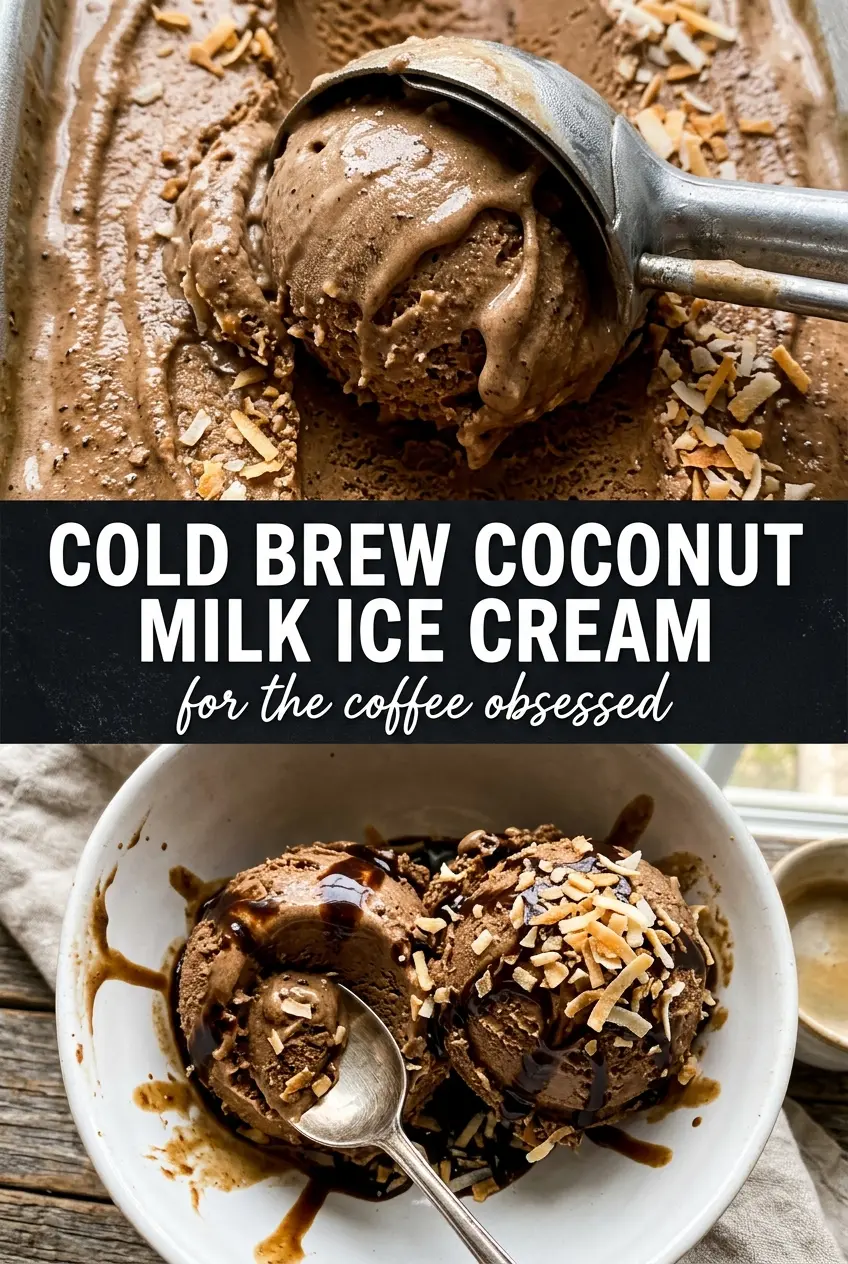
Deep coffee flavor and the kind of creamy finish that makes a second scoop feel inevitable is what this ice cream delivers. The cold brew comes through bold and clean, while the coconut milk keeps the texture lush without turning the whole thing heavy. It freezes with a soft, scoopable body instead of the icy edge that ruins a lot of homemade dairy-free ice creams.
The trick is keeping the base balanced before it ever hits the machine. Coconut milk brings the fat you need for body, but it also needs a little help from starch and sugar to keep the texture smooth after freezing. The cold brew concentrate gives you coffee flavor without watering the mix down, and a brief cook on the stove dissolves the sugar and activates the thickener just enough to improve the churn.
Below you’ll find the small details that matter here: how to avoid a grainy base, what kind of cold brew works best, and how to serve it with that deep coffee finish intact.
The coconut milk gave it a silky texture and the cold brew flavor stayed bold after freezing. I churned it for 20 minutes and it scooped like a dream the next day.
Creamy coconut milk coffee ice cream with bold cold brew flavor deserves a spot in your freezer for the next dessert craving.
The Reason This Ice Cream Stays Creamy Without Dairy
The biggest mistake in dairy-free ice cream is treating the base like it can freeze on its own and still behave. Coconut milk has enough fat to help, but fat alone doesn’t stop iciness. The starch gives the base a little body before churning, which means the finished ice cream freezes with a softer, denser scoop instead of brittle crystals.
Cold brew concentrate matters here because it adds flavor without extra water. If you use regular brewed coffee, the base thins out and the coffee taste gets muddy. You want a concentrate that tastes strong enough to drink straight in small sips, because the freezer always dulls flavor a little.
What Each Ingredient Is Doing in the Bowl
- Full-fat coconut milk — This is the body of the ice cream. Use full-fat canned coconut milk, not the drinkable carton version, or the base will freeze thin and icy. If the cans separate, whisk them thoroughly before measuring so the fat is evenly distributed.
- Cold brew coffee concentrate — This is where the deep coffee flavor comes from. Concentrate keeps the mix bold without adding much water, which helps the finished texture stay creamy. Use a concentrate you already enjoy drinking, because the flavor gets muted a bit once frozen.
- Granulated sugar or maple syrup — Sugar doesn’t just sweeten; it lowers the freezing point and keeps the ice cream scoopable. Maple syrup works if you want a deeper, almost caramel note, but it will soften the coffee flavor slightly. If you use maple, the base may need an extra minute on the stove to fully combine.
- Arrowroot or cornstarch — This is the texture insurance. It thickens the base just enough to improve body after freezing, and that small bit of structure matters a lot in a dairy-free recipe. Whisk it into the cold ingredients first so it doesn’t clump when heated.
- Vanilla extract — Vanilla rounds out the coffee and keeps the coconut from tasting flat. It won’t read as a separate flavor, but you’ll miss it if you leave it out. Add it before heating so it blends evenly through the base.
- Salt — A small amount sharpens the coffee and keeps the sweetness from taking over. It doesn’t make the ice cream salty; it just makes the cold brew taste more like itself.
Building the Base So It Freezes Smooth
Whisk Everything Before the Heat Goes On
Combine the coconut milk, cold brew concentrate, sugar, starch, vanilla, and salt in a saucepan and whisk until the mixture looks uniform. This is where you catch starch clumps before they have a chance to cook into little gelled bits. If the coconut milk has separated in the can, whisk until no thick blobs remain.
Cook Just Until It Thickens Slightly
Warm the base over medium heat, whisking constantly, until the sugar dissolves and the mixture takes on a lightly thickened, glossy look. You are not looking for pudding here. If it gets too hot, the coconut milk can taste cooked and the starch can turn gummy, so pull it as soon as the mixture coats the back of a spoon in a thin layer.
Chill It All the Way Through
Set the saucepan in an ice bath and cool the base completely before it goes into the fridge. A warm base churns poorly and takes longer to freeze, which usually means a looser texture with more ice crystals. After that, refrigerate it for the full chill time so the fat firms up and the flavor settles.
Churn, Then Freeze to Finish
Churn according to your machine’s instructions until the texture looks like soft serve. It should mound in the machine and leave slow ridges as the paddle turns. Transfer it to a container, press parchment or plastic wrap directly on the surface, and freeze until scoopable. If it freezes rock hard, it usually sat in the machine too long or went into the freezer before the base was fully chilled.
How to Adapt the Coffee Ice Cream Without Losing the Good Texture
Maple-Sweetened Version
Swap the granulated sugar for maple syrup if you want a darker, rounder sweetness. The flavor leans a little more caramel-like, which works beautifully with coffee, but it also softens the set slightly. Let the base cook just long enough to fully combine, then chill it thoroughly before churning.
Extra-Strong Coffee Finish
If you want the coffee to hit harder, add an extra tablespoon or two of cold brew concentrate and reduce the sugar slightly only if your concentrate is already sweetened. Don’t add more liquid coffee unless you’re also willing to accept a firmer, icier texture. For the boldest finish, drizzle a little concentrate over each serving right before eating.
No-Arrowroot Backup
Cornstarch works in place of arrowroot with the same amount, and it gives nearly the same result here. Arrowroot can stay a touch silkier, while cornstarch can set a little firmer, but both will help the base freeze smoother than an unthickened mixture. Whisk it in cold before heating so the texture stays even.
Storage and Reheating
- Refrigerator: The churned base should not be stored in the fridge once frozen; it belongs in the freezer. Before churning, the mixed base can chill in the refrigerator for up to 24 hours.
- Freezer: Freeze in a shallow airtight container for up to 2 weeks for the best texture. After that it can start to take on a little more ice and lose some coffee brightness.
- Reheating: There is no reheating here. For serving, let the container sit at room temperature for 5 to 10 minutes so the scoop releases cleanly instead of cracking the top.
Questions I Get Asked About This Recipe
Cold Brew Coffee and Coconut Milk Ice Cream
Ingredients
Equipment
Method
- In a saucepan, whisk full-fat coconut milk, cold brew coffee concentrate, granulated sugar or maple syrup, arrowroot or cornstarch, vanilla extract, and salt until smooth and combined.
- Heat the mixture over medium heat, whisking constantly, until it thickens slightly and the sugar dissolves, about 5 minutes, then remove from heat.
- Cool the mixture completely over an ice bath until no longer warm, then refrigerate at least 4 hours.
- Churn the chilled mixture in an ice cream maker according to the manufacturer’s instructions until it looks like soft-serve.
- Transfer to a freezer-safe container and freeze until scoopable, then serve with an extra drizzle of cold brew coffee concentrate.