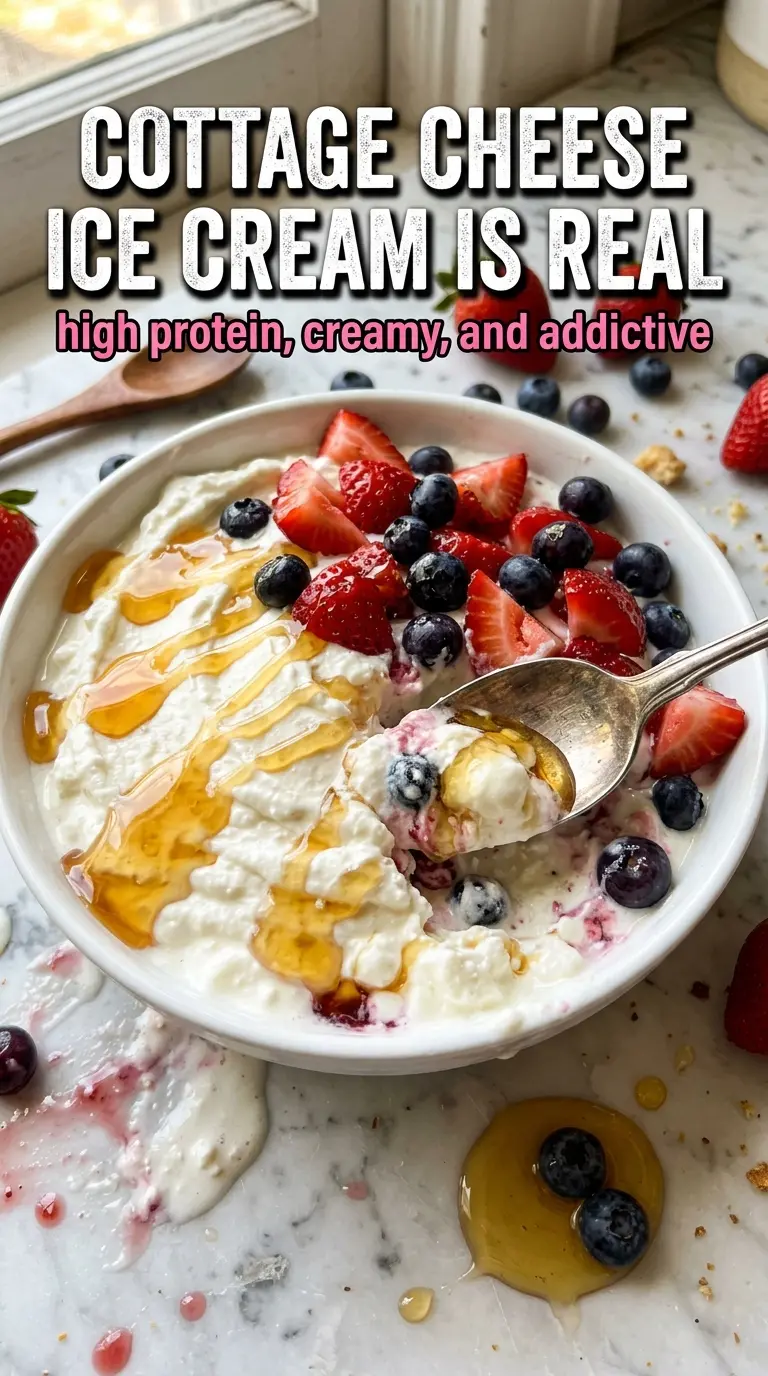
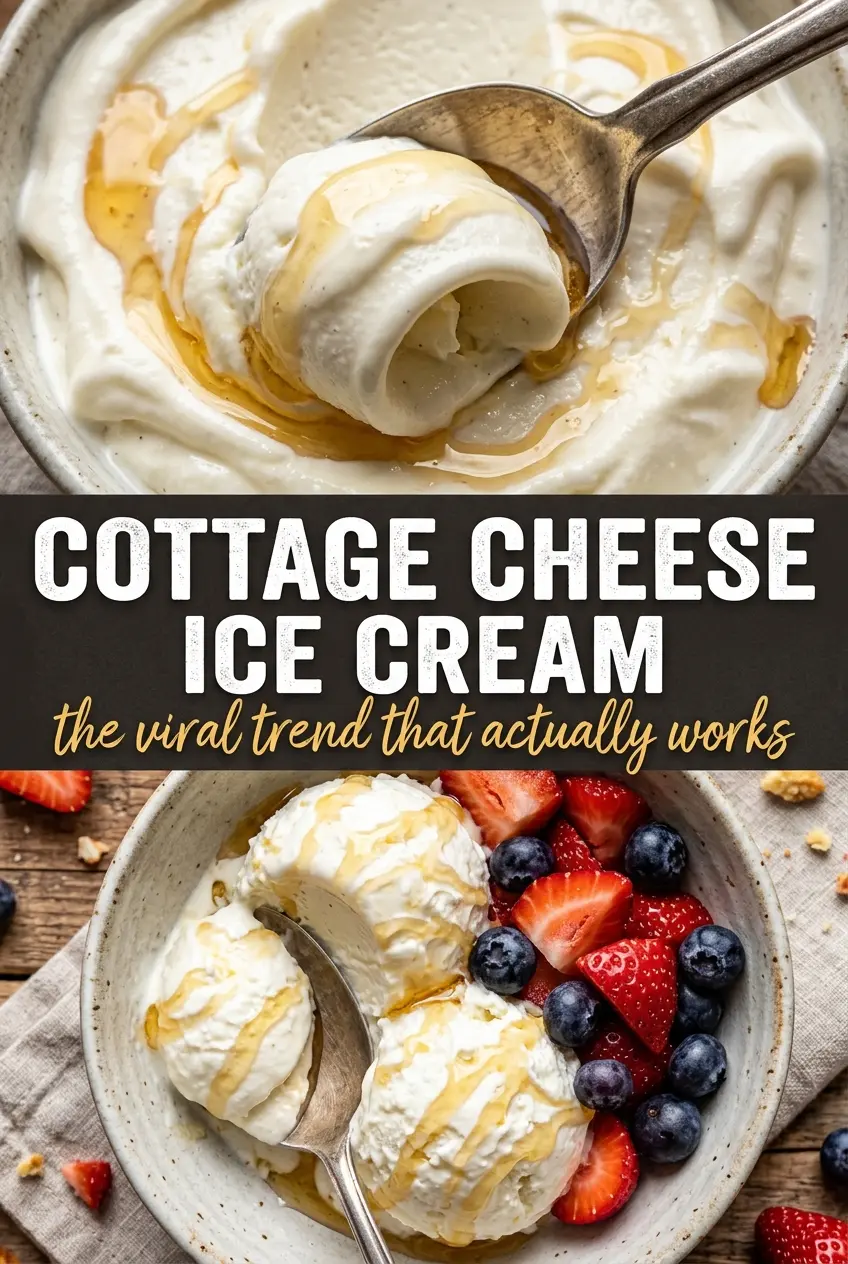
Silky, scoopable cottage cheese ice cream earns its place in the freezer because it lands somewhere between a dessert and a protein snack, and it does it without the icy, chalky texture that usually gives blended dairy desserts away. When it works, you get a thick vanilla base that tastes rich on the spoon, softens just enough after a short rest, and holds toppings the way a good ice cream should.
The trick is blending long enough to erase every last curd, then freezing just until firm instead of letting it turn into a block. Honey or maple syrup does more than sweeten here; it helps keep the texture a little more spoonable straight from the freezer. A splash of lemon juice brightens the flavor and keeps the cottage cheese from tasting flat, which matters more than people expect in a simple recipe like this.
Below, I’ll show you why full-fat cottage cheese gives the best texture, what to do if your blender leaves little bits behind, and how to change the flavor without losing that smooth, creamy finish.
I was skeptical, but the blender took the cottage cheese completely smooth and the texture after freezing was shockingly close to real ice cream. The honey and vanilla gave it that classic creamy taste, and my kids kept asking for more.
Like this cottage cheese ice cream? Save it to Pinterest for a creamy high-protein dessert that actually scoops.
The Freezer Mistake That Makes Cottage Cheese Ice Cream Grainy
The biggest failure point here isn’t the freezing time. It’s stopping the blender too early. Cottage cheese has to go from curdy to completely smooth, and if you leave even small flecks behind, they turn into icy bits once the mixture freezes. A food processor can work, but a high-powered blender gives the cleanest result because it breaks the curds down faster and more evenly.
The other thing people miss is balance. Cottage cheese alone tastes tangy and a little sharp, which is why honey, vanilla, and salt matter. The sweetener softens the freeze, the vanilla makes it taste like dessert instead of a protein hack, and the salt keeps the flavor from falling flat after it firms up.
- Full-fat cottage cheese — This gives the creamiest texture and the least icy finish. Low-fat cottage cheese will work, but it freezes harder and tastes a little thinner.
- Honey or maple syrup — Either one helps with sweetness and scoopability. Honey gives a rounder, more classic ice cream flavor; maple adds a deeper note that reads a little less neutral.
- Lemon juice — This doesn’t make the ice cream taste lemony. It brightens the dairy and keeps the flavor from going dull after freezing.
- Vanilla extract — Use real vanilla if you have it. It’s the backbone of the flavor here, and cheap imitation vanilla can taste harsh in such a simple dessert.
What Each Ingredient Is Actually Doing in This Ice Cream
- Base ingredient (cream, milk, or custard) — This provides the foundation and richness. Quality matters.
- Sweetener (sugar, honey, or condensed milk) — This sweetens and prevents ice crystals. The ratio is critical.
- Flavor element (vanilla, fruit, chocolate, coffee, or other) — This defines the ice cream personality. Use quality ingredients.
- Egg yolks (if making custard base) — These create richness and silky texture. Optional but elevates ice cream.
- Churning (if using ice cream maker) — This incorporates air and prevents ice crystals. Critical for smooth texture.
- Freezing temperature and time — Proper freezing prevents rock-hard texture. Store at 0°F or below.
- Mix-ins (chocolate, cookies, fruit, or swirls) — These add texture and prevent one-dimensional flavor. Add near end of churning.
- Serving temperature (slightly soft, not rock hard) — This provides creamy mouthfeel. Remove from freezer 5 minutes before serving.
Getting It Smooth Before the Freeze Takes Over
Blending Until the Curds Disappear
Add the cottage cheese, honey, vanilla, salt, and lemon juice to the blender or food processor and run it until the mixture looks glossy and completely smooth, about 2 minutes. Scrape down the sides once or twice so no little curds hide near the top. If the mixture still looks slightly grainy, keep blending; those tiny bits are what show up later as icy specks.
Tasting for Sweetness at Room Temperature
Give the base a quick taste before it goes into the freezer. It should taste a touch sweeter than you want the finished ice cream to taste, because cold dulls sweetness. If it tastes flat now, it’ll taste flatter later, so adjust with a little more honey or maple syrup before freezing.
Freezing in the Right Container
Pour the mixture into a freezer-safe container and smooth the top. A shallow container freezes more evenly than a deep one, which helps the texture stay softer and easier to scoop. Cover it well so it doesn’t pick up freezer odors or form ice on the surface.
Letting It Soften Just Enough to Scoop
After about 4 hours, the ice cream will be firm and scoopable, but not rock hard. Let it sit at room temperature for 5 minutes before serving. If you try to scoop it straight from the freezer, you’ll crush the texture and end up with hard shards instead of clean scoops.
How to Change the Flavor Without Losing the Creamy Texture
Berry Swirl
Blend the base as written, then fold in a spoonful of mashed strawberries or raspberries before freezing. Don’t overmix or you’ll lose the swirl and color the whole batch. The berries add brightness and a little tartness, which works well with the mild cottage cheese flavor.
Chocolate Chip Version
Stir in chocolate chips after blending, right before freezing. If you blend them in, they disappear into the base and can make the texture feel muddy instead of clean. Mini chips distribute best and give you little bursts of chocolate in every scoop.
Dairy-Free Swap
This specific recipe depends on cottage cheese, so a straight dairy-free swap won’t give the same result. If you need a dairy-free frozen dessert, use a coconut yogurt base instead, but expect a softer texture and a noticeable coconut flavor. It won’t taste the same, and that’s worth knowing before you start.
Extra-Protein Boost
Add a scoop of plain or vanilla protein powder if you want a denser, more filling dessert. Blend it in with the base and add a tablespoon or two of extra liquid if needed so the mixture stays smooth. Too much protein powder can turn the texture chalky, so keep the addition modest.
Storage and Reheating
- Refrigerator: This ice cream isn’t meant to be stored in the fridge; it will melt into a thick pudding-style mixture within a few hours.
- Freezer: Keeps for about 1 week in a tightly covered container. After that, the texture gets icier and less smooth.
- Reheating: Don’t reheat it. For the best scoop, let it sit at room temperature for 5 to 10 minutes. If it’s too hard, the problem is usually too much freezing time or a container that’s too deep.
Answers to the Questions Worth Asking
Cottage Cheese Ice Cream
Ingredients
Equipment
Method
- Add full-fat cottage cheese, honey or maple syrup, vanilla extract, salt, and lemon juice to a high-powered blender or food processor, then blend until completely smooth with no lumps (about 2 minutes), scraping down as needed for a silky texture.
- Taste the mixture and adjust sweetness by adding more honey or maple syrup until it’s to your liking, aiming for a balance of vanilla and a slight lemon tang.
- Pour the blended base into a freezer-safe container, cover, and freeze for 4 hours until scoopable and thick.
- Let the container sit at room temperature for 5 minutes before scooping so the ice cream softens slightly for clean, creamy scoops.
- Serve immediately with fresh berries or chocolate chips, and drizzle with honey if desired for glossy topping spots.