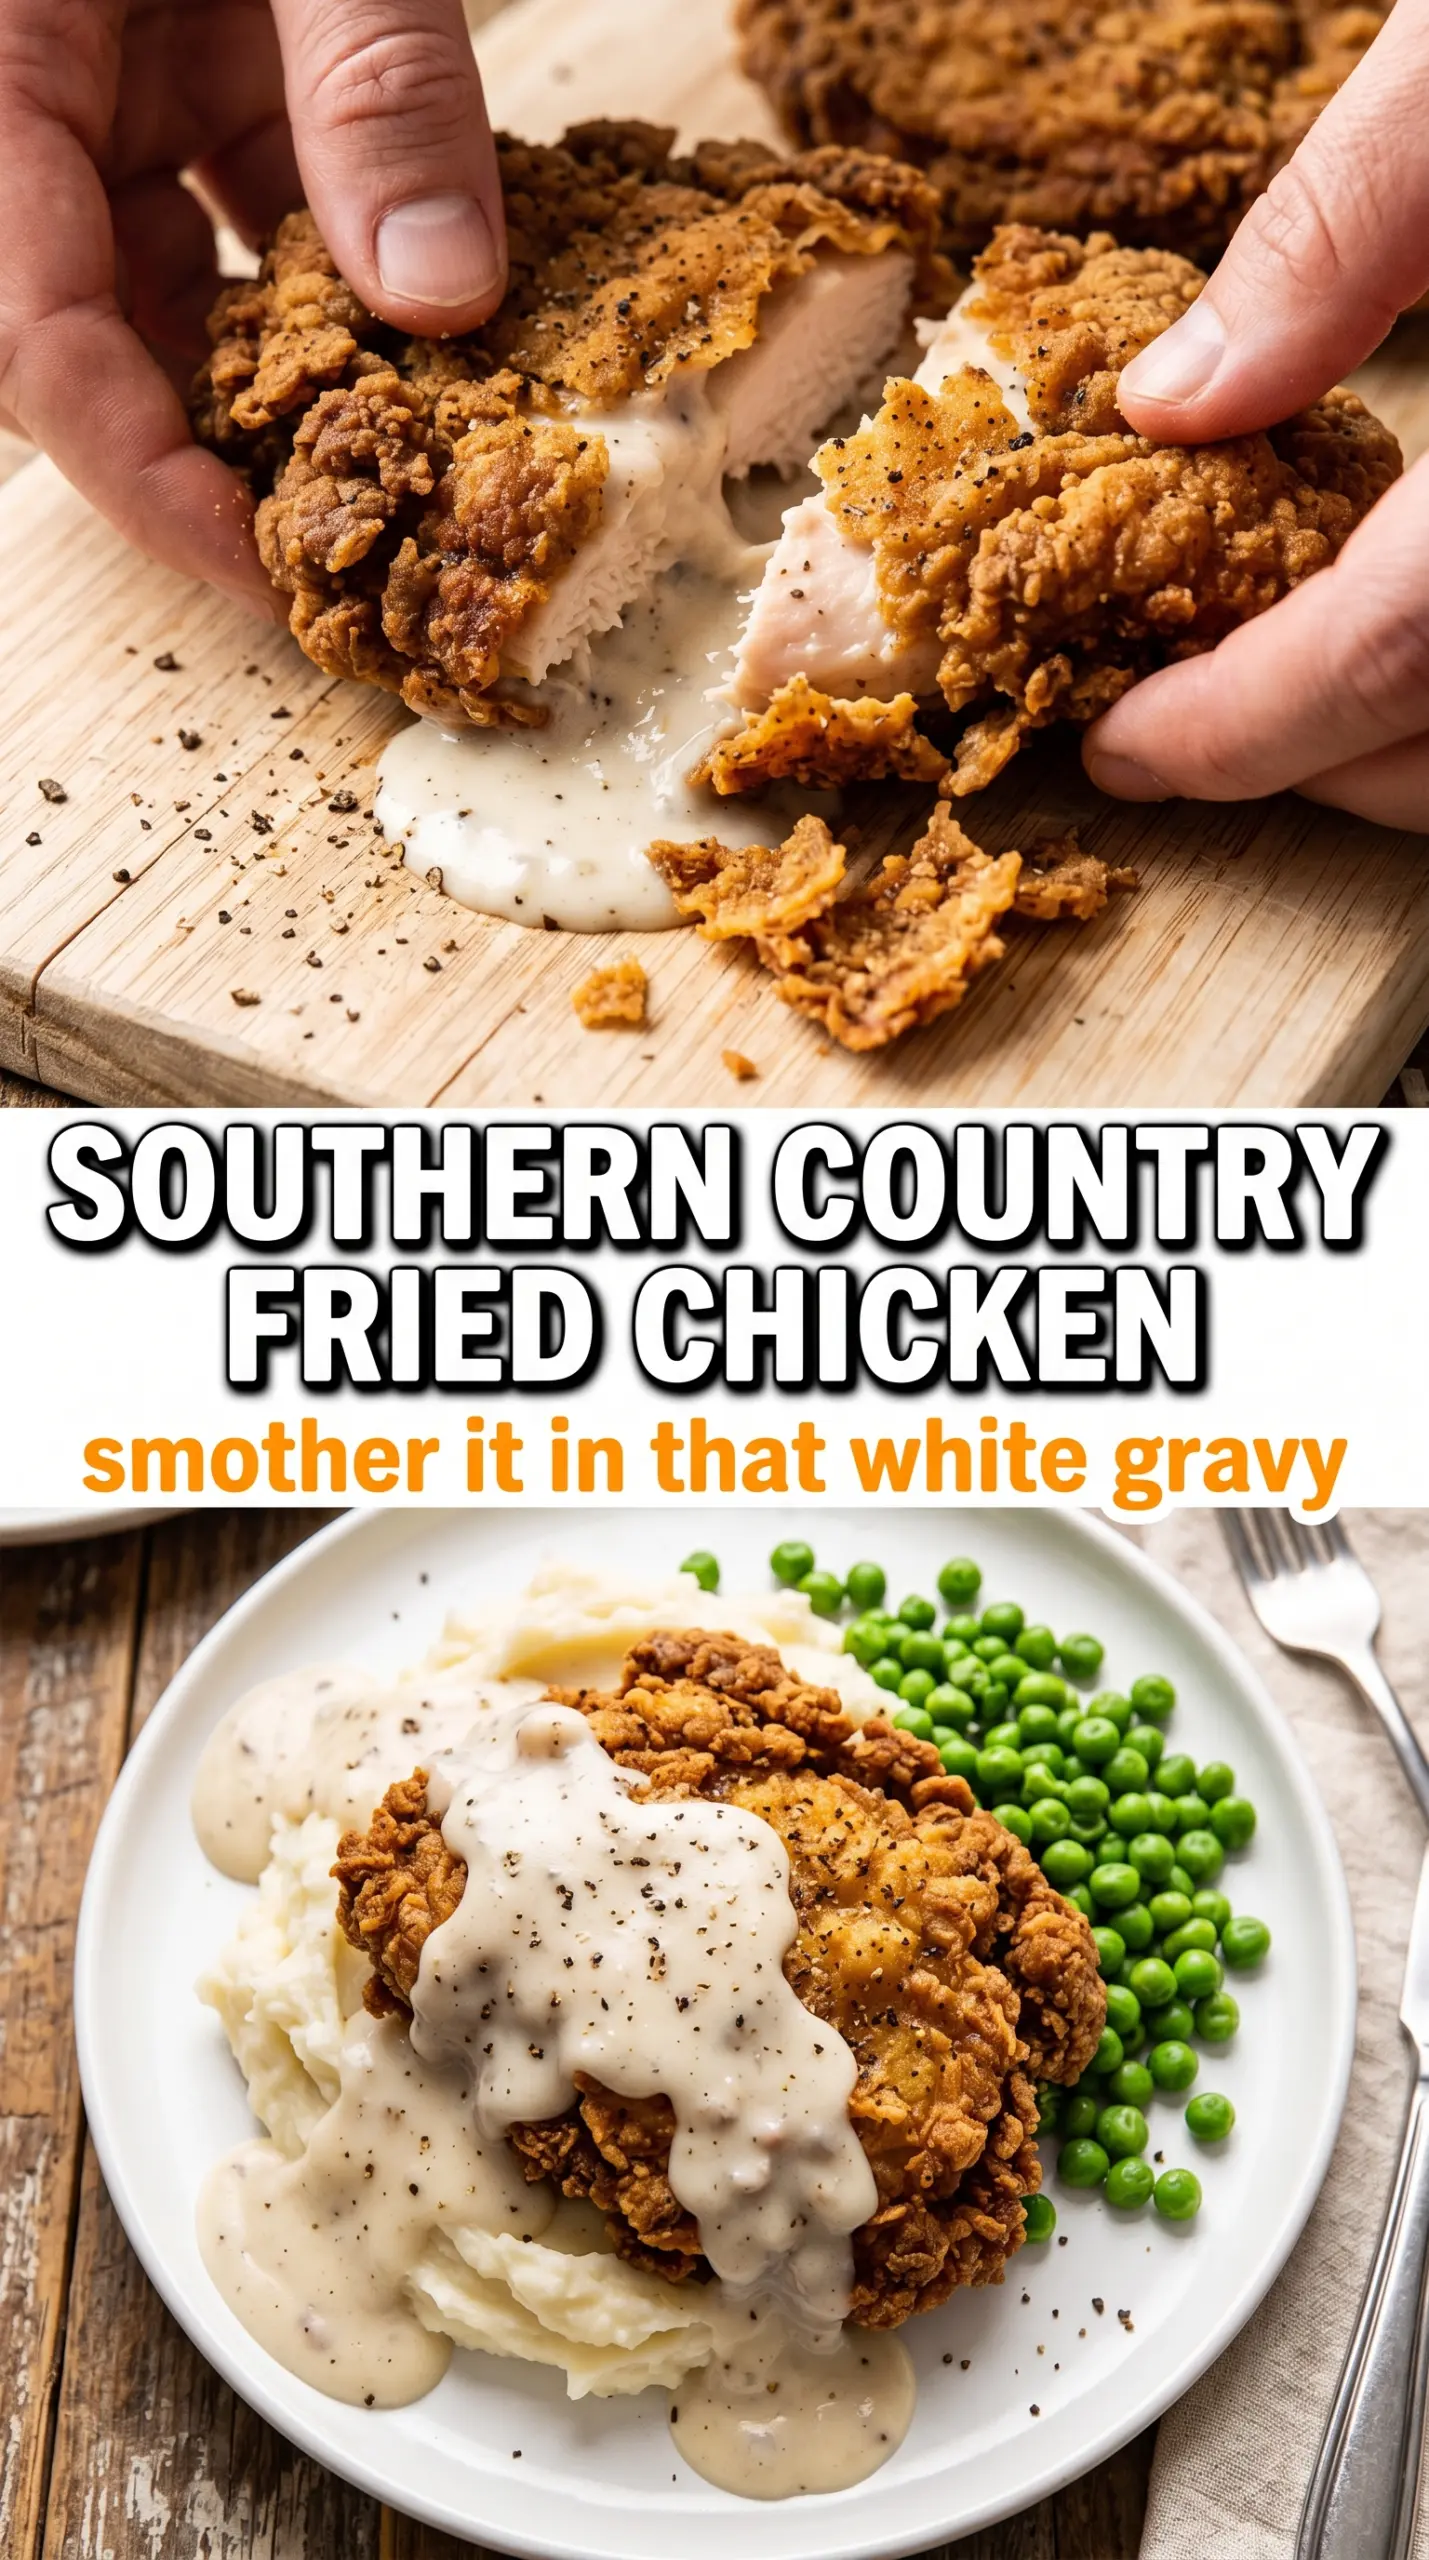
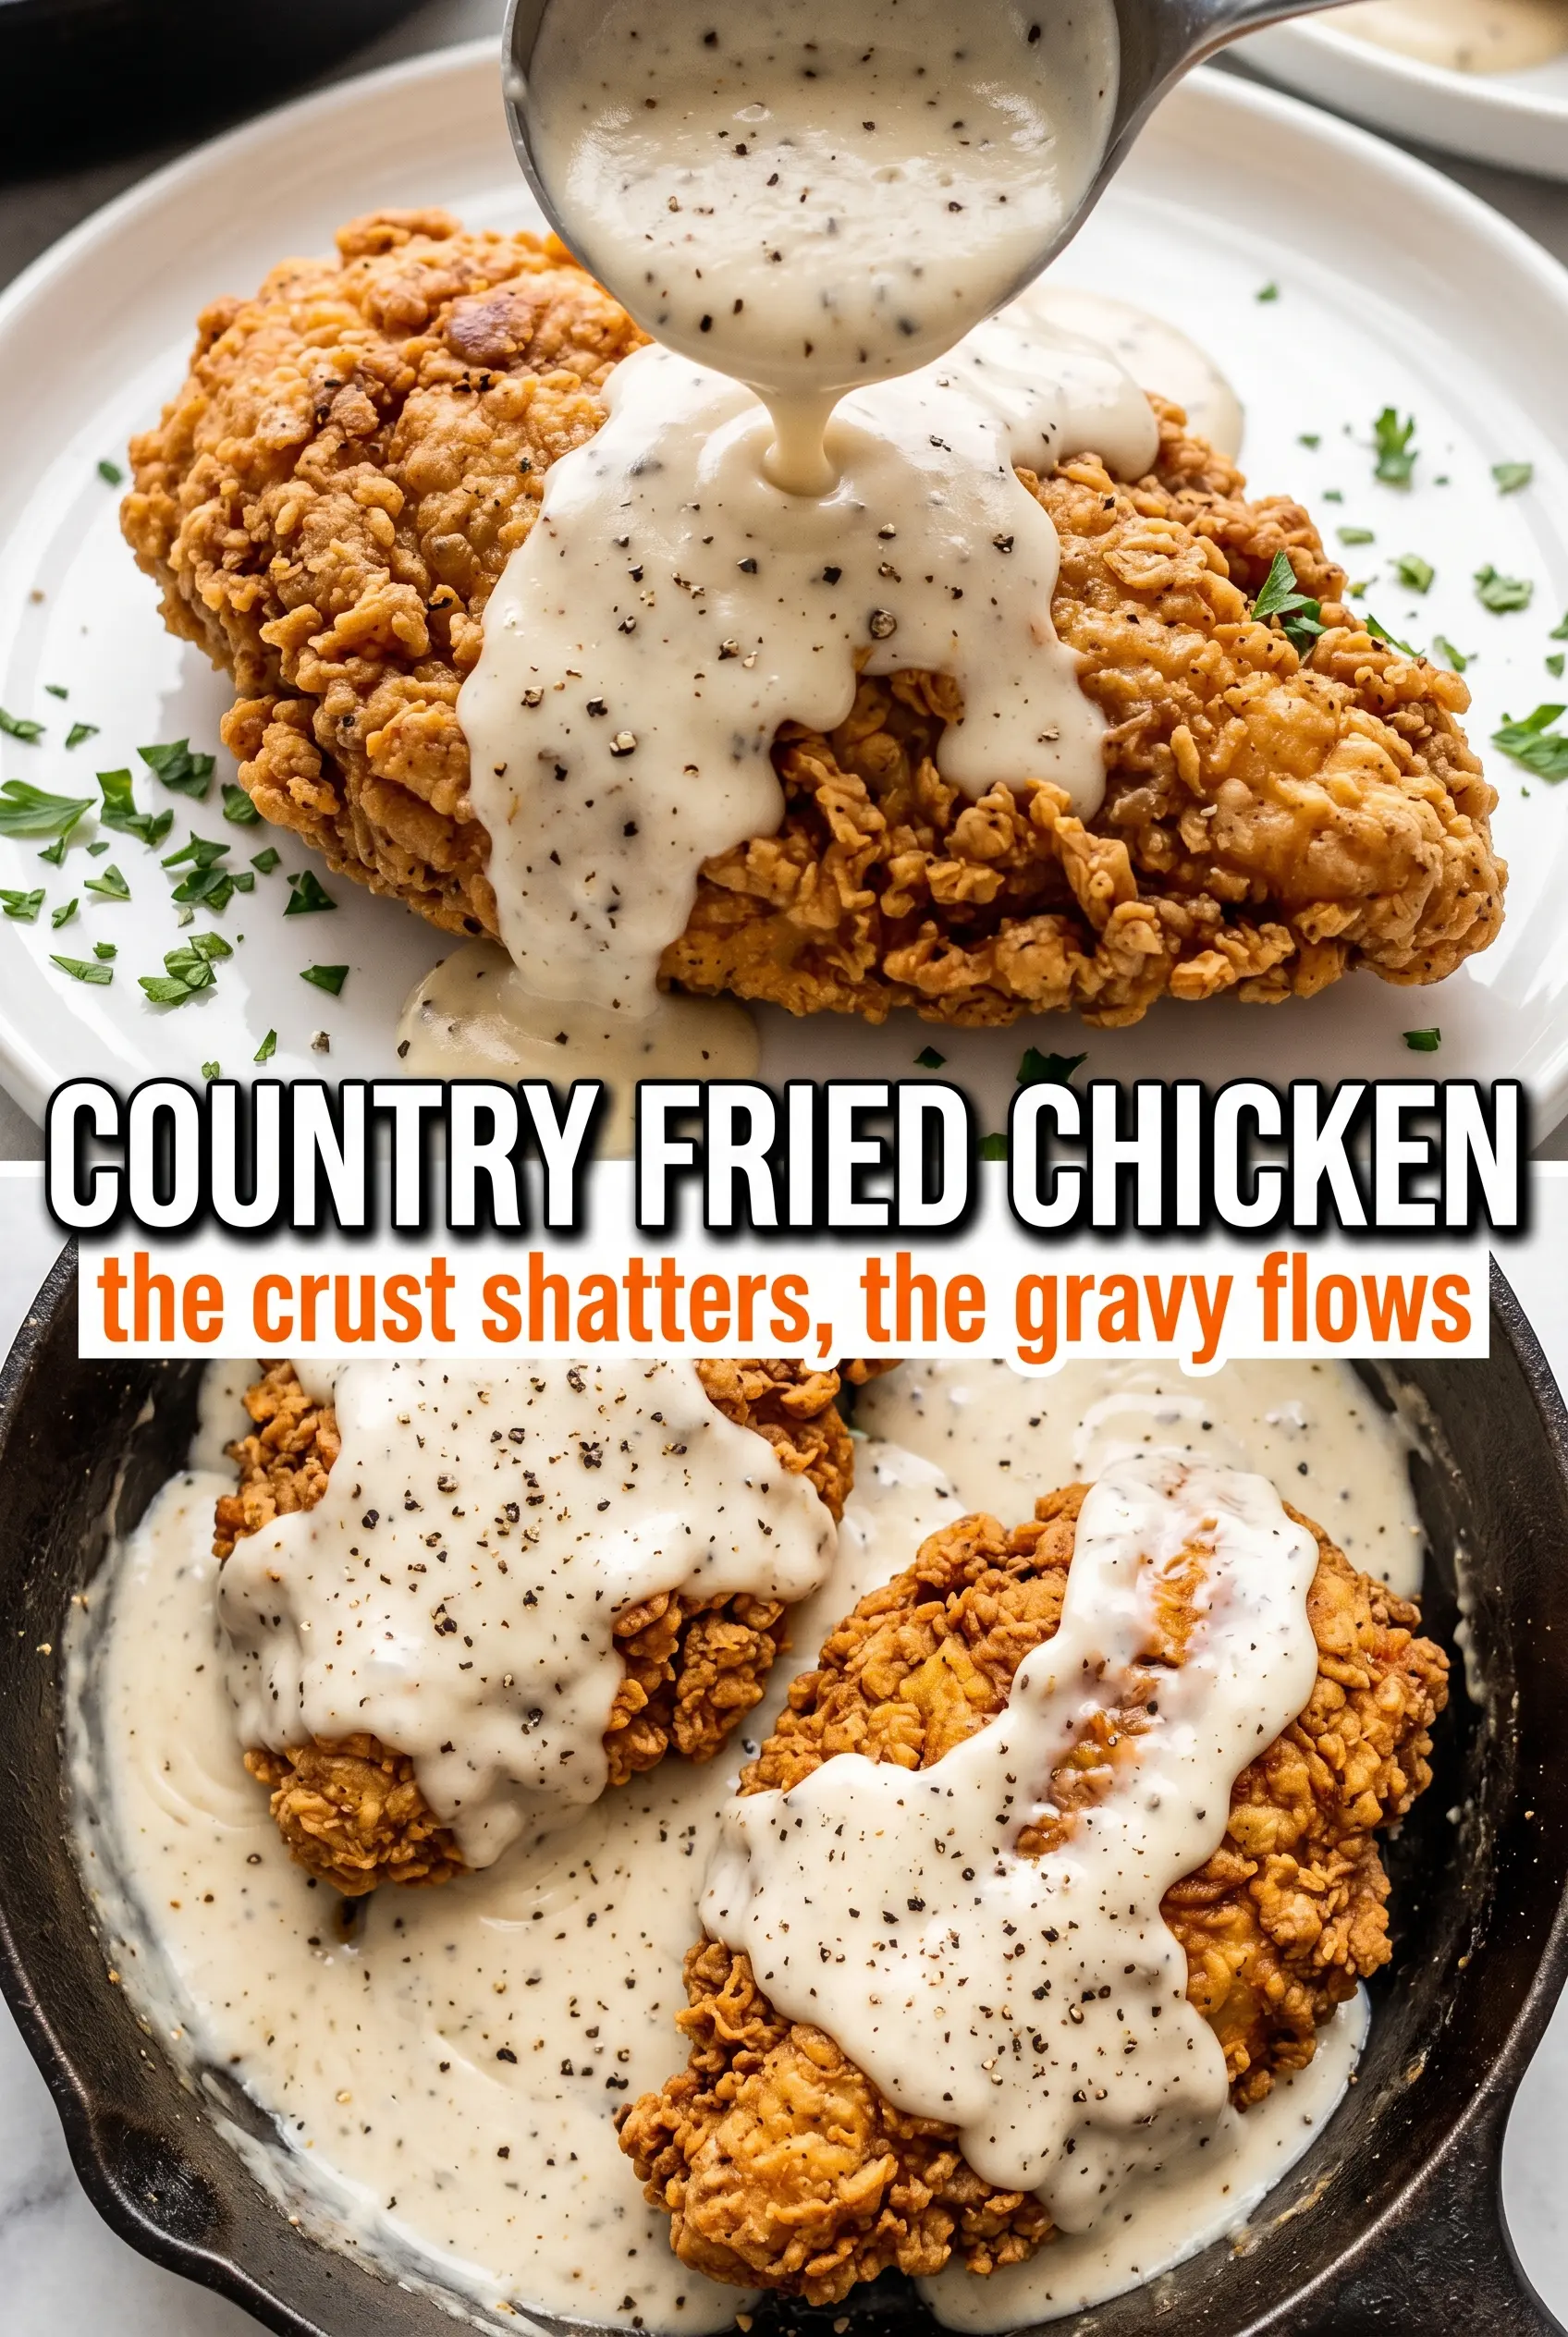
Shatteringly crisp country fried chicken starts with a coating that stays rugged instead of slipping off in the oil. The crust fries up deeply golden, with those craggy edges that catch every bit of white gravy, while the chicken underneath stays juicy from the buttermilk soak. It’s the kind of plate that looks straightforward and still delivers that first bite with a little crackle.
The trick is in the double dredge and the oil temperature. Pressing the flour on firmly builds the rough texture you want, and giving the chicken a second pass through the coating turns the outside into something thicker and crunchier. The gravy uses the same skillet drippings, so the whole dish tastes connected instead of like fried chicken plus a separate sauce.
Below, I’ve included the details that matter most: how long the chicken needs in the buttermilk, how to keep the crust from turning pasty, and what to watch for when you’re building the gravy so it lands smooth and peppery.
The coating stayed on beautifully, even after I poured the gravy over it, and the chicken was still juicy after a 12-minute fry. The extra dredge really made the crust crunchy instead of heavy.
Save this country fried chicken for the night you want a shatteringly crisp crust and peppery white gravy in the same bite.
The One Thing That Keeps the Coating Craggy Instead of Clumpy
Most fried chicken goes soft in one of two places: the flour coating turns pasty before it hits the oil, or the pan runs too cool and the crust absorbs grease instead of crisping. This version avoids both problems by giving the chicken a proper buttermilk soak, then letting the excess drip off before it gets dredged. You want the flour to cling in a rough, uneven layer, not a smooth paste.
The second dip-and-dredge matters because it builds thickness without needing a batter. That extra layer fries up into a nubby crust that stays audibly crisp even after it sits under gravy for a minute. If your coating looks wet or gummy before frying, the oil will work against you. A dry, well-pressed flour layer is what gives you that classic country fried chicken shell.
What Each Part Is Doing in the Pan
- Buttermilk — This tenderizes the chicken and gives the flour something slightly acidic to grab onto. Whole milk won’t behave the same way here. If you need a substitute, use milk mixed with a tablespoon of lemon juice or vinegar, but the coating won’t cling quite as well.
- Hot sauce — It doesn’t make the chicken spicy; it wakes up the seasoning in the flour and adds a little background tang. Any vinegary hot sauce works.
- Flour with garlic, onion, paprika, cayenne, salt, and black pepper — This is the crust, so the seasoning has to be in the flour, not only on the chicken. Smoked paprika gives the fried coating a deeper color and a little warmth. If you want less heat, cut the cayenne in half, but don’t skip it entirely.
- Vegetable oil — Use a neutral oil with a high enough smoke point for frying. The oil needs to stay around 350°F so the crust sets before it soaks up too much fat.
- Pan drippings, flour, and whole milk — The drippings carry the fried flavor into the gravy, and whole milk gives it the body you want. Low-fat milk works in a pinch, but the gravy will be thinner and less silky.
Frying the Chicken Before the Gravy Catches Up
Building the Crust
Pull each piece from the buttermilk and let the excess drip off for a few seconds before it goes into the flour. Press the flour onto every side, then repeat the dip-and-dredge so the surface gets shaggy and uneven. That rough texture is what crisps into those crunchy bits everyone wants. If you rush this part and the coating looks slick, it will slide off in the oil.
Keeping the Oil at the Right Heat
Heat 2 to 3 inches of oil to 350°F in a cast iron skillet and keep an eye on it between batches. If the oil is too cool, the chicken takes on grease and the crust turns heavy; if it’s too hot, the outside darkens before the inside cooks through. Fry the pieces for 10 to 12 minutes per side, turning once, until the crust is a deep golden brown and the chicken reaches 165°F in the thickest part.
Making the White Gravy in the Same Skillet
After the chicken comes out, leave 2 tablespoons of drippings in the pan and whisk in the flour. Let that cook for about a minute so the raw flour taste disappears, then add the milk gradually while whisking. The gravy thickens as it heats, not the instant milk hits the pan, so give it a minute or two. If it goes lumpy, the milk went in too fast; keep whisking over medium heat and it usually smooths out.
Serving While the Crust Is Still Loud
Drain the chicken briefly, then serve it right away with the gravy spooned over the top or pooled beside it. Country fried chicken loses its best texture if it sits too long, because steam softens the crust. A few minutes on the plate is fine. Ten minutes is enough to lose the snap.
How to Adjust It Without Losing the Crunch
Make It Lighter on Heat
Cut the cayenne down to 1/4 teaspoon or leave it out if you want a milder crust. The chicken will still be well seasoned from the garlic, onion, paprika, and black pepper. What you lose is the little heat that lingers under the gravy.
Gluten-Free Country Fried Chicken
Use a 1:1 gluten-free flour blend that includes starches. It won’t brown exactly the same way as all-purpose flour, but the double dredge still gives you a solid crust. The gravy also needs a gluten-free flour blend if you want the whole plate to stay gluten-free.
Thighs Instead of Breasts
Thighs stay juicier and are a little more forgiving if your oil drops in temperature. Breasts work well too, but they dry out faster if they’re thick, so pound them to an even thickness before soaking. Keep the fry time tied to internal temperature, not the clock alone.
Storage and Reheating
- Refrigerator: Store the chicken and gravy separately for up to 3 days. The crust softens in the fridge, which is normal.
- Freezer: The fried chicken can be frozen, but the crust won’t stay as crisp. Freeze in a single layer, then reheat from frozen for the best texture; the gravy does not freeze as well and can turn grainy.
- Reheating: Reheat the chicken on a rack in a 375°F oven until hot and crisp again. The biggest mistake is microwaving it, which turns the coating limp and steamy. Warm the gravy slowly on the stove with a splash of milk and whisk until smooth.
Questions I Get Asked About This Recipe
Country Fried Chicken
Ingredients
Equipment
Method
- Soak the bone-in chicken pieces in buttermilk and hot sauce for at least 30 minutes or overnight, fully submerged. You should see the coating develop lightly as the chicken firms up in the dairy mixture.
- Whisk together all seasoned flour coating ingredients in a shallow dish until the spices are evenly distributed. The mixture should look uniform and speckled with paprika and pepper.
- Remove the chicken from the buttermilk, letting excess drip off back into the bowl. Keep the chicken coated but not pooling wet liquid before dredging.
- Dredge the chicken firmly in the seasoned flour, pressing so the coating adheres. For extra crunch, repeat the dip-and-dredge once more so the surface becomes thick and rough.
- Heat 2-3 inches of vegetable oil to 350°F in a large cast iron skillet. Use a steady oil temperature so the crust turns golden without burning.
- Fry the chicken for 10-12 minutes per side until deeply golden and the internal temperature reaches 165°F. Flip once carefully when the first side is crisp and set, and keep the coating shatter-crisp and golden.
- Drain the fried chicken on paper towels. Let it rest just long enough for excess oil to stop dripping, keeping the crust intact.
- Whisk the pan drippings and flour in a skillet over medium heat for 1 minute. Stir until it looks smooth and slightly toasted, indicating the flour is cooked.
- Gradually whisk in the whole milk and cook until thickened. The gravy should become glossy and pourable, coating the back of a spoon.
- Season the gravy with salt and pepper to taste. Taste and adjust so the flavor pops without overpowering the chicken.
- Serve the chicken immediately with white gravy poured over the top. Aim for gravy that pools around the base while the coating stays crisp.