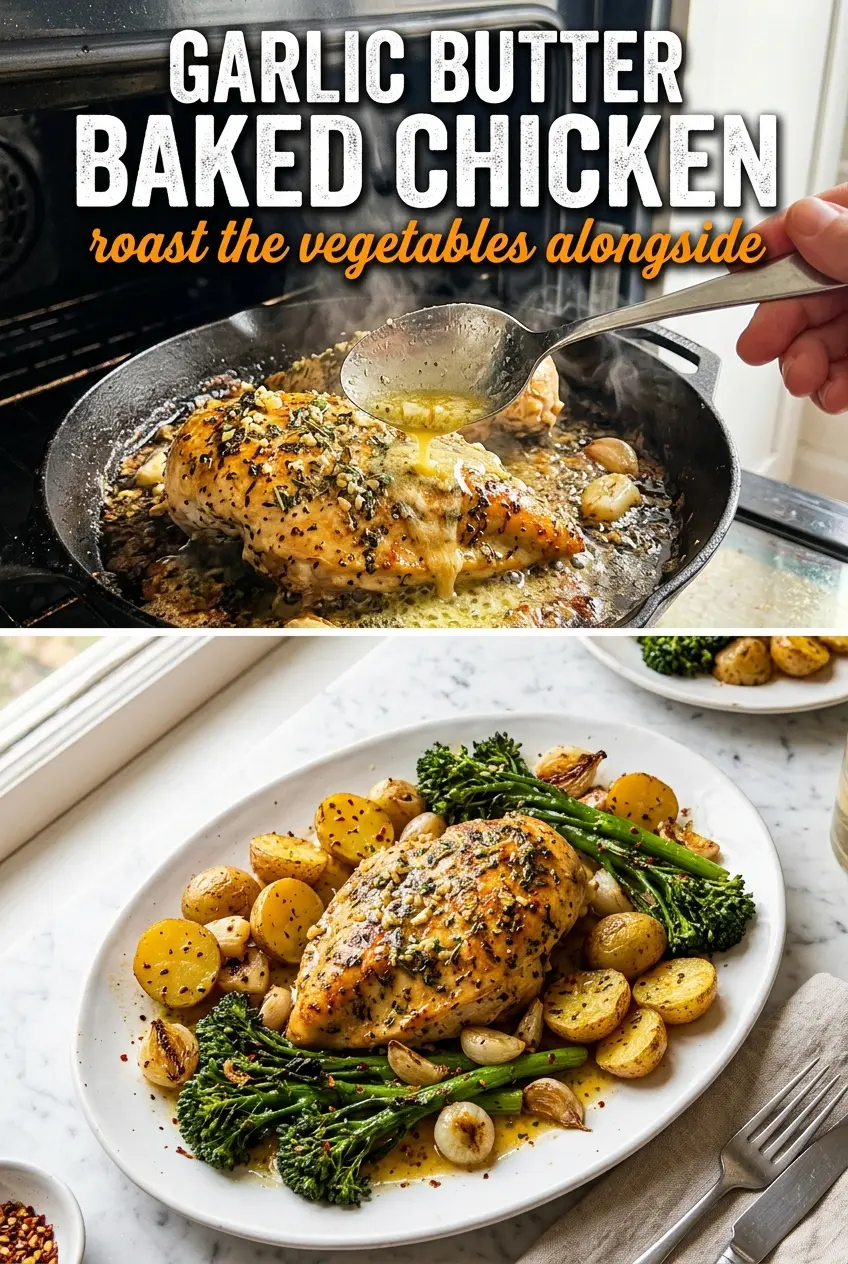
Garlic butter baked chicken breast lands on the table with a golden surface, a glossy pan sauce, and meat that stays juicy instead of drying out in the oven. The butter does more than add richness here. It carries the garlic and herbs across every bite, and the quick baste halfway through keeps the top from turning pale while the pan juices concentrate underneath.
The trick is simple: season the chicken directly, then spoon the melted garlic herb butter over the breasts before they go into the oven. A hot oven gives you color fast, but the butter and lemon juice keep the chicken from tasting heavy. I use a baking dish just big enough to hold the breasts in a single layer so the juices pool instead of disappearing across a sheet pan.
Below, I’ve included the details that matter most, from keeping the chicken breast tender to knowing exactly when to pull it from the oven. There’s also a few smart swaps if you want to use different herbs or adjust the recipe for what’s already in your kitchen.
The butter sauce browned around the edges and the chicken stayed so juicy. Basting it halfway through made a big difference, and the garlic didn’t burn like it does in some baked chicken recipes.
Love the glossy garlic herb butter and juicy chicken? Save this garlic butter baked chicken breast for an easy dinner that still tastes special.
The Part That Keeps the Chicken Juicy Instead of Drying Out
Chicken breast dries out when it sits in the oven too long, not because it started out lean. The difference here is the butter baste and the hot oven. The butter coats the surface early, which helps the outside brown before the inside overcooks, and the pan juices give you a built-in signal for when the chicken is close.
Thickness matters more than most people think. If one end of the breast is much thicker, it’ll still be raw when the thin end is already done. Pounding the thicker side lightly or slicing the breast into even pieces gives you a much better result, and it keeps the cooking time predictable.
- Chicken breasts — Choose pieces that are close in size so they finish together. If one breast is much larger, butterfly it or pound the thick end just enough to even it out.
- Butter — This is the base of the sauce and the reason the chicken tastes rich without needing a long marinade. Olive oil won’t give you the same coating or the same pan juices.
- Fresh garlic — Fresh garlic softens as it bakes and perfumes the butter. Jarred garlic works in a pinch, but it tends to taste flatter and a little harsher.
- Fresh herbs — Parsley, thyme, and rosemary give the butter real depth. Dried herbs can work, but use less and expect a less vibrant finish.
- Lemon juice — The small amount of acid keeps the butter from tasting heavy. Bottled lemon juice can work, but fresh juice gives the cleanest finish.
What Each Ingredient Is Actually Doing in This Recipe

- Primary ingredient (the star) — Quality matters most. Choose the best you can find.
- Cooking medium (oil, butter, or broth) — This carries flavors and prevents dryness.
- Seasonings (salt, pepper, spices, herbs) — Layer flavors so nothing overpowers. Build depth gradually.
- Aromatics (garlic, onion, herbs) — Cook with fat to bloom flavors. Become the foundation.
- Supporting ingredients — Complement the main ingredient without overpowering it.
- Sauce or liquid (if applicable) — Brings flavors together. Balance richness with acid.
- Acid (lemon, vinegar, wine, or other) — Brightens and prevents flat-tasting results.
- Final finish (garnish, glaze, or sauce) — Prevents one-dimensional taste and adds visual appeal.
Building the Garlic Herb Butter So It Stays Fragrant in the Oven
Mix the melted butter with the garlic, herbs, and lemon juice before it touches the chicken. That gives the garlic a head start in the warm fat and keeps the herbs from sitting in clumps on top of the meat. You want the mixture loose and pourable, not separated or grainy.
Seasoning the Chicken Directly
Sprinkle salt, pepper, garlic powder, and smoked paprika over both sides of the chicken before anything else goes on. That first layer of seasoning matters because the butter sits on top and doesn’t penetrate deeply on its own. If the chicken looks wet, pat it dry first; moisture on the surface slows browning and turns the coating patchy.
Coating With the Butter Mixture
Pour the garlic herb butter over the chicken in the baking dish and tilt the pan so the sauce runs around and underneath the breasts. The meat should look glossy and partly submerged at the edges, not drowned. If the butter starts to solidify before it goes into the oven, warm it just enough to loosen it again.
Baking and Basting at the Right Moment
Bake at 425°F for 20 to 25 minutes, depending on thickness. Halfway through, spoon the pan juices back over the tops of the chicken. That quick baste helps color the surface and keeps the garlic butter from drying into little browned bits before the chicken is finished. Pull the dish when the thickest part reaches 165°F, then let it rest for 5 minutes so the juices settle back into the meat.
Make It Dairy-Free With Olive Oil and Broth
Use olive oil instead of butter and add a splash of chicken broth to the dish before baking. You’ll lose the rich, silky pan sauce, but you’ll still get garlicky, herb-coated chicken with good browning and less heaviness.
Swap the Herbs Based on What’s Fresh
Use oregano, basil, or tarragon in place of one of the listed herbs if that’s what you have. Keep rosemary modest because it can take over fast, and use dried herbs at about one-third the amount of fresh.
Make It Gluten-Free Without Changing the Method
This recipe is naturally gluten-free as written, so the only thing to watch is what you serve with it. Keep the seasoning blends simple and check that any smoked paprika or garlic powder mix doesn’t include anti-caking fillers if you’re cooking for someone highly sensitive.
Turn It Into a Pan Sauce for Serving
After the chicken comes out, whisk a tablespoon of broth or water into the hot pan juices and spoon that over the sliced chicken. It loosens the butter into a light sauce and pulls up the browned bits without making the dish greasy.
Storage and Reheating
- Refrigerator: Store leftovers in an airtight container for up to 4 days. The butter will firm up, but the chicken stays good for lunches or quick dinners.
- Freezer: It freezes well for up to 2 months if you slice the chicken first and freeze it with some of the pan juices. The texture is a little softer after thawing, but it still reheats nicely.
- Reheating: Warm it covered in a 300°F oven with a spoonful of the pan juices or a splash of broth until just heated through. The common mistake is blasting it in the microwave until the edges turn rubbery.
Answers to the Questions Worth Asking
Garlic Butter Baked Chicken Breast
Ingredients
Equipment
Method
- Preheat the oven to 425°F and lightly grease a baking dish, so it’s ready when the chicken goes in.
- Season the chicken breasts on both sides with salt, pepper, garlic powder, and smoked paprika until evenly coated, with no dry spots visible.
- Melt the butter and stir in the garlic, parsley, thyme, rosemary, and lemon juice until combined and fragrant, with a smooth glossy texture.
- Place the seasoned chicken in the prepared dish and pour the garlic herb butter over each breast, coating thoroughly so butter pools around the base.
- Bake for 20-25 minutes, basting with the pan juices once at the halfway point for a deeper golden surface.
- Continue baking until the internal temperature reaches 165°F, with the tops golden and the juices bubbling around the edges.
- Rest the chicken for 5 minutes to let the juices settle, then spoon the pan juices over the breasts.
- Serve with lemon wedges alongside for brightness at the table.