Golden-seared chicken breasts over buttery mashed potatoes is the kind of dinner that disappears fast and gets requested again before the plates are even cleared. The chicken stays juicy under a well-seasoned crust, the potatoes turn creamy without becoming gluey, and the garlic herb pan sauce ties the whole plate together with just enough richness to make it feel finished.
What makes this version work is the order of operations. The potatoes are cooked and kept warm first, so the chicken can sear in a hot pan without being rushed. The same pan is then used for the sauce, which means every browned bit from the chicken ends up in the gravy instead of being left behind. That’s where the depth comes from.
Below, I’ll walk through the small details that keep the chicken from drying out and the potatoes from turning stiff. There’s also a swap for using milk instead of cream, plus a few variation ideas if you want to stretch the meal or make it fit what’s already in your kitchen.
The chicken browned beautifully and the pan sauce picked up all the flavor from the skillet. The mashed potatoes stayed light and creamy, not gummy, and my husband went back for seconds right away.
Save this garlic herb chicken and mashed potatoes dinner for the nights when you want a full plate, a pan sauce, and barely any cleanup.
The Part That Keeps the Chicken Juicy While the Potatoes Stay Creamy
The biggest failure point in a chicken-and-potatoes dinner is timing. If the chicken waits around while the potatoes finish, the seared crust softens and the meat starts losing its juices. If the potatoes sit too long after mashing, they tighten up and go heavy. This version solves both problems by getting the potatoes handled first, then cooking the chicken at a steady medium-high heat so it can rest briefly while the sauce comes together.
The other thing that matters here is thickness. If your chicken breasts are uneven, the thin ends dry out before the thick centers reach temperature. Pounding them to an even thickness means the whole piece finishes at the same time, which is the difference between juicy and stringy. The pan sauce also helps by adding moisture at the end instead of relying on the chicken itself to carry the whole plate.
- Chicken breasts — Boneless skinless breasts work well here, but they need even thickness. If one side is much thicker, pound them lightly so they sear and finish at the same pace.
- Yukon Gold potatoes — These mash into a naturally buttery, creamy texture without turning chalky. Russets work too, but they lean fluffier and less rich.
- Butter — This does more than add flavor. It gives the potatoes body and helps the pan sauce feel silky instead of thin.
- Heavy cream or whole milk — Warm it before adding it to the potatoes. Cold dairy cools the potatoes down and makes the mash stiff instead of smooth.
What Each Ingredient Is Actually Doing in This Recipe
- Primary ingredient (the star) — Quality matters most. Choose the best you can find.
- Cooking medium (oil, butter, or broth) — This carries flavors and prevents dryness.
- Seasonings (salt, pepper, spices, herbs) — Layer flavors so nothing overpowers. Build depth gradually.
- Aromatics (garlic, onion, herbs) — Cook with fat to bloom flavors. Become the foundation.
- Supporting ingredients — Complement the main ingredient without overpowering it.
- Sauce or liquid (if applicable) — Brings flavors together. Balance richness with acid.
- Acid (lemon, vinegar, wine, or other) — Brightens and prevents flat-tasting results.
- Final finish (garnish, glaze, or sauce) — Prevents one-dimensional taste and adds visual appeal.
Building the Sear, the Mash, and the Sauce in the Right Order
Getting the Potatoes Soft Without Waterlogging Them
Start the potatoes in well-salted water and cook them until a knife slides in without resistance. If they’re undercooked, the mash will stay grainy no matter how much butter you add. Drain them thoroughly and let the steam escape for a minute before mashing, because extra water is what turns good potatoes loose and bland. Warm cream or milk blends in faster and keeps the texture light.
Seasoning and Searing the Chicken
Coat the chicken evenly with the garlic powder, smoked paprika, thyme, rosemary, salt, and pepper. The spice mixture should cling to the surface and not look wet or paste-like. Set the chicken into hot oil and leave it alone long enough for a deep golden crust to form before flipping. If you move it too early, it sticks and tears instead of releasing cleanly.
Making the Pan Sauce From the Brown Bits
Once the chicken is out of the pan, lower the heat and add the butter and garlic. The garlic should smell fragrant, not browned; burnt garlic makes the sauce bitter fast. Pour in the broth and scrape the bottom with a wooden spoon until the browned bits dissolve into the liquid. Let it simmer just until slightly reduced. That short simmer gives you a sauce that lightly coats the chicken instead of running off the plate.
Plating for the Best Bite
Spoon the mashed potatoes onto the plate first so they act like a soft base for the sauce. Set the chicken on top, then drizzle the sauce over both the meat and the potatoes. Fresh parsley at the end gives a clean finish and keeps the whole dish from tasting too heavy. Slice the chicken only after it rests a minute or two so the juices stay where they belong.
How to Adapt This Dinner When You Need to Change the Plan
Make it dairy-free
Use olive oil in place of the butter in the mash and the sauce, and swap in unsweetened oat milk or another plain dairy-free milk for the cream. The potatoes will still be creamy, but they’ll taste a little lighter and less rich than the original.
Turn it into a gluten-free dinner
This recipe is naturally gluten-free as written as long as your broth is certified gluten-free. That matters because broth is one of the easiest places for hidden wheat to sneak in.
Use chicken thighs instead of breasts
Boneless skinless thighs bring more fat and stay forgiving on the stove, so they’re a good swap if you’re nervous about dry chicken. They need a little longer in the pan, and the texture will be richer and softer than the breast version.
Add extra vegetables without changing the sauce
Sauté mushrooms, green beans, or peas on the side and keep the chicken sauce as the final drizzle. That keeps the plate balanced without watering down the pan sauce or crowding the skillet while the chicken sears.
Storage and Reheating
- Refrigerator: Store leftovers in airtight containers for up to 4 days. The mashed potatoes will firm up a bit in the fridge, which is normal.
- Freezer: The chicken freezes better than the potatoes. If you want to freeze the full meal, expect the mash to lose some of its smooth texture when thawed.
- Reheating: Reheat the chicken covered at low heat in the oven or in a skillet with a splash of broth. Warm the potatoes separately with a little milk or cream, stirring gently so they don’t break or turn pasty.
Answers to the Questions Worth Asking
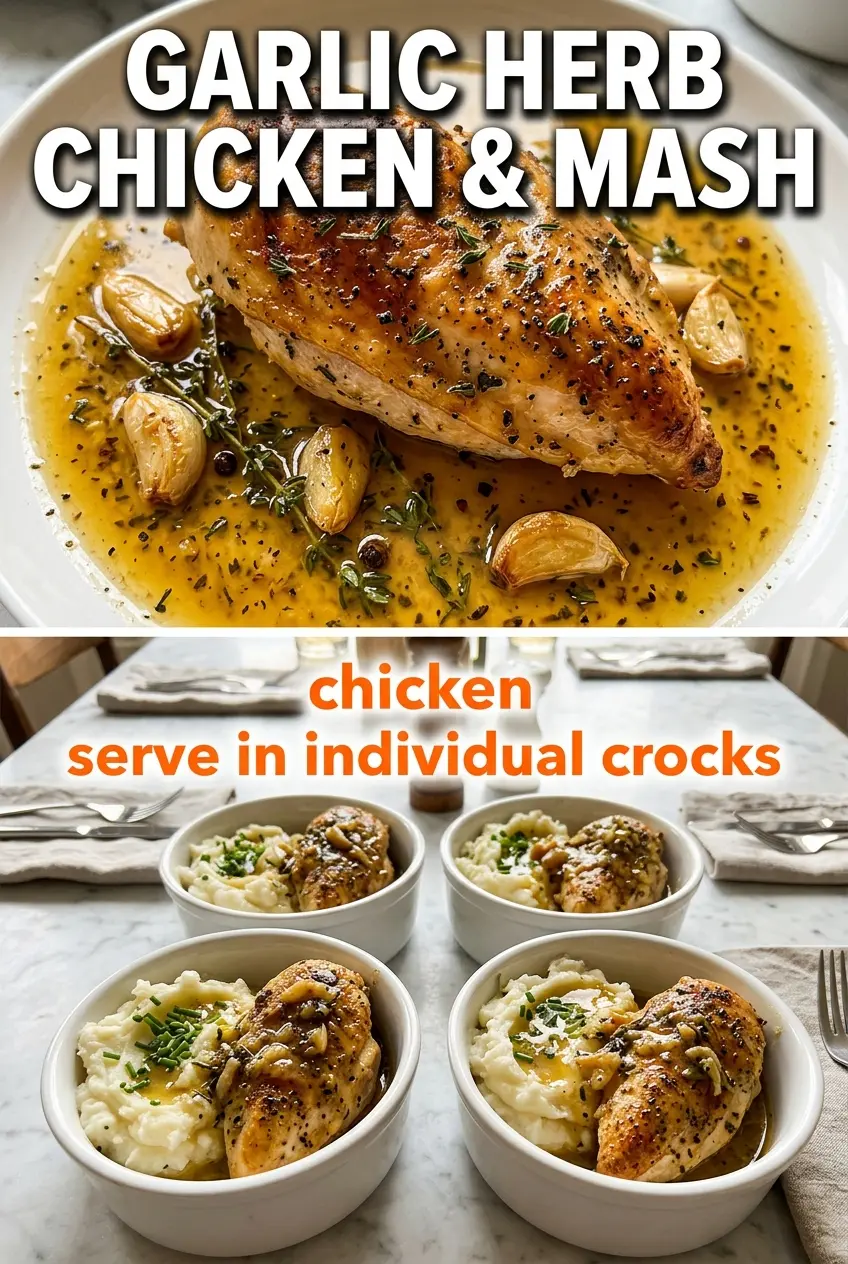
Garlic Herb Chicken Breast with Mashed Potatoes
Ingredients
Equipment
Method
- Boil the Yukon Gold potatoes in salted water for 15-18 minutes until fork-tender, then drain and mash until smooth and fluffy.
- Stir in butter and warmed heavy cream or whole milk along with salt, pepper, and garlic powder until creamy and evenly combined; keep warm.
- Pat the chicken breasts dry, then season all over with garlic powder, smoked paprika, dried thyme, dried rosemary, salt, and pepper.
- Heat olive oil in a cast iron skillet over medium-high heat and sear the chicken for 5-6 minutes per side until golden and cooked through to 165°F, then remove.
- Melt 2 tablespoons butter in the same pan and cook the minced garlic for 1 minute until fragrant.
- Add chicken broth and scrape up the browned bits, then simmer for 2-3 minutes until a simple pan sauce forms.
- Spoon mashed potatoes onto plates and place the chicken breasts on top.
- Drizzle the garlic herb pan sauce over the chicken, then garnish with fresh parsley before serving.