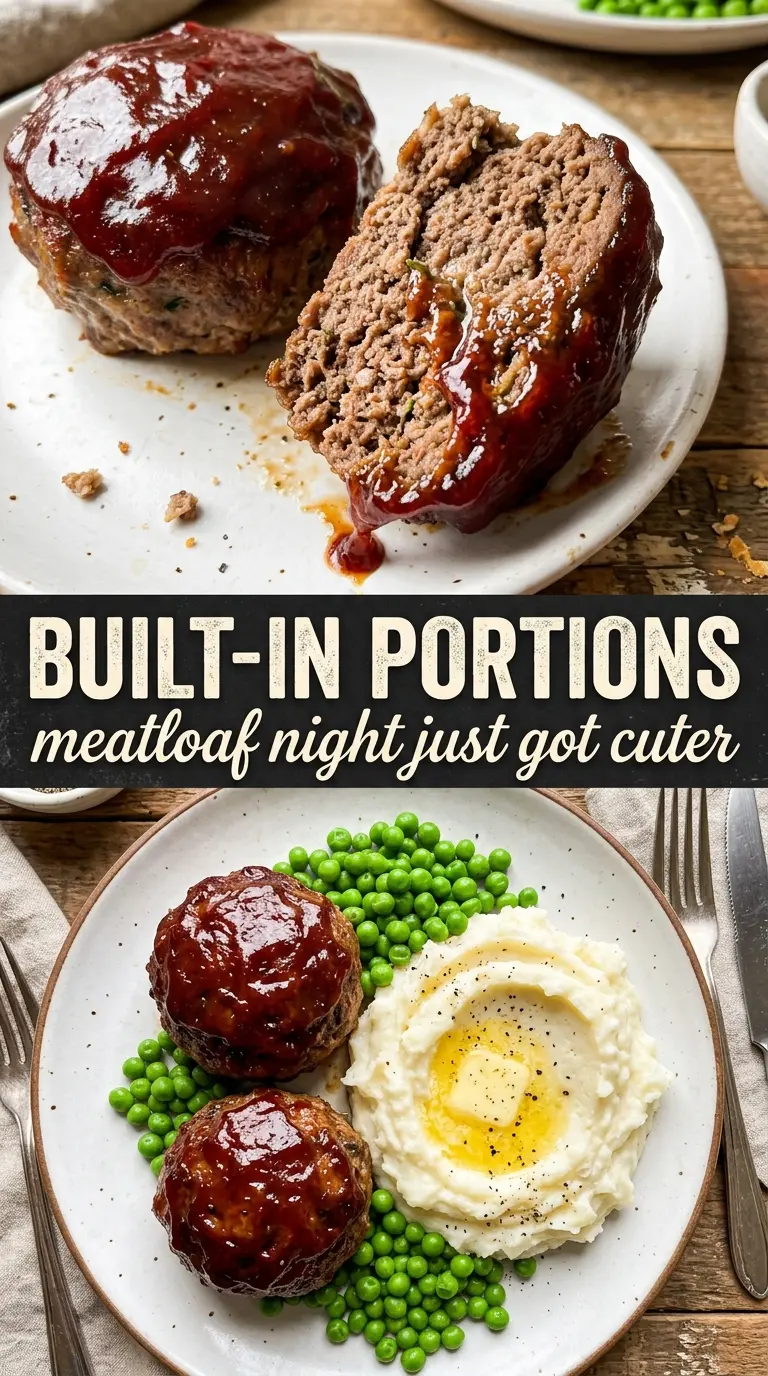
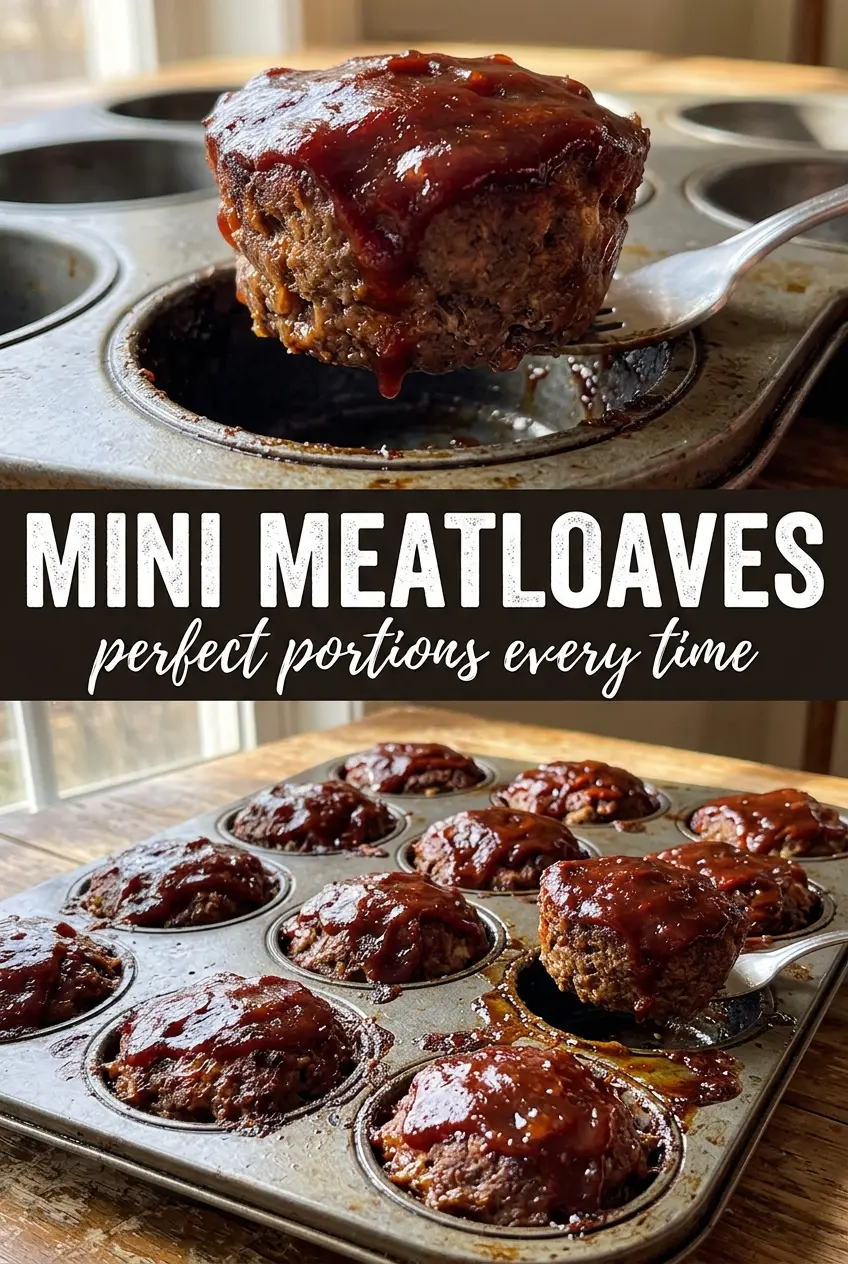
Mini meatloaf bakes faster than a full loaf and gets you those best parts every time: a caramelized glaze, tender center, and crisp edges all in one portion. The muffin tin does more than make the shape cute. It gives each little loaf enough surface area to brown properly, so you’re not waiting an hour for the middle to catch up with the outside.
The real trick is mixing the meat just until everything is combined. Once ground beef gets worked too much, it turns dense and springy instead of tender. The grated onion melts into the meat as it bakes, which keeps the texture moist without leaving obvious chunks behind, and a quick ketchup-brown sugar glaze gives each one that sticky top people always reach for first.
Below, I’ve included the cue that tells you when to stop mixing, the ingredient swaps that still keep these juicy, and the timing detail that keeps the meatloaves from sticking in the pan when they’re done.
The glaze caramelized on top and the centers stayed juicy. I baked them in a muffin tin exactly like you said, and they came out in 25 minutes with no messy loaf slicing.
Like these juicy muffin tin mini meatloaves? Save this recipe for the nights when you want fast dinner portions with a caramelized ketchup glaze.
The Difference Between Tender Mini Meatloaf and Dense Little Bricks
Mini meatloaf goes wrong for the same reason a full loaf does: too much mixing and not enough fat management. When you squeeze the meat mixture into a paste, the proteins tighten up and the finished loaves turn chewy. The muffin tin helps with even cooking, but it won’t save an overworked mixture.
The other thing that matters here is portion size. If the meatballs are packed too tightly in the cups, they steam instead of roast around the edges. Press them in gently, just enough to fill the wells and hold their shape. That little bit of breathing room gives you a better crust and keeps the centers from drying out before the glaze has a chance to caramelize.
What Each Ingredient Is Actually Doing in These Mini Meatloaves
- Ground beef — Use 80/20 if you can. Leaner beef works, but it gives you a drier result unless you’re extra careful with the bake time. The fat keeps the mini loaves tender and helps the glaze cling to the top.
- Breadcrumbs and milk — This is the moisture buffer. Together they act like a soft binder, holding the meat together without making it heavy. If you need a swap, crushed saltines or gluten-free breadcrumbs both work, but don’t skip the milk or another liquid ingredient.
- Grated onion and garlic — Grating the onion is the move here. It disappears into the mixture and seasons the meat from the inside instead of leaving sharp pieces behind. Minced onion works in a pinch, but the texture will be more obvious.
- Worcestershire sauce — This adds depth and a little savory tang that plain salt can’t replace. There isn’t a perfect substitute, though soy sauce plus a splash of vinegar gets you close if that’s what you have.
- Ketchup glaze — The brown sugar helps the ketchup caramelize instead of just drying on top. The mustard keeps it from tasting flat. Spoon it on before baking so it sets into a glossy cap instead of sitting on top like an afterthought.
How to Mix, Fill, and Bake Them So They Stay Juicy
Combining the Meat Without Overworking It
Start with the beef, breadcrumbs, eggs, milk, onion, garlic, Worcestershire, and seasonings in one bowl, then use your hands to fold everything together just until the mixture looks even. Stop as soon as you no longer see streaks of dry breadcrumb or loose egg. If the meat starts looking paste-like, you’ve gone too far and the texture will tighten in the oven.
Filling the Muffin Tin the Right Way
Grease the muffin tin well and divide the mixture evenly among the cups. Press each portion down gently so it fills the cavity, but don’t compact it like a snowball. A light touch leaves enough air in the mixture for the meatloaves to stay tender, and it helps the rendered fat collect around the edges instead of trapping inside the center.
Glazing Before the Heat Does Its Work
Mix the ketchup, brown sugar, and mustard, then spoon about a teaspoon over each mini meatloaf. Don’t drown them. A thin layer is enough to caramelize and turn sticky in the oven, while too much glaze can slide off and pool in the pan before it has a chance to set.
Knowing When They’re Done
Bake until the tops are browned and the internal temperature reaches 160°F, usually 20 to 25 minutes. The centers should feel firm but still a little springy when pressed. Let them rest for 5 minutes before removing them from the tin; if you try to lift them out too soon, they can fall apart and leave the juices behind.
How to Adapt Mini Meatloaf for Different Diets and Busy Weeknights
Gluten-Free Version
Swap the breadcrumbs for gluten-free breadcrumbs or crushed gluten-free crackers. The texture stays close to the original as long as the crumbs are fine, and the milk still gives them enough softness to keep the meatloaf from feeling dry.
Dairy-Free Option
Use an unsweetened dairy-free milk with a neutral taste, like oat or almond milk. The result is still tender, though oat milk gives a slightly rounder finish than almond. Keep the amount the same so the mixture doesn’t turn dry.
Turkey Mini Meatloaf
Ground turkey works, but it needs a little more help to stay moist. Use turkey that isn’t extra-lean if possible, and watch the baking time closely because it can go from done to dry fast. The glaze matters even more here because it adds a little insurance on top.
Make-Ahead for Weeknights
You can mix and portion the meatloaves into the muffin tin a few hours ahead, cover, and refrigerate until you’re ready to bake. That shortcut keeps dinner moving fast, but bring the tin toward room temperature for a few minutes before it goes into the oven so the centers don’t lag behind.
Storage and Reheating
- Refrigerator: Store in an airtight container for up to 4 days. The glaze softens a little, but the meat stays tender.
- Freezer: These freeze well. Cool completely, wrap individually, and freeze for up to 3 months. Thaw overnight in the fridge for the best texture.
- Reheating: Reheat covered in a 325°F oven until warmed through, or use the microwave in short bursts. Don’t blast them on high heat or the edges dry out before the center is hot.
Answers to the Questions Worth Asking
Mini Meatloaf
Ingredients
Equipment
Method
- Preheat oven to 375°F and grease a 12-cup muffin tin. Visual cue: lightly coat each cup so the mini meatloaves release cleanly.
- Combine ground beef, breadcrumbs, eggs, whole milk, onion, garlic, Worcestershire sauce, garlic powder, onion powder, and salt and pepper until just mixed. Visual cue: stop mixing as soon as the mixture comes together with no dry pockets.
- Divide the meat mixture evenly among the muffin cups, pressing gently. Visual cue: level the tops so the glaze sits flat.
- Mix ketchup, brown sugar, and mustard, then spoon about 1 teaspoon over each mini meatloaf. Visual cue: each top should be visibly coated.
- Bake 20–25 minutes at 375°F until internal temperature reaches 160°F and tops are caramelized. Visual cue: watch for a browned, shiny glaze on top.
- Rest 5 minutes before removing from the tin and serving. Visual cue: glaze will set slightly and meatloaves will hold their shape.