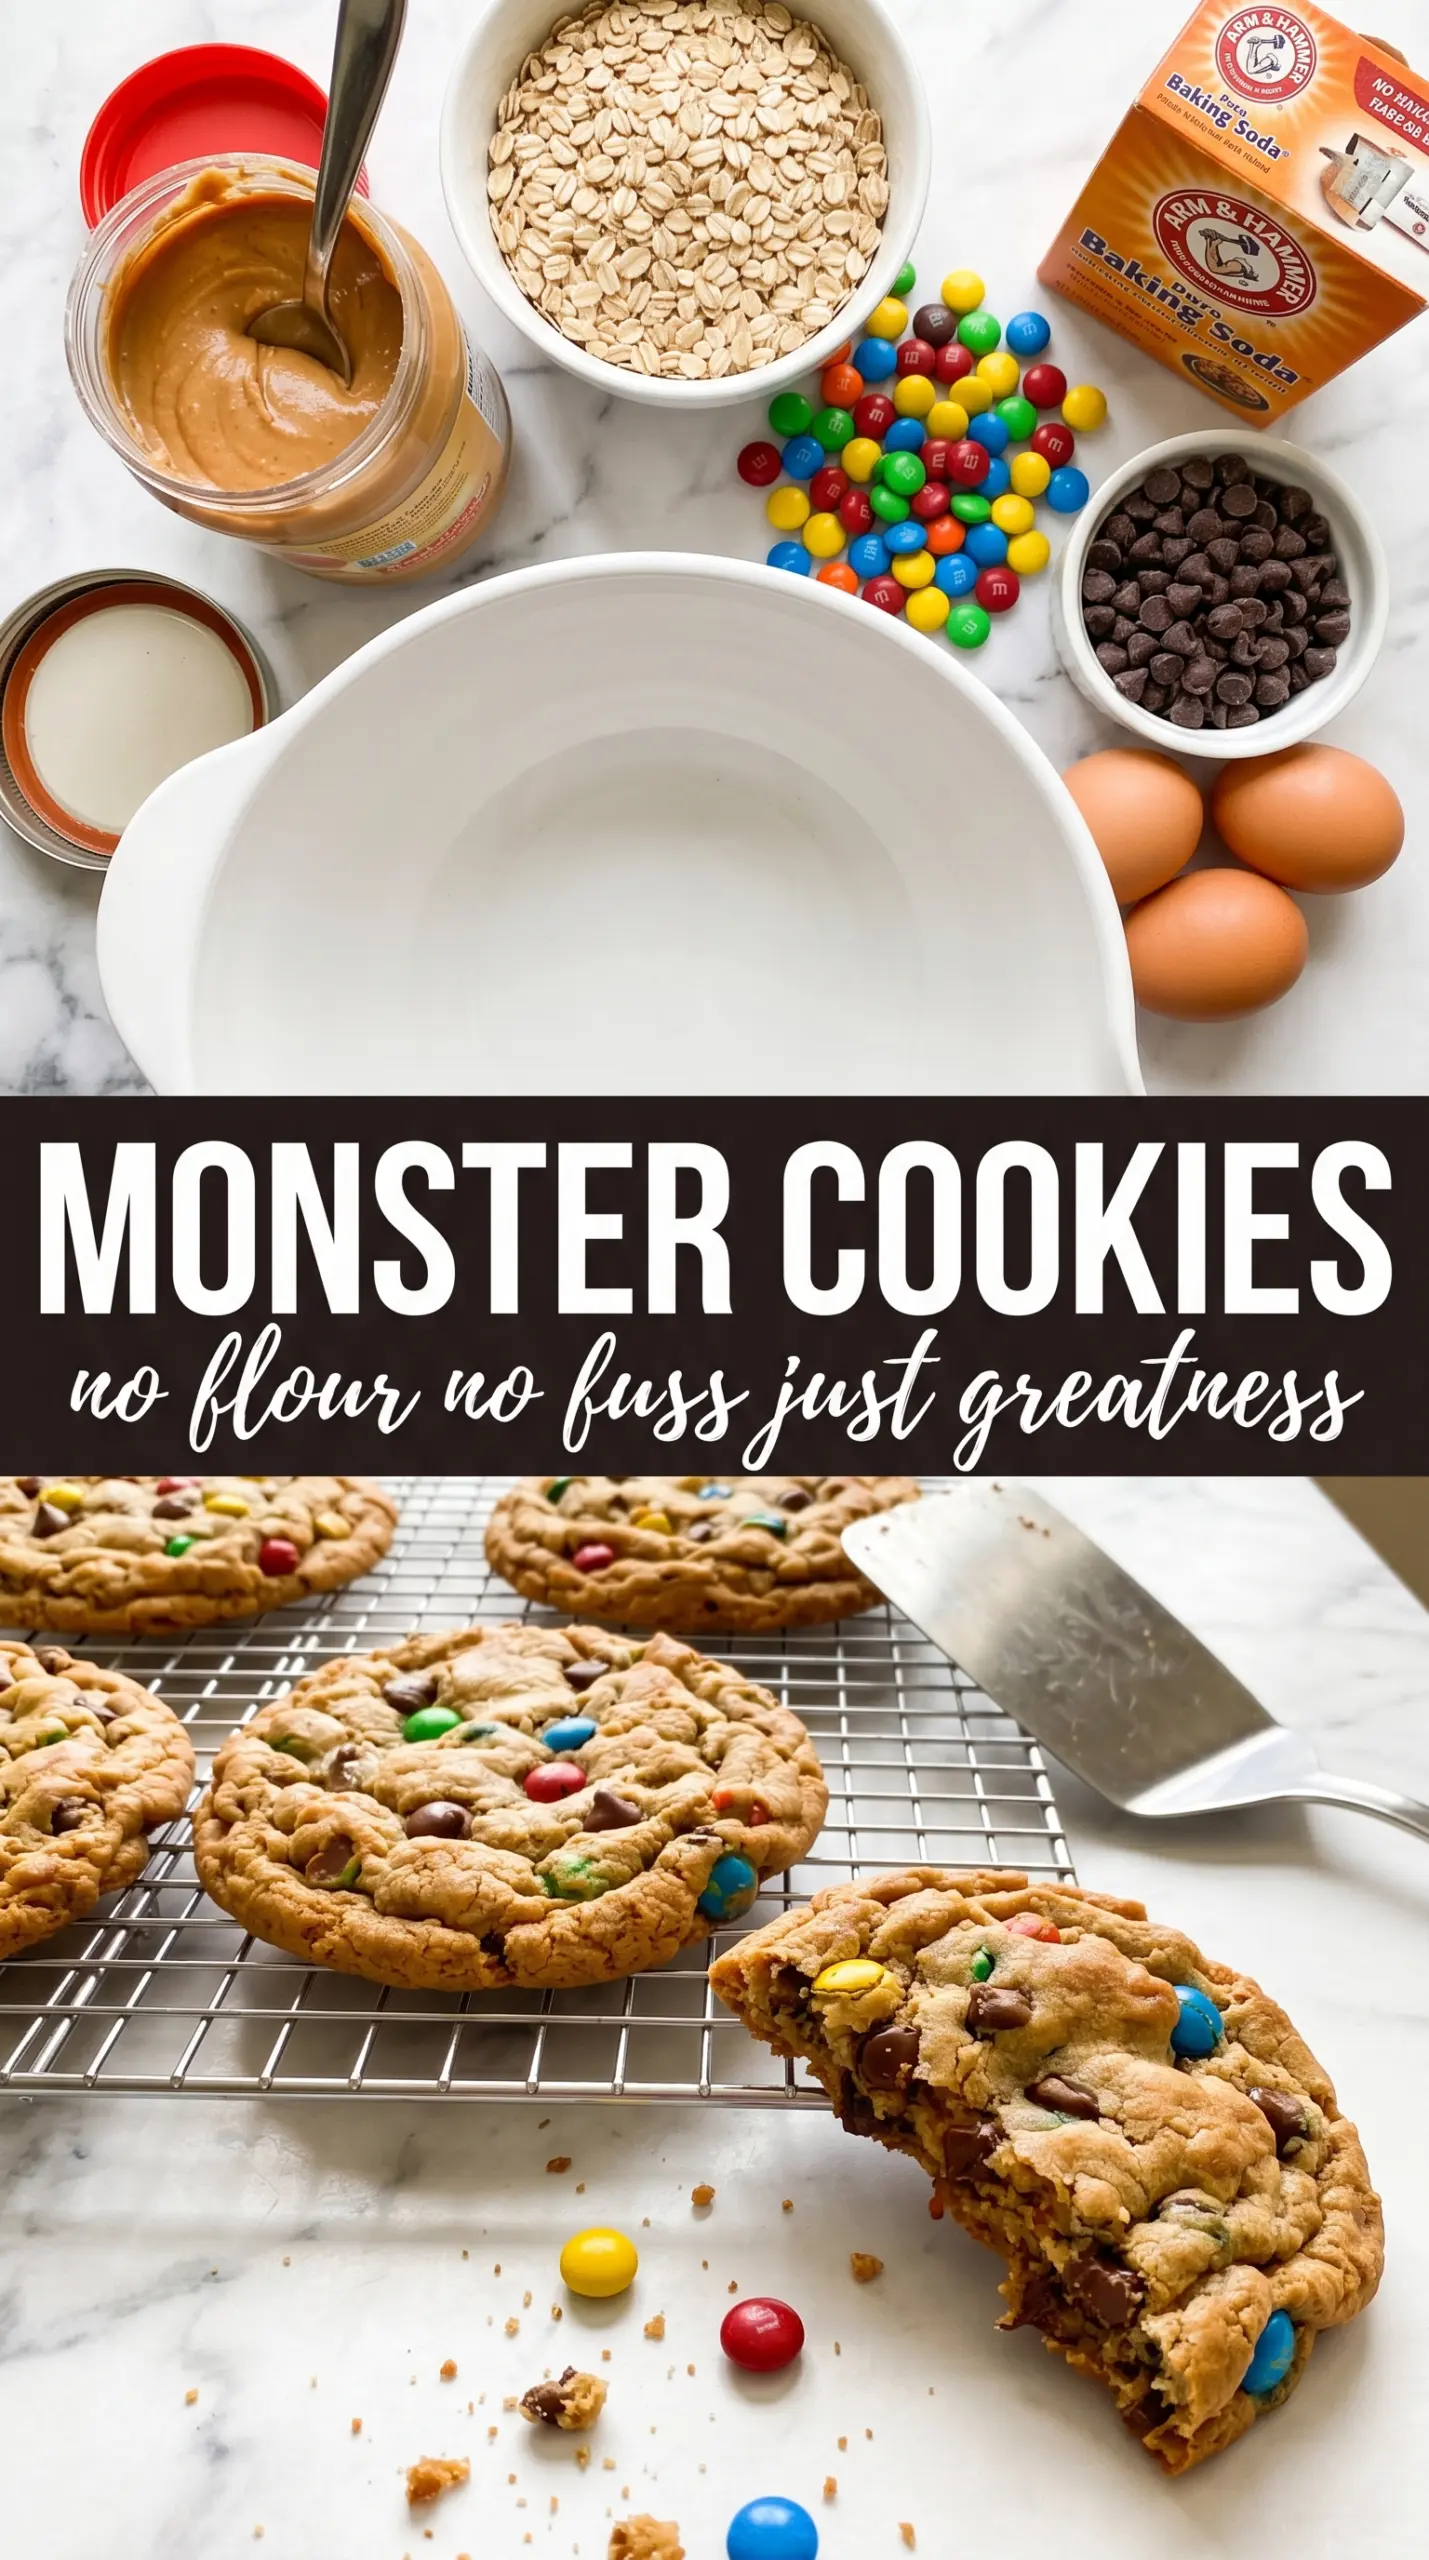
Monster cookies bake up thick, chewy, and packed with enough texture that every bite feels a little different. You get the nutty richness of peanut butter, the soft chew of oats, and those pops of chocolate from M&Ms and chips all in the same cookie. The edges set just enough to hold their shape while the center stays tender, which is exactly what a good monster cookie should do.
The trick with this style of cookie is balancing the mix so it stays sturdy without turning dry or crumbly. Peanut butter does the heavy lifting here, and quick-cooking oats give you that classic monster cookie bite without making the dough too coarse. A short bake keeps the centers soft, and letting them sit on the pan for a few minutes finishes the setting process without overbaking them in the oven.
Below, I’ve included the little details that matter most: how to keep the cookies chewy, why the oats matter, and what to change if you want to make them gluten-free or swap in different mix-ins. If you’ve had monster cookies turn out flat or dry before, the fix is in the ratios and the bake time.
The cookies stayed thick instead of spreading out, and the edges set up with that soft center that makes monster cookies so good. I added the M&Ms at the end like you suggested and they held their color perfectly.
Love the thick, chewy monster cookies with peanut butter, oats, and colorful M&Ms? Save this batch for the next time you want a no-flour cookie that bakes up soft in the center.
Why These Cookies Stay Thick Instead of Spreading
Monster cookies can go thin fast if the dough is too loose or the oats are too coarse. This version leans on peanut butter and eggs for structure, then uses quick-cooking oats that soften just enough to bind everything together without making the cookies heavy or dry. The result is a dough that scoops cleanly and bakes into cookies with defined edges and a soft center.
The other thing that keeps them from flattening is the way they’re baked. You want the centers to look a little underdone when they come out of the oven. If you wait until they look fully set in the oven, they’ll overbake by the time they cool on the pan.
- Peanut butter — Use a standard creamy peanut butter, not the natural kind that separates heavily, because the added stabilizers help the cookies hold their shape. Natural peanut butter can work, but the dough may spread more and taste slightly drier.
- Quick-cooking oats — These soften faster than old-fashioned oats and give the cookies a better chew without large, jagged flakes. If you only have old-fashioned oats, pulse them a few times so the texture is closer.
- M&Ms and chocolate chips — Folding them in at the end keeps the dough from getting streaky and helps the candies stay whole. The mini chips spread the chocolate flavor through the cookie so every bite doesn’t rely on the M&Ms alone.
- Eggs — Three eggs sound like a lot, but they’re part of what keeps these cookies soft and sturdy at the same time. Don’t cut them back unless you want a drier, more crumbly cookie.
What Each Ingredient Is Actually Doing in This Recipe
- Primary ingredient (the star) — Quality matters most. Choose the best you can find.
- Cooking medium (oil, butter, or broth) — This carries flavors and prevents dryness.
- Seasonings (salt, pepper, spices, herbs) — Layer flavors so nothing overpowers. Build depth gradually.
- Aromatics (garlic, onion, herbs) — Cook with fat to bloom flavors. Become the foundation.
- Supporting ingredients — Complement the main ingredient without overpowering it.
- Sauce or liquid (if applicable) — Brings flavors together. Balance richness with acid.
- Acid (lemon, vinegar, wine, or other) — Brightens and prevents flat-tasting results.
- Final finish (garnish, glaze, or sauce) — Prevents one-dimensional taste and adds visual appeal.
Mixing the Dough So It Bakes Up Soft and Chewy
Starting with the Peanut Butter Base
Beat the peanut butter with both sugars until the mixture looks evenly blended and a little fluffy. You’re not trying to dissolve the sugar completely; you just want the dough to start looking cohesive instead of grainy. If the peanut butter is stiff from the jar, it helps to stir it well first so the dough mixes smoothly.
Adding the Eggs and Vanilla
Mix in the eggs, vanilla, and baking soda until the batter turns glossy and smooth. The dough will loosen up here before the oats go in, and that’s normal. If it still looks separated after a full minute of mixing, keep going before adding the oats so the base is fully emulsified.
Folding in the Oats and Mix-Ins
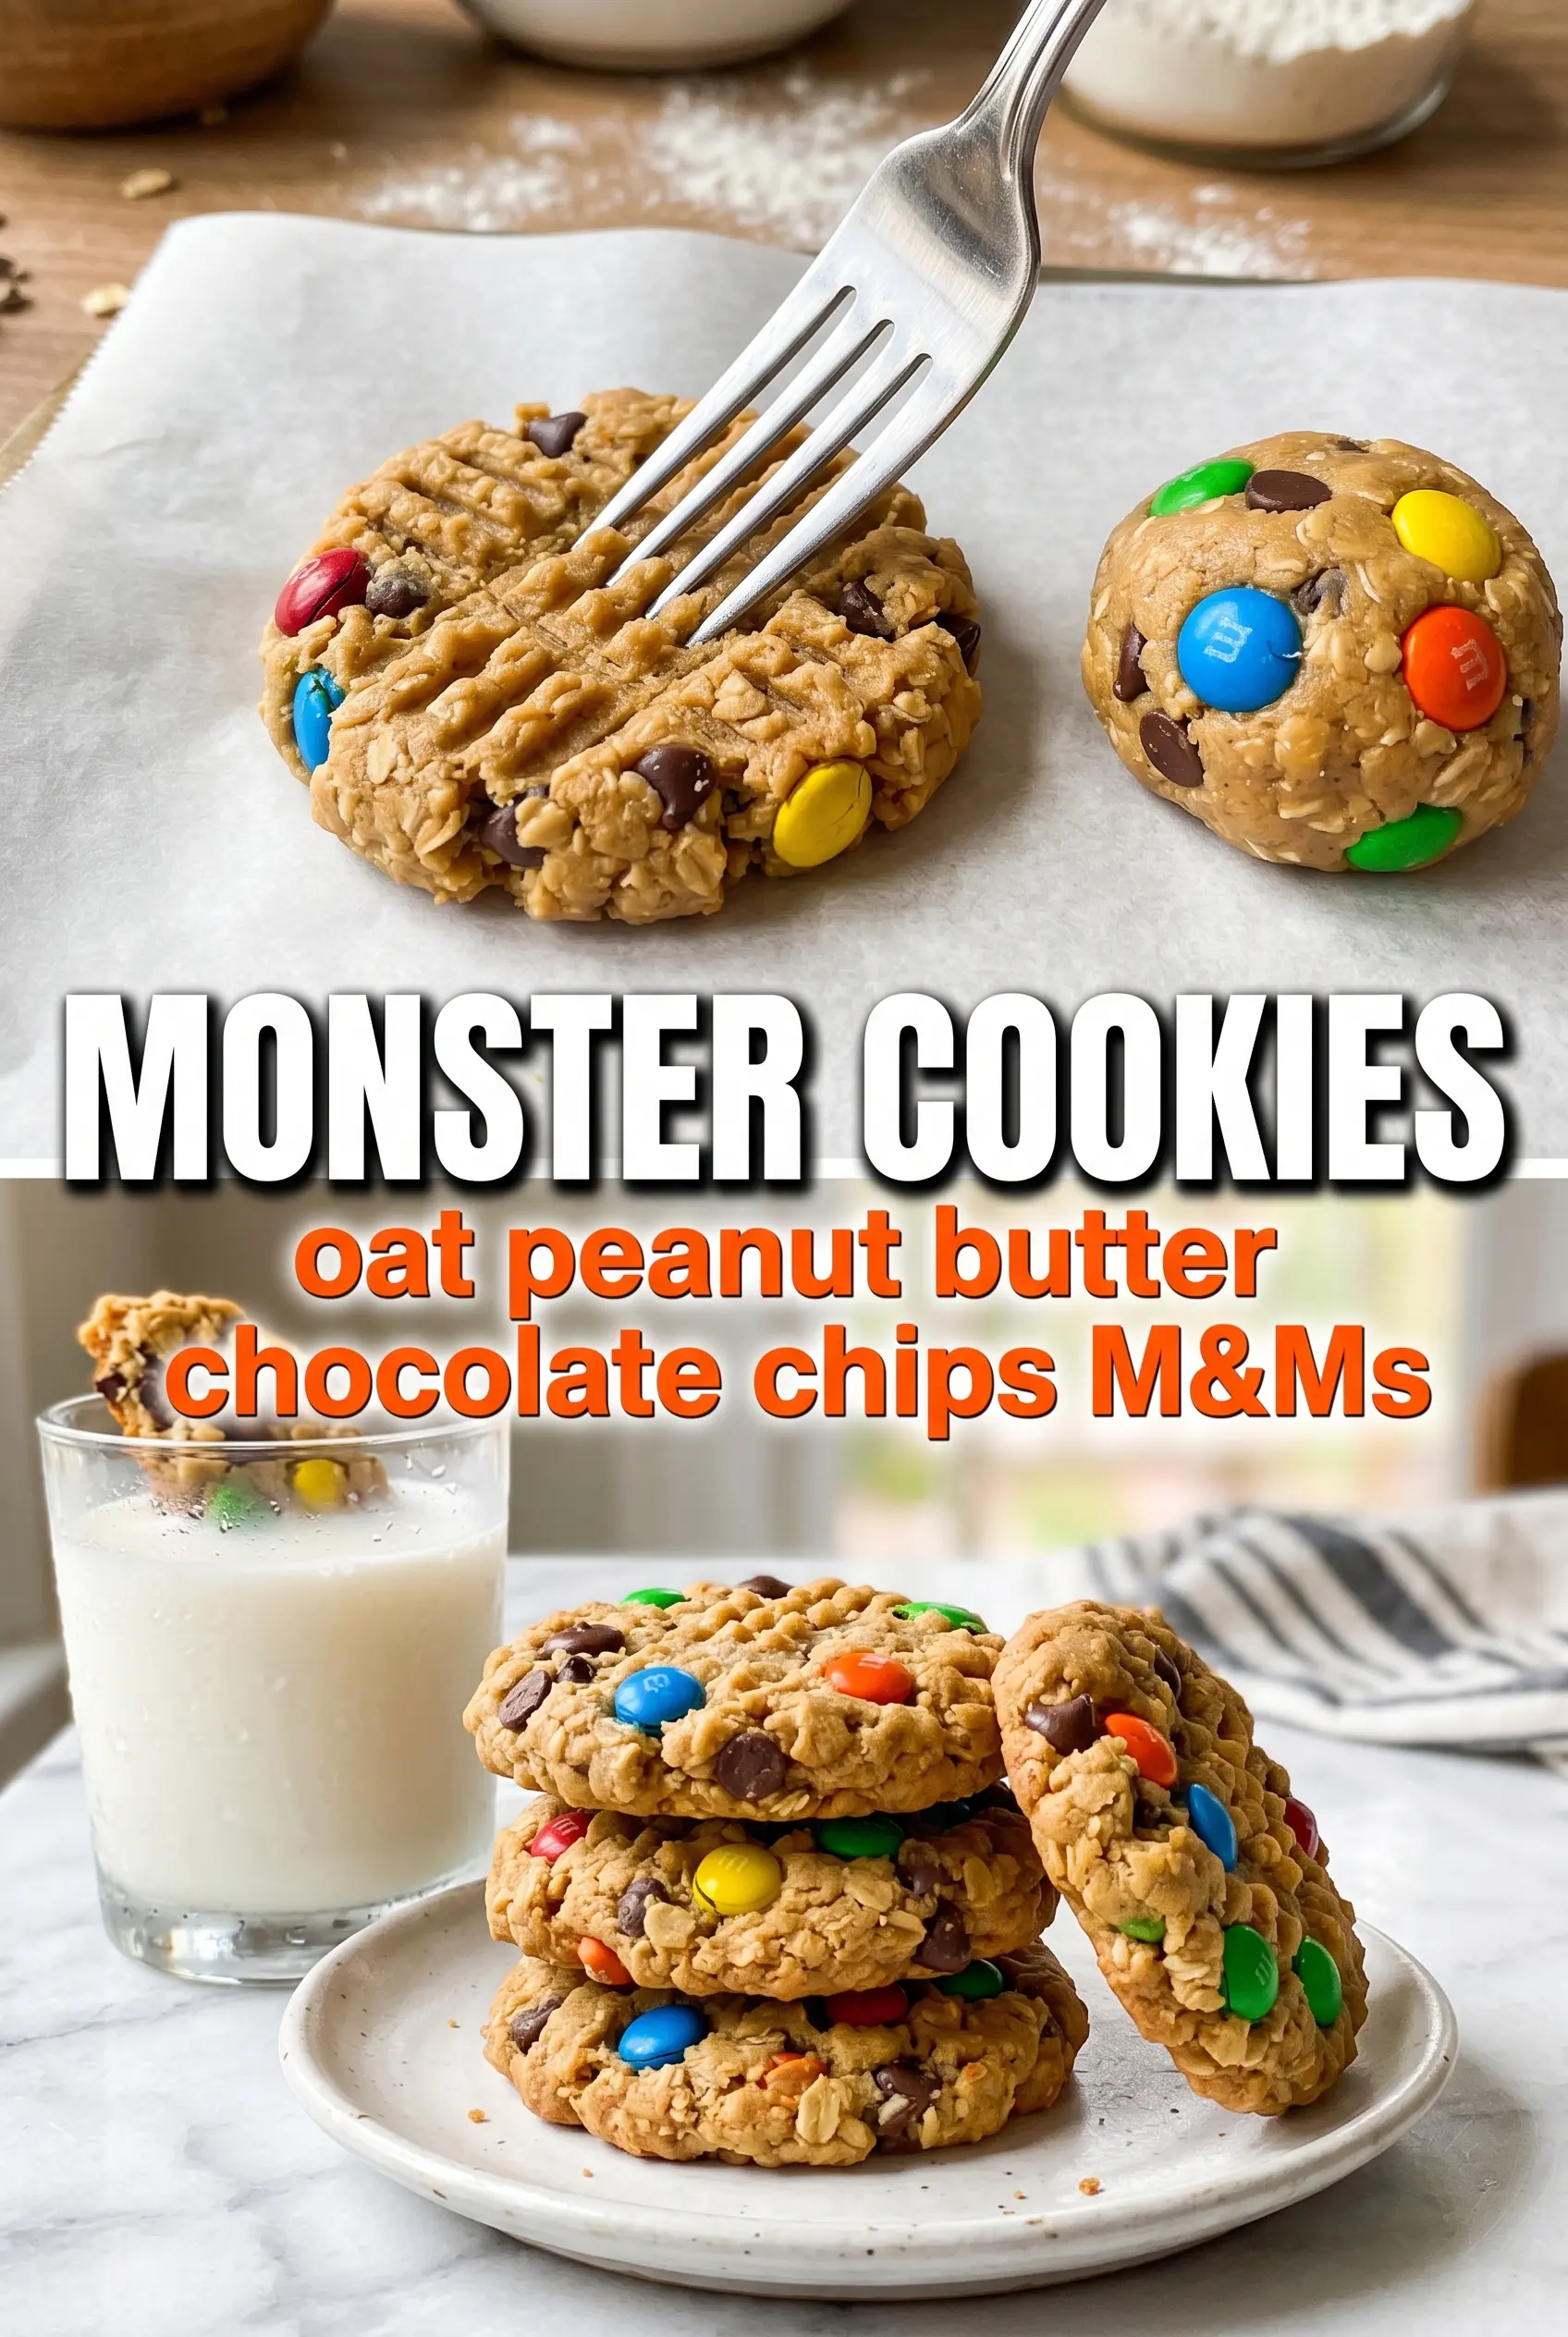
Stir in the oats until you don’t see dry pockets left at the bottom of the bowl, then fold in the M&Ms and chocolate chips by hand. The dough will get thick fast, and that’s exactly what you want. If it seems too sticky to scoop, let it sit for 5 minutes so the oats can absorb some of the moisture before portioning.
Baking Until the Centers Still Look Soft
Scoop the dough into 2-tablespoon portions and flatten them slightly with your palm before baking. They should look a little puffy and rough on top when they go into the oven. Pull them out when the edges are set and the centers still look soft and slightly shiny; they finish baking on the hot pan during the rest time.
Patriotic M&M Monster Cookies
Use red, white, and blue M&Ms for a patriotic version that looks great on a dessert tray. The flavor stays the same, but the cookies get a little extra visual pop without any extra work.
Gluten-Free Monster Cookies
These are naturally gluten-free as long as your oats are certified gluten-free. That’s the swap that matters here, because the cookies get their structure from peanut butter, eggs, and oats instead of flour.
Swap the Candy and Chips
You can swap in chopped peanuts, butterscotch chips, or white chocolate chips for a different finish. Keep the total mix-in amount about the same so the dough doesn’t get overloaded and fall apart when baked.
Storage and Reheating
- Refrigerator: Store in an airtight container for up to 5 days. They stay chewy, though the M&Ms can firm up a bit.
- Freezer: Freeze baked cookies for up to 2 months, or freeze scooped dough balls and bake straight from frozen with 1 to 2 extra minutes.
- Reheating: Warm a cookie in the microwave for 8 to 10 seconds if you want that soft center back. Don’t overheat them or the peanut butter and chocolate will get greasy.
Questions I Get Asked About This Recipe
Monster Cookies
Ingredients
Equipment
Method
- Preheat the oven to 350°F and line two baking sheets with parchment paper, keeping the paper flat so the cookies bake evenly (visual cue: parchment fully covers the sheet).
- Beat the creamy peanut butter, brown sugar, and granulated sugar together in a large bowl until combined and glossy (visual cue: no dry sugar pockets remain).
- Add the large eggs, vanilla extract, and baking soda, then mix until smooth (visual cue: the mixture looks uniform and thick).
- Stir in the quick-cooking oats until fully incorporated (visual cue: oats are evenly distributed and the dough looks thicker).
- Fold in the M&Ms (red, white, and blue for patriotic version), chocolate chips, and mini chocolate chips so they are visible throughout the dough (visual cue: colorful bits and chips are dotted in every scoop).
- Scoop dough into 2-tablespoon balls and place them 2 inches apart on the prepared baking sheets, flattening slightly with your palm (visual cue: discs are about the same thickness).
- Bake for 10–12 minutes until the edges are set but the centers still look slightly underdone (visual cue: centers appear soft and not fully browned).
- Let the cookies cool on the baking sheet for 5 minutes before transferring to a wire rack so they firm up as they cool (visual cue: cookies hold their shape when gently nudged).