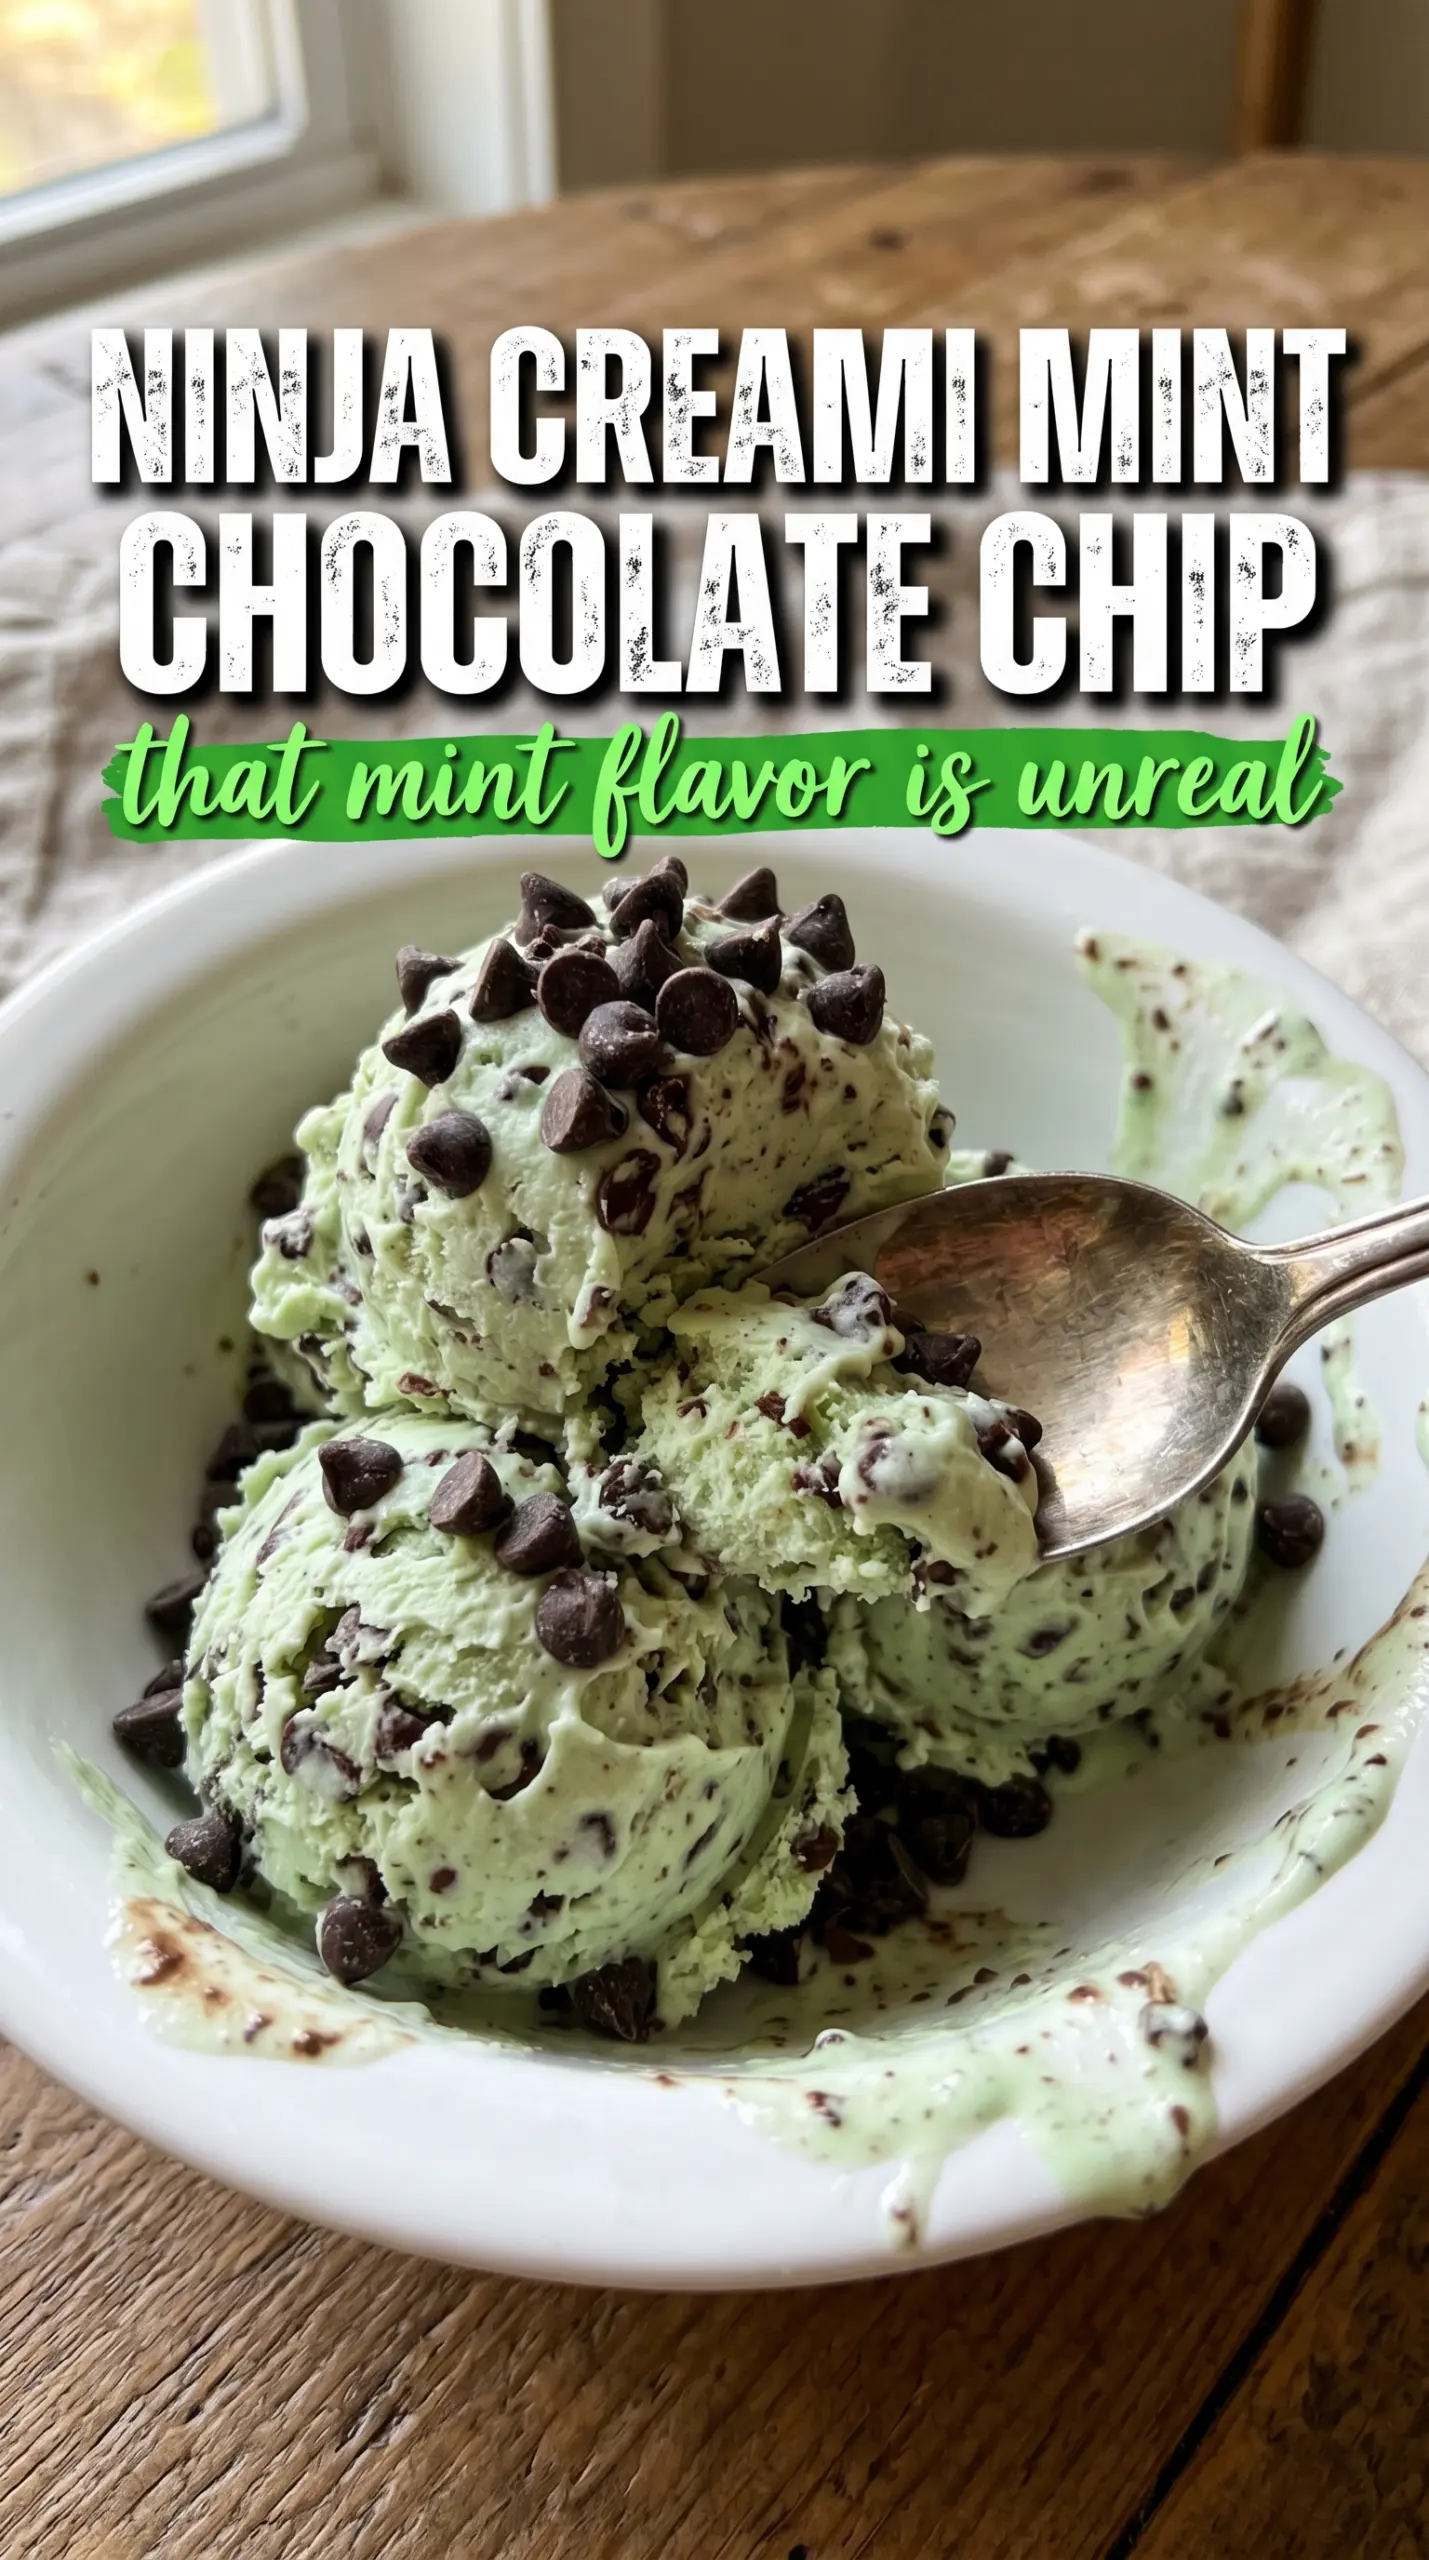
Cold, creamy mint ice cream with little bursts of dark chocolate is one of those desserts that disappears fast because it lands right between refreshing and indulgent. The peppermint stays clean instead of tasting candy-sweet, and the chocolate chips give each spoonful a crisp little crunch against the smooth base. In the Ninja Creami, that texture is easy to get at home without churning a pot on the stove.
This version works because the base is built with enough fat from the cream and cream cheese to stay rich after freezing, while the sugar keeps it from freezing into a brick. A small amount of cream cheese adds body without making the mint taste tangy, and the extract does the flavoring heavy lifting. The mix-in chips go in after spinning, which keeps them from sinking or getting too chopped up.
Below, I’ve included the small details that matter most: how to keep the mint flavor bright, what to do if the first spin looks crumbly, and which swaps still give you that classic mint chip finish.
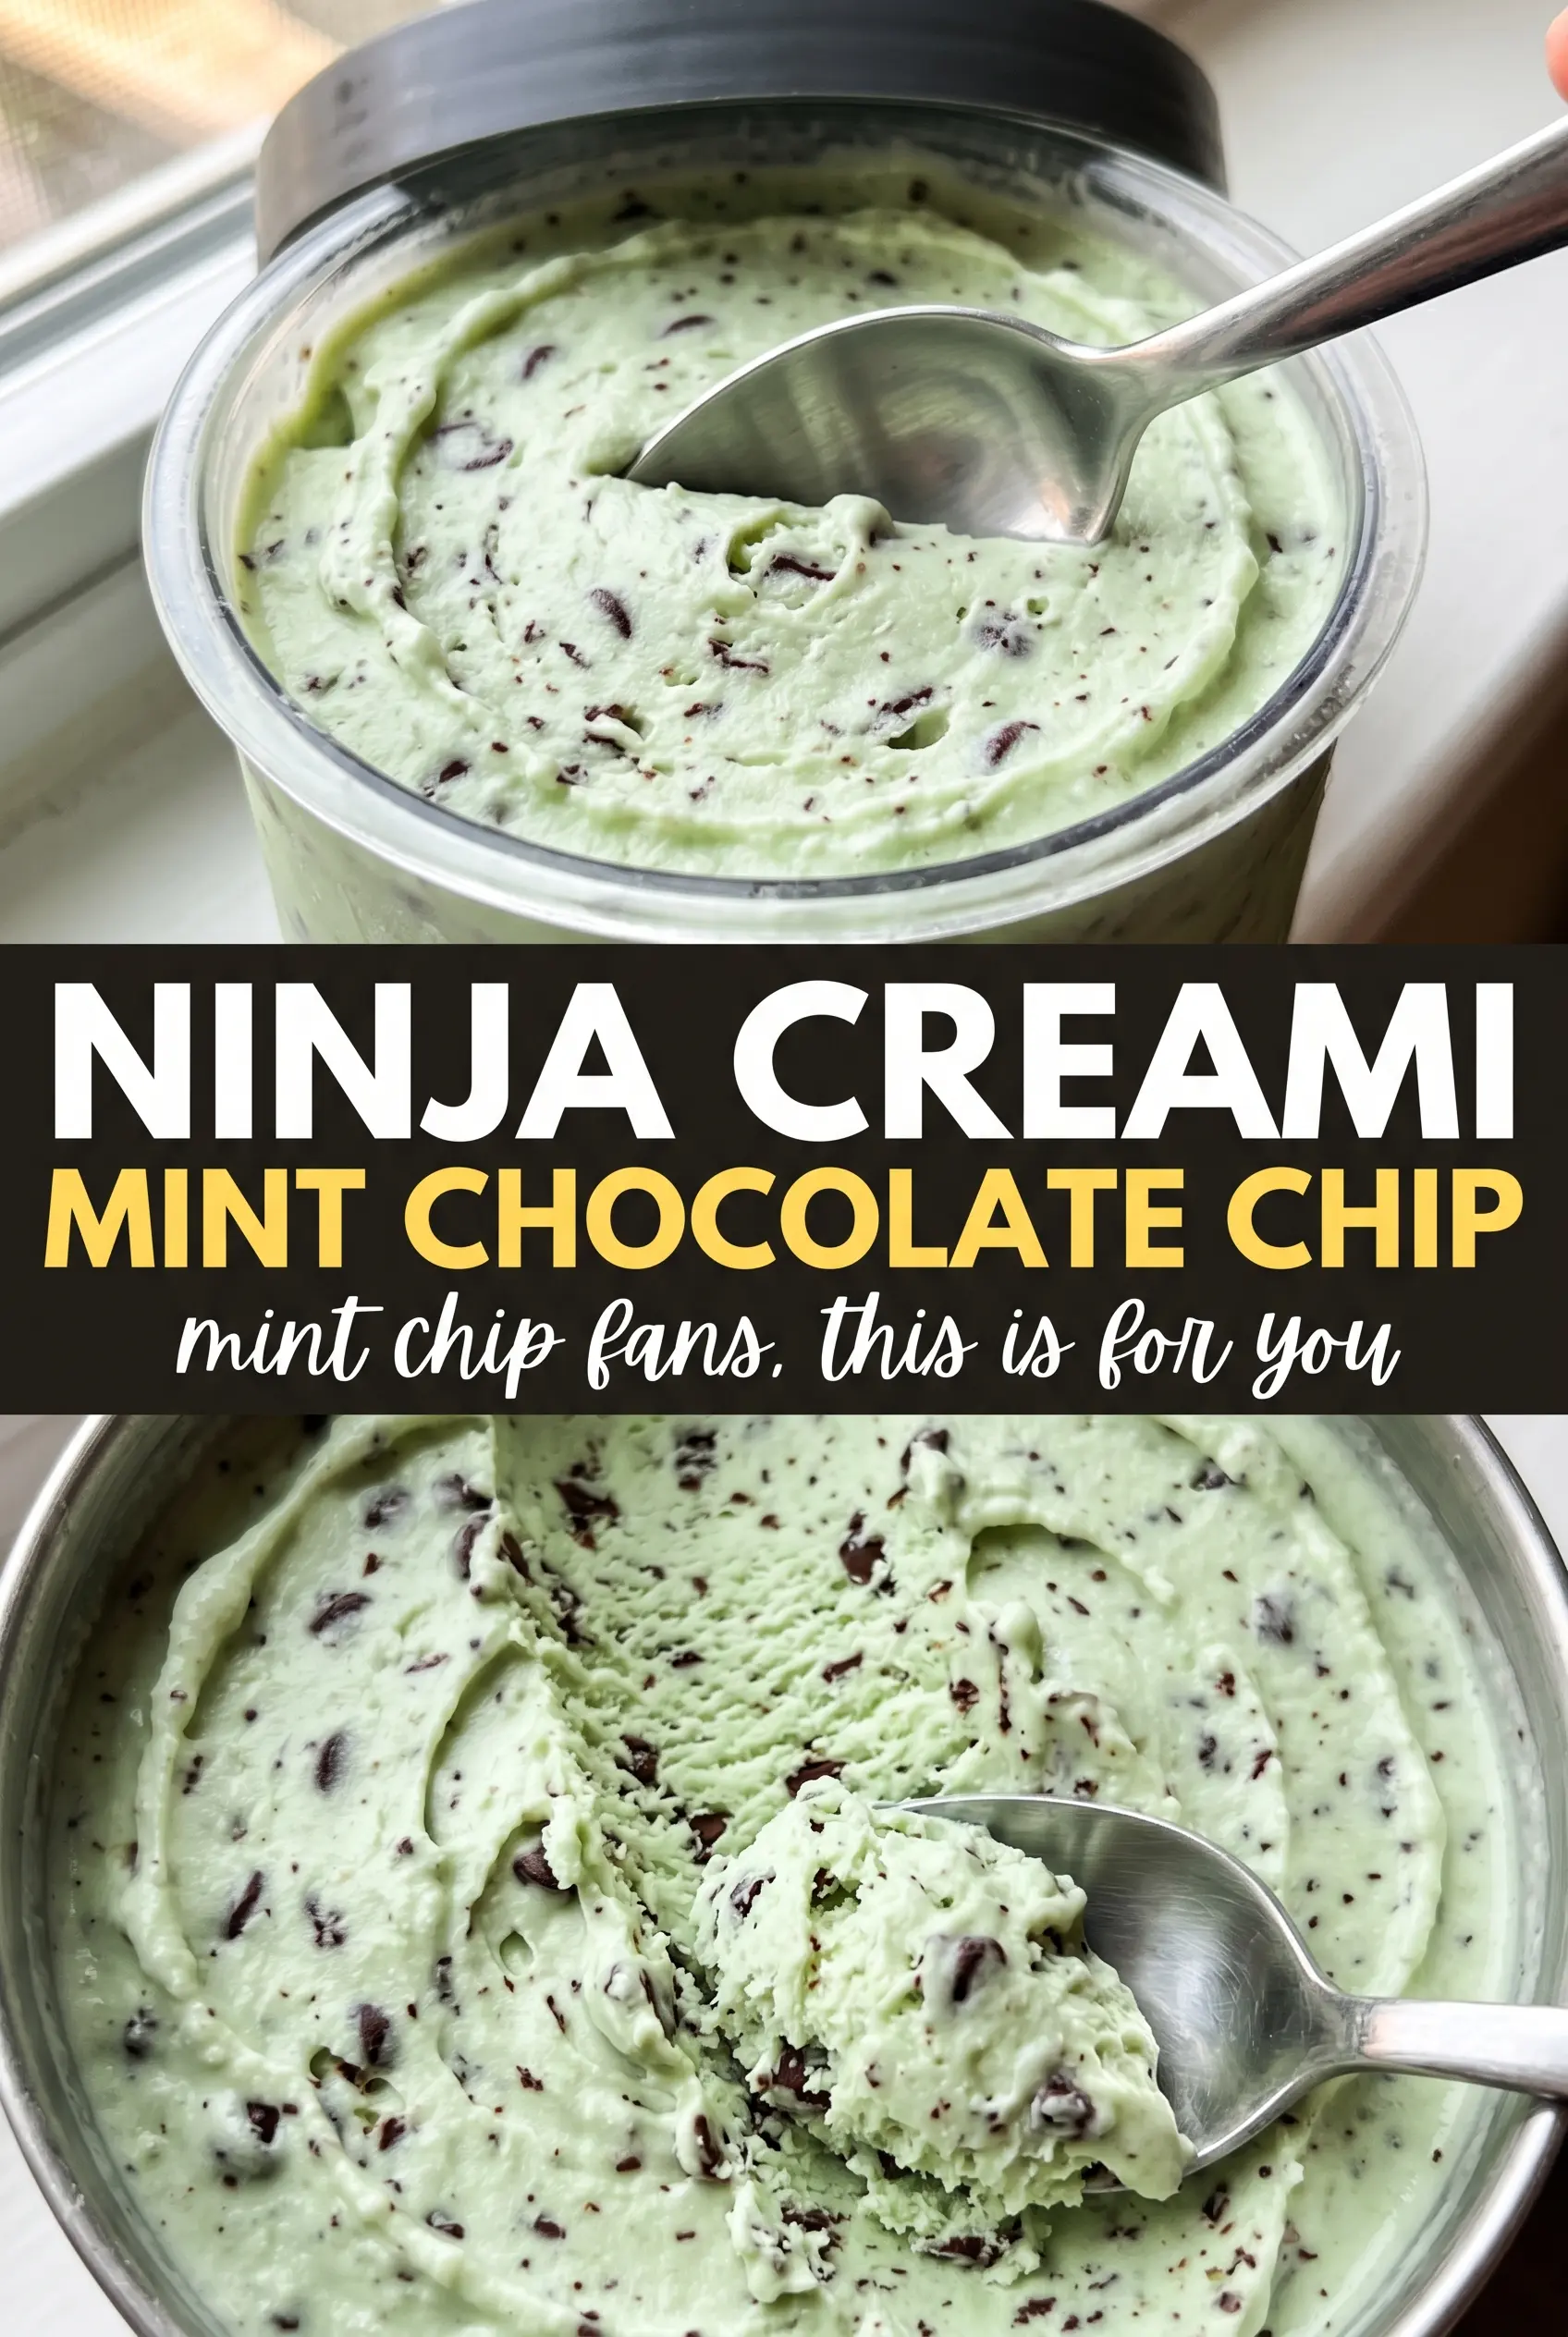
The texture came out spot on after one re-spin, and the mini chips stayed perfectly distributed instead of turning into dusty flecks. My kids kept sneaking spoonfuls straight from the pint.
Save this Ninja Creami mint chocolate chip ice cream for the nights when you want a bright mint base, creamy texture, and a real chocolate chip crunch.
The Part That Keeps This Creami from Turning Icy
A Ninja Creami base that tastes thin before freezing usually comes back icy after spinning. That’s why the cream cheese matters here. It gives the mixture a little more structure so the finished ice cream scoops like a proper dessert instead of shaving into dry flakes on the first pass.
The other thing that helps is balance. Peppermint extract is strong enough to carry the whole flavor, so the recipe doesn’t need a long ingredient list or a custard. Too much extract is the fastest way to end up with toothpaste flavor, so the measured teaspoon is the sweet spot for a bright mint taste that still reads as dessert.
- Whole milk — This gives the base enough water to freeze solid in the pint, but enough milk solids to stay smooth once processed. Lower-fat milk works, but the finished texture will be a little less creamy.
- Heavy cream — This is the biggest reason the ice cream feels rich instead of icy. Half-and-half can work in a pinch, but you’ll lose some body.
- Cream cheese — Softened cream cheese blends in cleanly and helps the base spin into something dense and scoopable. Don’t leave it cold or you’ll end up with tiny lumps in the frozen pint.
- Peppermint extract — Use peppermint, not spearmint. Peppermint gives that classic mint chip flavor that tastes cool and clean.
- Mini chocolate chips — Minis are the right size for the Mix-In cycle. Standard chips are heavier and can sink; minis distribute better and stay easy to bite.
- Green food coloring — Optional, but it gives you the classic mint-chip look. The flavor doesn’t depend on it, so skip it if you want a natural pale cream color.
What Each Ingredient Is Actually Doing in This Ice Cream
- Base ingredient (cream, milk, or custard) — This provides the foundation and richness. Quality matters.
- Sweetener (sugar, honey, or condensed milk) — This sweetens and prevents ice crystals. The ratio is critical.
- Flavor element (vanilla, fruit, chocolate, coffee, or other) — This defines the ice cream personality. Use quality ingredients.
- Egg yolks (if making custard base) — These create richness and silky texture. Optional but elevates ice cream.
- Churning (if using ice cream maker) — This incorporates air and prevents ice crystals. Critical for smooth texture.
- Freezing temperature and time — Proper freezing prevents rock-hard texture. Store at 0°F or below.
- Mix-ins (chocolate, cookies, fruit, or swirls) — These add texture and prevent one-dimensional flavor. Add near end of churning.
- Serving temperature (slightly soft, not rock hard) — This provides creamy mouthfeel. Remove from freezer 5 minutes before serving.
Freezing, Spinning, and the One Re-Spin That Fixes Most Problems
Blending the Base Until It’s Completely Smooth
Blend the milk, cream, sugar, softened cream cheese, peppermint extract, vanilla, salt, and food coloring until there are no visible cream cheese bits left. If the base looks even slightly grainy before it freezes, those little specks turn into hard little flecks after spinning. Scrape down the blender if needed and give it one more quick blend; the mixture should look uniform and a little glossy.
Freezing the Pint Flat and Undisturbed
Pour the base into the pint and freeze it on a level surface for a full 24 hours. If the top freezes slanted, the blade doesn’t pass through evenly and you end up with a lopsided spin. The mixture should be frozen solid all the way through before you process it, not slushy in the center.
Spinning, Then Deciding on the Re-Spin
Run the Ice Cream cycle first. A crumbly top after the first spin is normal; that doesn’t mean it failed. If it looks powdery or dry, add 1 tablespoon milk and use the Re-Spin setting. Stop there once the texture turns creamy and pulls together, because too much liquid can make the final pint loose instead of scoopable.
Folding in the Chocolate Chips at the End
Use the Mix-In setting for the mini chocolate chips. That keeps the chips intact and spreads them through the pint instead of chopping them to dust. If you stir them in by hand after spinning, they tend to clump in one spot, and if you mix them in too early, they freeze hard and can throw off the texture.
How to Tweak the Pint Without Losing the Mint Chip Texture
Dairy-Free Version
Use full-fat canned coconut milk in place of the milk and cream, then skip the cream cheese or use a dairy-free cream cheese that blends smoothly. The texture will be a little less classic and a touch more coconut-forward, but it still spins into a rich frozen dessert if the base is well chilled before freezing.
Lower-Sugar Mint Chip
You can cut the sugar slightly, but don’t remove it completely. Sugar keeps the base from freezing into a hard block, and too little means a crumbly spin and a weaker scoop. If you want to reduce sweetness, lower it by 1 tablespoon at a time and keep the cream ratio the same.
No Green Food Coloring
Leave the coloring out and the ice cream will turn out pale, almost white, with the same mint flavor. That’s the cleaner choice if you care more about taste than the classic mint-chip color. The texture doesn’t change at all.
Storage and Re-Spinning
- Refrigerator: Not recommended. Ice cream softens too fast and loses its texture.
- Freezer: Store the finished pint tightly covered for up to 2 weeks. It will firm up again after a day or two, so expect a harder texture than fresh-spun ice cream.
- Reheating: Let it sit at room temperature for 5 to 10 minutes before scooping. If it’s been frozen hard, run the pint through the Ice Cream or Re-Spin setting again with a splash of milk to bring back the creamy texture.
Questions I Get Asked About This Recipe
Ninja Creami Mint Chocolate Chip Ice Cream
Ingredients
Equipment
Method
- Add whole milk, heavy cream, granulated sugar, softened cream cheese, peppermint extract, vanilla extract, green food coloring (if using), and salt to a blender and blend until completely smooth. Stop and scrape the sides if you see any streaks of cream cheese; the mixture should look glossy and uniform.
- Pour the mint base into the Ninja Creami pint container and seal it. Freeze for 24 hours until solid, with no slosh remaining when you tilt the pint.
- Process on the Ice Cream setting and let the machine finish until the texture looks fluffy and scoopable. If it isn’t fully broken down, re-spin with 1 tablespoon milk for smoother results.
- Select the Mix-In setting and add mini chocolate chips. Watch for chocolate chips to fold through evenly so you don’t see a concentrated pocket.
- Serve immediately after mixing. The surface should look lightly aerated with dark chocolate chips visible throughout.