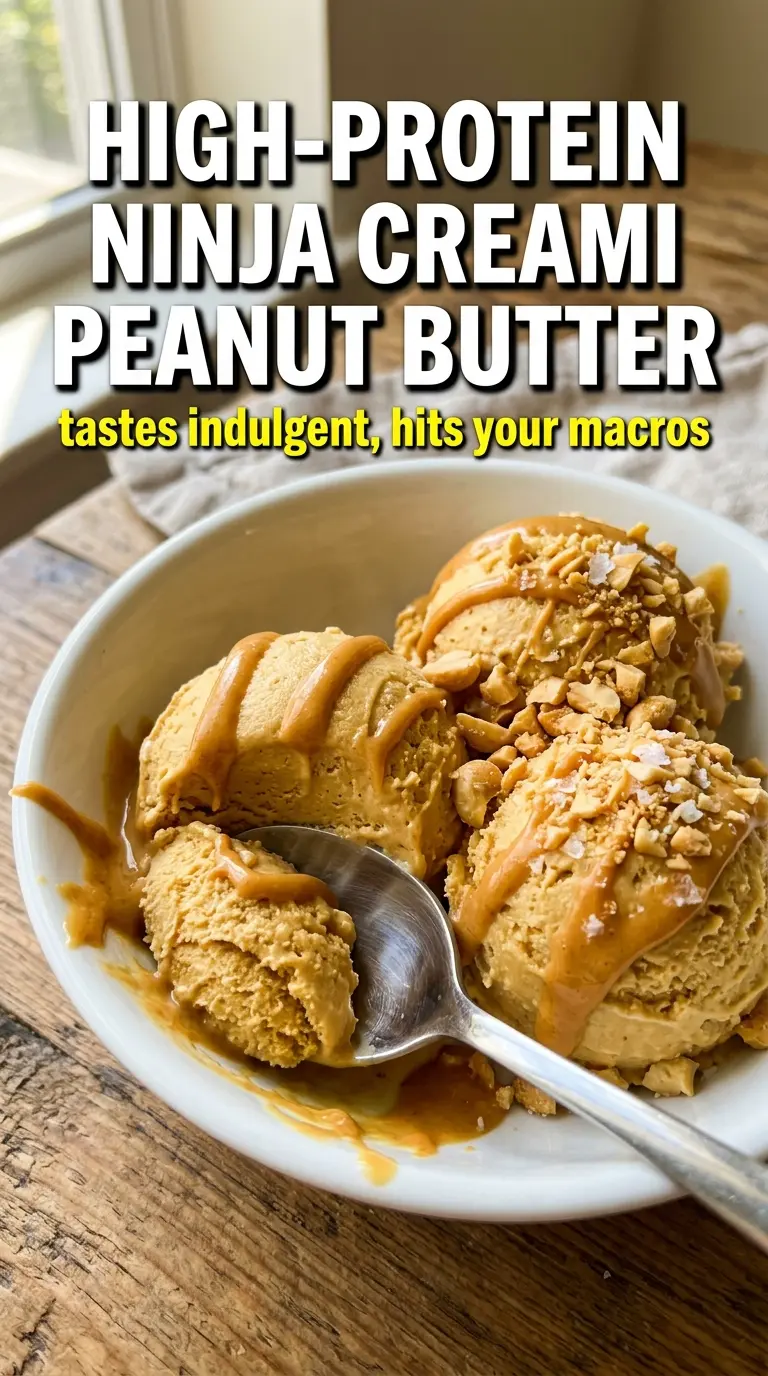
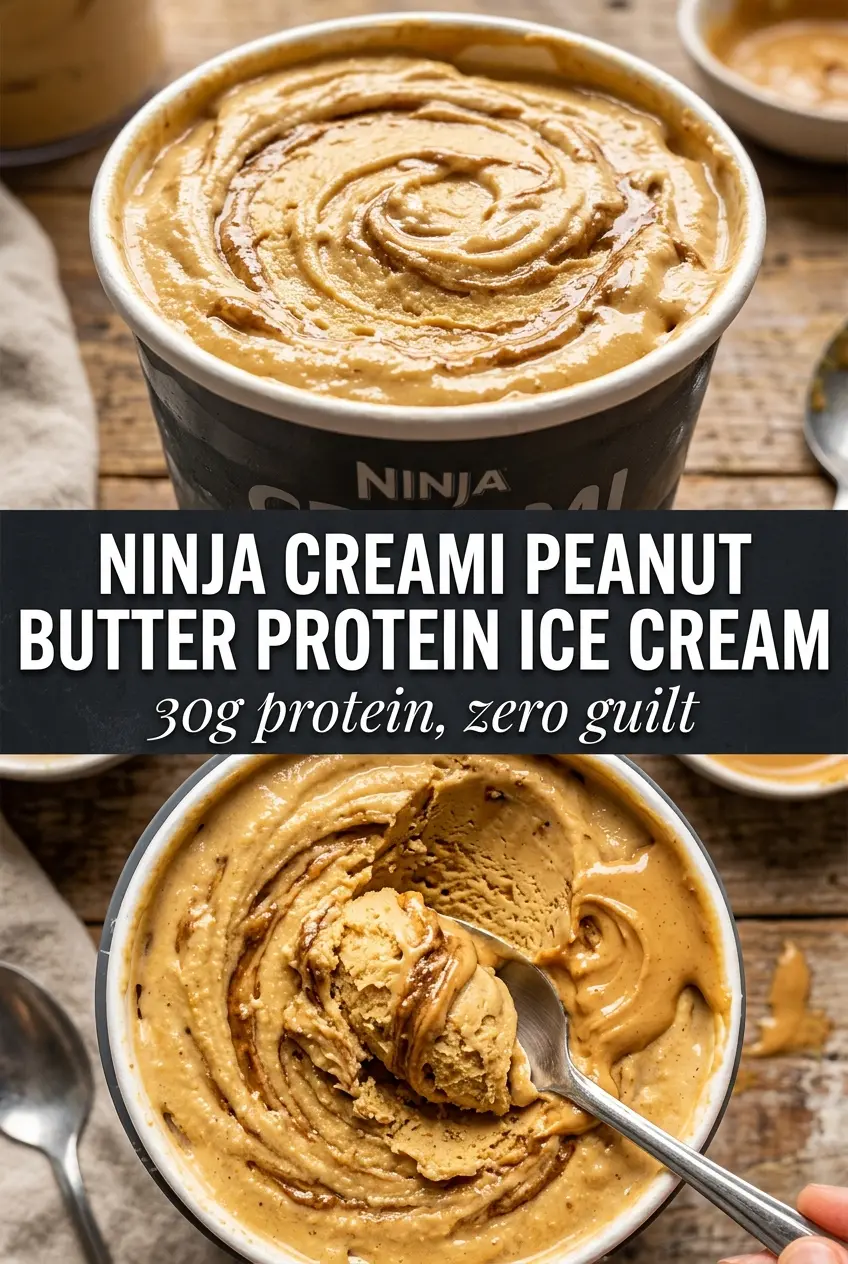
Rich peanut butter ice cream that still feels light on the spoon is one of those treats that earns repeat status fast. The texture lands somewhere between soft-serve and scoop shop ice cream once it’s spun correctly, and the peanut butter gives it a dense, nutty finish that tastes far more indulgent than the ingredient list suggests. The protein powder doesn’t just add nutrition here — it also helps create that thick, frozen base the Ninja Creami is built for.
The trick is getting the mixture fully smooth before it ever hits the freezer. Protein powder clumps can survive the spin and turn the final pint sandy, so I whisk this base until it looks completely uniform, then let the machine do the rest. A little sugar or monk fruit helps keep the texture from freezing into a brick, and the peanut butter adds both flavor and body. Once it’s spun, a quick Mix-In with peanut butter chips or peanut butter cups gives you those cold, sweet pockets that make each bite better than the last.
Below, I’m walking through the one detail that matters most for a creamy spin, plus the ingredient swaps and fixes that help when your pint comes out a little too icy or a little too dense.
Mine came out thick and creamy on the first spin, and the peanut butter chips stayed crunchy instead of disappearing. My husband kept sneaking spoonfuls straight from the pint.
Save this Ninja Creami Peanut Butter Protein Ice Cream for the nights when you want a thick, peanut-buttery dessert with a real protein boost.
The Base Has to Be Smooth Before It Freezes
The biggest mistake with protein ice cream is freezing a lumpy base and hoping the machine will fix it later. It won’t. Any dry pockets of protein powder turn into gritty streaks, and once that texture is frozen in, the Creami can only partially smooth it out. Whisk until the mixture looks glossy and uniform, with no specks stuck to the sides or floating on top.
Peanut butter helps here because it adds fat and body, which both soften the final texture. If you use powdered peanut butter instead, the pint will freeze lighter and leaner, but you’ll lose some of that thick, spoon-coating richness. The sweetener also matters: a little sugar gives a softer freeze than monk fruit alone, though either one works if you’re okay with a firmer spin.
What the Peanut Butter and Protein Powder Are Doing Here
- Protein powder — This is the structure-builder. It helps the base freeze into something the Creami can shave and re-spin into a thick dessert, but quality matters a lot here. Some powders dissolve cleanly and some stay chalky, so use one you already know mixes smoothly in shakes.
- Creamy peanut butter — This gives the pint its dense, nutty flavor and helps keep the texture from turning icy. Natural peanut butter works, but the no-stir kind is easier because it emulsifies more predictably. If yours is stiff, warm it for a few seconds so it blends in without clumping.
- Milk — Whole milk makes the most scoopable result, while unsweetened almond milk keeps it lighter and a little less rich. Almond milk works fine, but the final pint will need the re-spin more often because it freezes harder with less fat.
- Sweetener — Sugar gives the softest bite, which matters in frozen desserts. Monk fruit keeps the recipe lower in sugar, but it can freeze a bit firmer, so the tablespoon of milk for a re-spin becomes more useful.
- Mix-ins — Peanut butter chips or mini peanut butter cups are best added at the end with the Mix-In setting. If you stir them in by hand, they tend to sink into the base instead of staying scattered through the pint.
Freezing, Spinning, and Knowing When to Re-Spin
Mix the Base Until It Looks Completely Unified
Start with the milk and add the protein powder slowly while whisking. Then stir in the peanut butter, sweetener, vanilla, and salt until the mixture looks silky and even. If you see tiny flecks or grainy spots, keep whisking; those small clumps are what create a sandy finish later.
Freeze the Pint Flat and Undisturbed
Pour the mixture into the Ninja Creami pint and freeze it on a level surface for a full 24 hours. A tilted freezer shelf can leave the top frozen unevenly, which makes the blade struggle and gives you a crumbly spin. Don’t rush this part, because a soft center and hard edges are a bad combo for the machine.
Spin, Check, and Re-Spin Only If Needed
Run the Lite Ice Cream setting first. If the pint comes out powdery or crumbly, that usually means it needs one small splash of milk before a Re-spin, not a big pour. Add about 1 tablespoon, then spin again; too much liquid turns the texture from creamy to slushy fast.
Add the Mix-Ins at the End
Once the base is smooth and scoopable, use the Mix-In setting for the peanut butter chips or peanut butter cup pieces. That setting folds them through without shredding them. Serve right away for the best texture, because the pint firms up again after a few minutes in the freezer.
How to Adapt This Pint Without Losing the Creamy Texture
Dairy-Free With Almond Milk
Use unsweetened almond milk as written and keep the peanut butter in the base. The pint will freeze a little harder than a whole-milk version, so expect to use the Re-spin more often. You keep the same nutty flavor, but the result lands slightly lighter and less rich.
Lower-Sugar Version
Swap the sugar for monk fruit sweetener. It keeps the sweetness without adding sugar, but the texture freezes firmer, so that tablespoon of milk for the re-spin becomes even more useful. If you want the softest possible bite, sugar still wins.
Extra Peanut Butter, Less Protein Powder
If you want a richer, more dessert-like pint, reduce the protein powder slightly and add another half tablespoon of peanut butter. The base will taste more like classic peanut butter ice cream and a little less like a protein dessert, but it’ll still spin thick and creamy.
Storage and Re-Spinning
- Refrigerator: Not recommended. This is a frozen dessert, and it turns too soft and thin if held in the fridge.
- Freezer: Store the plain frozen base for up to 2 weeks before spinning. Once it’s already processed, it’s best eaten right away because the texture firms up quickly.
- Reheating: There’s no reheating here, but if the spun ice cream gets too hard after refreezing, let it sit on the counter for 5 to 10 minutes before trying to scoop it again. That brief rest brings the texture back without melting the edges.
Questions I Get Asked About This Recipe
Ninja Creami Peanut Butter Protein Ice Cream
Ingredients
Equipment
Method
- Whisk the milk, protein powder, peanut butter, sweetener, vanilla extract, and salt together until very smooth, with no visible protein powder clumps.
- Pour the smooth base into the Ninja Creami pint container and spread evenly.
- Freeze the filled pint for 24 hours, until fully solid.
- Process on the Lite Ice Cream setting first, until it turns thick and scoopable.
- If the result is grainy, add 1 tablespoon milk and Re-spin on the Lite Ice Cream setting until smooth.
- Use the Mix-In setting to fold in peanut butter chips or mini peanut butter cup pieces evenly through the ice cream.
- Serve immediately for the thickest, smoothest texture.