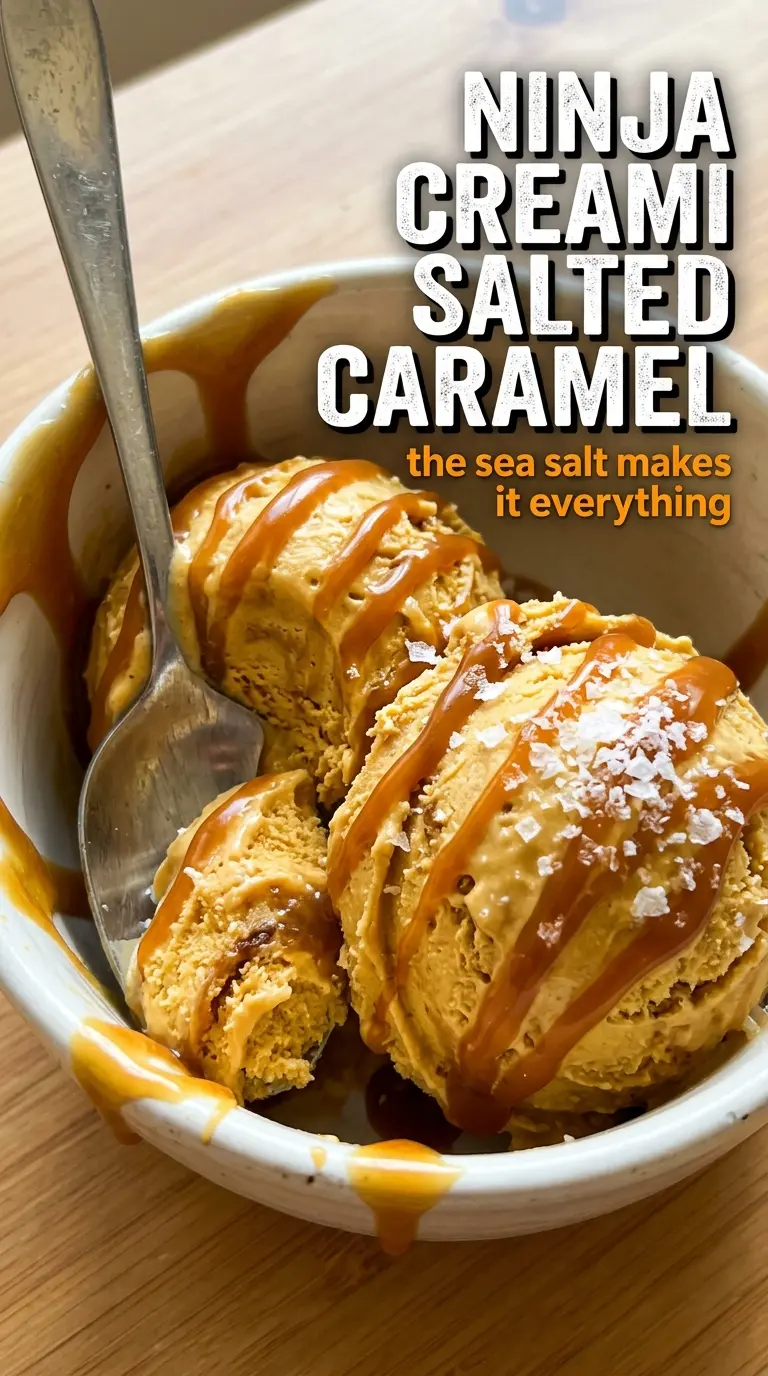
Rich caramel flavor and a silky, scoopable texture are what make this Ninja Creami salted caramel ice cream worth keeping in the freezer. The base tastes like real caramel, not just sweet cream with a splash of syrup, and that little hit of sea salt keeps the finish from turning flat. Every spoonful lands somewhere between buttery and bold, with enough depth to taste like you put in more effort than you did.
The trick is building enough body in the base before it ever freezes. Cream cheese gives the mixture a little emulsified richness, brown sugar deepens the caramel note, and the salt sharpens everything without making it taste salty. Blend it until the cream cheese disappears completely; any small lump will show up later after freezing, and the Creami can only do so much to smooth out a base that wasn’t fully mixed.
The caramel flavor came through beautifully, and after one re-spin it was thick and creamy with no icy bits at all. My husband kept going back for “just one more spoonful” because the salt on top made the caramel taste even deeper.
Save this Ninja Creami salted caramel ice cream for the nights when you want deep caramel flavor, a creamy spin, and a salty finish that keeps every bite interesting.
The Part That Keeps This Creami Base From Tasting Flat
The biggest mistake with caramel ice cream is chasing sweetness instead of depth. If the base is just milk, cream, and caramel sauce, it can taste thin after freezing, especially once the cold mutes flavor. Brown sugar gives the caramel a darker backbone, and the sea salt keeps the finish from reading one-note. That’s what makes this taste like salted caramel instead of plain vanilla with a caramel swirl.
Texture matters just as much as flavor here. Cream cheese adds a small amount of fat and stabilizer, which helps the frozen base spin into something smooth instead of icy. You don’t need much, but you do need to blend it fully before freezing. A lumpy base will freeze lumpy, and no setting on the machine fixes that completely.
What Each Ingredient Is Actually Doing in This Ice Cream
- Base ingredient (cream, milk, or custard) — This provides the foundation and richness. Quality matters.
- Sweetener (sugar, honey, or condensed milk) — This sweetens and prevents ice crystals. The ratio is critical.
- Flavor element (vanilla, fruit, chocolate, coffee, or other) — This defines the ice cream personality. Use quality ingredients.
- Egg yolks (if making custard base) — These create richness and silky texture. Optional but elevates ice cream.
- Churning (if using ice cream maker) — This incorporates air and prevents ice crystals. Critical for smooth texture.
- Freezing temperature and time — Proper freezing prevents rock-hard texture. Store at 0°F or below.
- Mix-ins (chocolate, cookies, fruit, or swirls) — These add texture and prevent one-dimensional flavor. Add near end of churning.
- Serving temperature (slightly soft, not rock hard) — This provides creamy mouthfeel. Remove from freezer 5 minutes before serving.
What Each Ingredient Is Doing in This Ice Cream
- Whole milk — This keeps the base pourable before freezing and light enough for the Creami to churn cleanly. Lower-fat milk will work, but the final texture won’t be as rich.
- Heavy cream — This is where the silky texture comes from. You can use half-and-half in a pinch, but the ice cream will freeze a little harder and need more re-spins.
- Caramel sauce — Use a sauce you actually like eating by the spoonful. Store-bought works fine here, but if yours is thin and overly sweet, the finished ice cream will taste that way too.
- Brown sugar — This deepens the caramel flavor and gives the base a little more body. It’s worth keeping even if your caramel sauce is already sweet.
- Cream cheese — The small amount smooths out the texture and helps the base emulsify. Soften it first so it blends in completely; cold cream cheese leaves tiny bits behind.
- Vanilla extract — Vanilla rounds out the caramel and keeps the flavor from tasting sharp. A good vanilla helps, but this isn’t the place to use an expensive one if you don’t want to.
- Sea salt — This is what makes the caramel pop. Fine sea salt blends best, and flaky salt is better saved for the top at serving time.
Freezing the Base the Right Way Before the Spin
Blend Until It Looks Like One Smooth Mixture
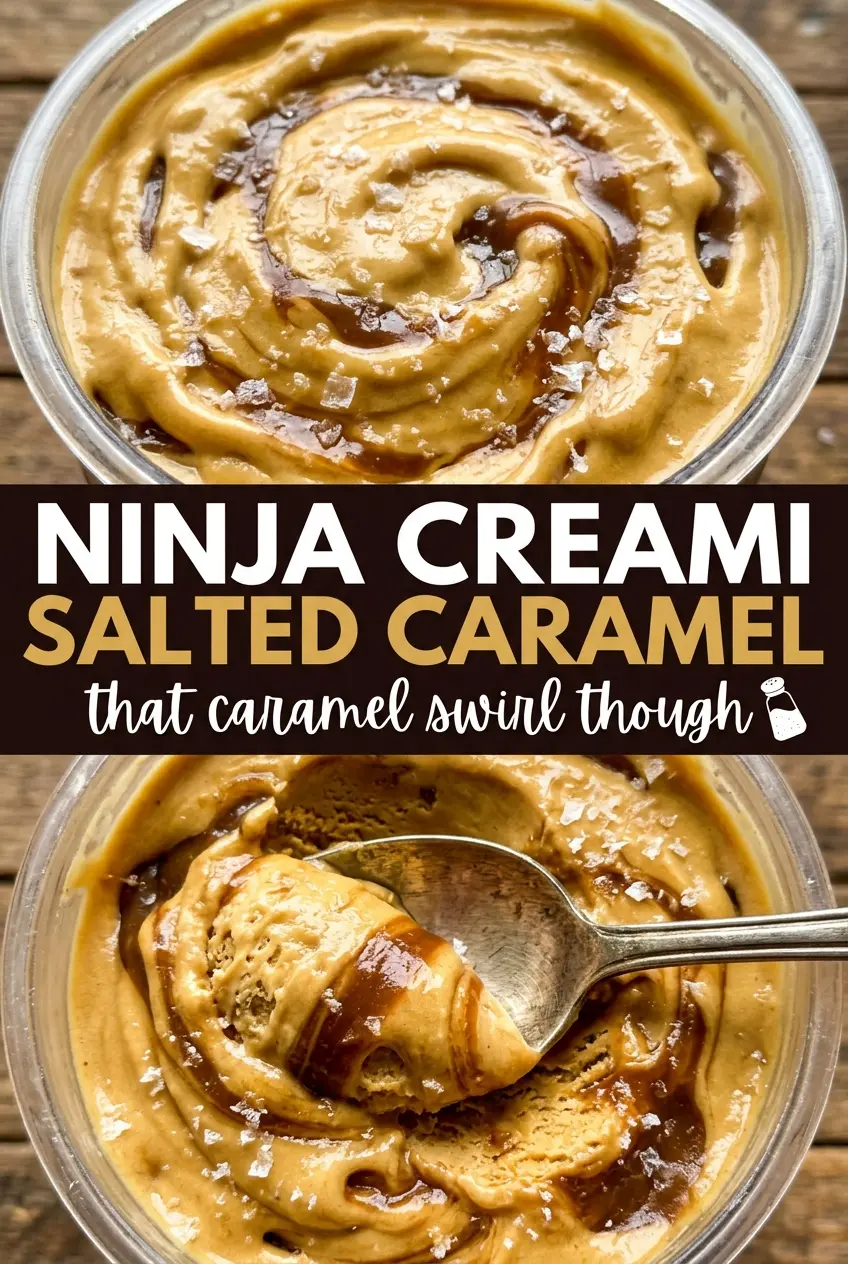
Combine everything and blend until the mixture looks uniform and glossy, with no streaks of cream cheese floating through it. If you see even tiny pale specks, keep going. Those little bits freeze into firm pockets that show up after spinning, and they make the texture less smooth than it should be.
Leave Room in the Pint
Pour the base into the Ninja Creami pint and stop about 1 inch from the top. The mixture expands as it freezes, and overfilling can push the surface into a dome that doesn’t spin evenly. A flat, level top gives the blade a better path through the pint and usually means less scraping later.
Freeze Fully, Not Just Firm
Give the pint the full 24 hours. If the center is even slightly soft, the Ice Cream setting can turn the top loose while the bottom stays dense and chalky. A completely solid base is what lets the machine shave it into that smooth, scoopable texture instead of a slushy one.
Re-Spin Only When It Needs It
After the first spin, check the texture before adding milk. Some pints come out perfect on the first pass, but if the mixture looks crumbly or powdery, add just a splash of milk and re-spin. Too much milk turns a good base into soft serve, and you lose the dense, creamy finish that makes this worth making.
Three Ways to Shift the Flavor Without Breaking the Texture
Dairy-Free Version
Use full-fat coconut milk in place of the milk and cream, then choose a dairy-free caramel sauce and dairy-free cream cheese. The texture will be slightly softer and the coconut will come through a bit, but the salt and caramel still carry the recipe well.
Extra-Salty Caramel Finish
Keep the base as written and finish each serving with a little flaky salt and an extra ribbon of caramel sauce. That gives you the contrast of sweet base and sharp topping, which makes the caramel taste deeper instead of just sweeter.
Lower-Sugar Version
Cut the brown sugar back to 1 tablespoon and use a caramel sauce that isn’t overly sweet. You’ll lose a little of the deep candy-like finish, but the ice cream stays balanced and the caramel flavor reads cleaner.
Making It Ahead for a Small Crowd
Double the recipe only if you have two pints and enough freezer space for both to freeze flat. The finished ice cream is best spun right before serving, since refrozen processed ice cream can firm up again at the edges.
Storage and Re-Spinning
- Refrigerator: Not recommended. This is meant to be frozen, and it loses its structure fast once it starts to soften.
- Freezer: Keep the base frozen in the pint for up to 2 weeks for the best texture. After that, it can still work, but the edges may start to taste a little drier.
- Reheating: Let the pint sit at room temperature for 3 to 5 minutes before spinning again if it freezes especially hard. If you add milk too early, the texture goes from creamy to loose fast.
Questions I Get Asked About This Recipe
Ninja Creami Salted Caramel Ice Cream
Ingredients
Equipment
Method
- Blend whole milk, heavy cream, caramel sauce, brown sugar, cream cheese, vanilla extract, and sea salt until completely smooth with no cream cheese lumps remaining.
- Pour the mixture into the Ninja Creami pint container, leaving 1 inch of headspace.
- Freeze for 24 hours until solid.
- Process on the Ice Cream setting until thick and scoopable.
- If the texture is too firm, re-spin with a splash of milk.
- Drizzle extra caramel sauce over the top and finish with flaky sea salt before serving.