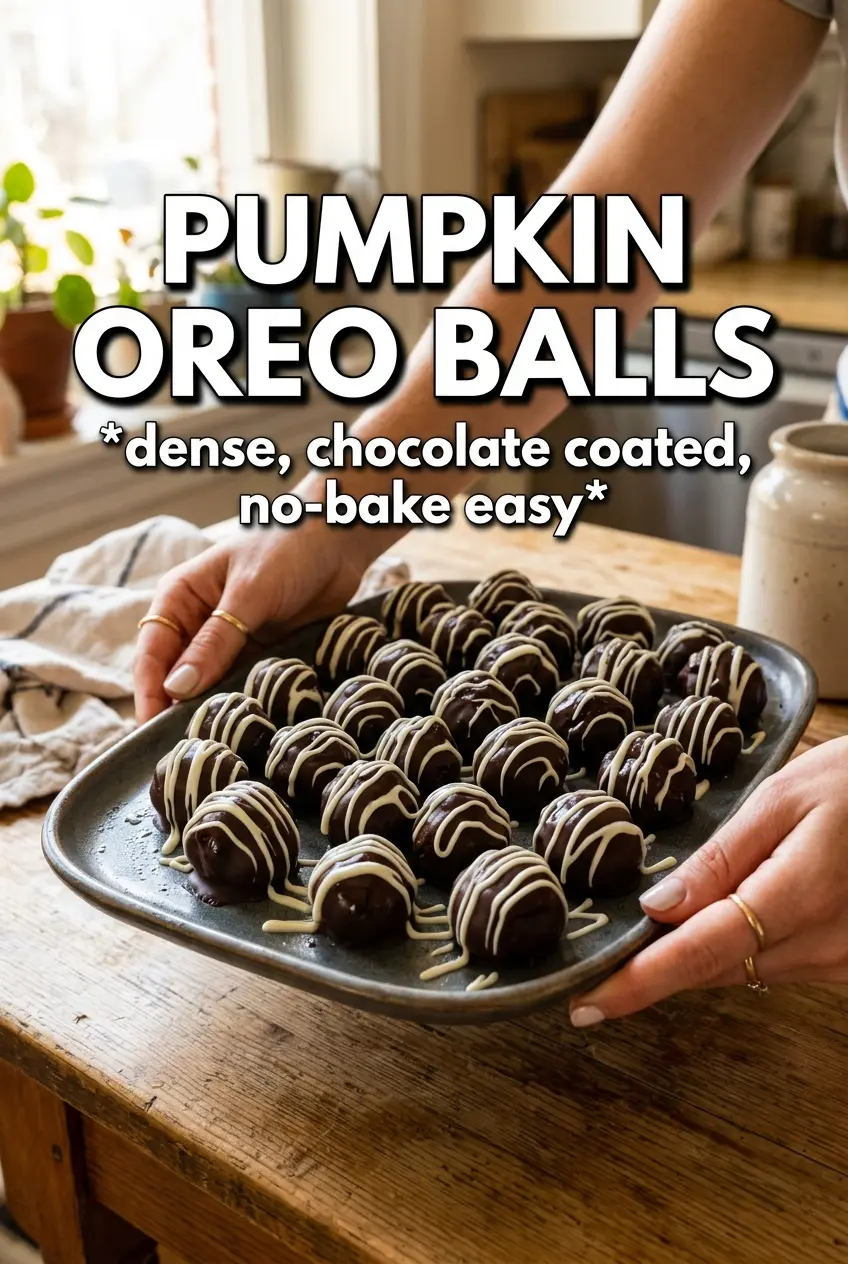
Pumpkin Oreo balls have that sweet spot of being rich, creamy, and just a little messy in the best way. The center stays soft and cheesecake-like, with pumpkin spice running through every bite, while the chocolate shell gives you that clean snap before you hit the Oreo crumbs on top. They disappear fast because they taste like a no-bake truffle, but they’re easier to make than they look.
The part that matters most is drying the pumpkin puree before it goes into the filling. Pumpkin adds great flavor, but it also brings water, and extra moisture is what makes Oreo balls go slack or crack when you dip them. Crushing the whole cookies into fine crumbs, filling and all, gives the mixture enough structure to roll cleanly without turning gummy.
Below I’ll walk through the two chilling stages that keep these neat, plus the easiest way to get a smooth coating if you’re using white chocolate or candy melts.
The filling set up perfectly after chilling, and the white chocolate dipped smooth without cracking. I loved the pumpkin spice Oreo flavor in the center — my kids ate three before I could even get them on a plate.
Save these pumpkin Oreo balls for a no-bake dessert with a creamy center, crisp chocolate shell, and that pumpkin spice Oreo bite.
Why These Pumpkin Oreo Balls Hold Their Shape Instead of Turning Soft
The biggest problem with pumpkin truffles is moisture. Oreos already bring enough softness on their own, so if the pumpkin puree goes in wet, the mixture turns loose and the balls slump after rolling. Blotting the pumpkin first keeps the filling dense enough to scoop, chill, and dip without fighting you.
The second thing that helps is the double chill. First the filling firms up in the fridge, then the shaped balls go into the freezer just long enough to set the outside. That contrast matters because a cold center meets warm coating more cleanly, which means less dragging, fewer cracks, and less filling leaking into the chocolate.
- Pumpkin puree — Blot it with paper towels until it looks thick and pasty. Canned pumpkin varies a lot in moisture, and this step is what keeps the filling from getting too loose.
- Cream cheese — Full-fat cream cheese gives the best body and tang. Softened cream cheese blends smooth; cold cream cheese leaves little lumps that never fully disappear.
- Pumpkin spice Oreos — These carry most of the flavor and structure. Regular Oreos work too, but you lose the built-in spice note, so the pumpkin pie spice matters more.
- White chocolate or candy melts — Candy melts are easier if you want a clean shell and an orange tint. White chocolate tastes richer, but it can seize if overheated, so melt it gently.
What Each Ingredient Is Actually Doing in This Recipe
- Primary ingredient (the star) — Quality matters most. Choose the best you can find.
- Cooking medium (oil, butter, or broth) — This carries flavors and prevents dryness.
- Seasonings (salt, pepper, spices, herbs) — Layer flavors so nothing overpowers. Build depth gradually.
- Aromatics (garlic, onion, herbs) — Cook with fat to bloom flavors. Become the foundation.
- Supporting ingredients — Complement the main ingredient without overpowering it.
- Sauce or liquid (if applicable) — Brings flavors together. Balance richness with acid.
- Acid (lemon, vinegar, wine, or other) — Brightens and prevents flat-tasting results.
- Final finish (garnish, glaze, or sauce) — Prevents one-dimensional taste and adds visual appeal.
The Chilling Window That Makes Dipping Easy
Building the Filling
Beat the cream cheese first until it looks smooth and fluffy, then add the blotted pumpkin and spices. That gives you a base that mixes evenly before the cookie crumbs go in. Once the Oreo crumbs are added, the mixture should look thick and moldable, not sticky like frosting. If it still feels soft, chill it longer before scooping; extra crumbs can help, but the real fix is moisture control.
Shaping and Firming
Scoop the mixture into one-inch portions and roll them quickly between your palms. The goal is smooth, compact balls with no cracks, because rough edges tear the coating later. A short freeze is enough here; you want them firm, not frozen solid, so the chocolate clings instead of sliding off. If they’re too hard on the outside, let them sit a minute before dipping.
Coating and Finishing
Melt the white chocolate or candy melts until just smooth, then dip each ball and tap off the extra coating. Work one at a time and add the crushed Oreo topping immediately, before the shell starts to set. If the coating thickens while you work, warm it in short bursts and stir well; overheated chocolate gets grainy and loses its glide. Orange food coloring is optional, but it gives the finish that pumpkin look without changing the flavor.
How to Adapt Pumpkin Oreo Balls for Different Kitchens and Crowd Sizes
Use regular Oreos when pumpkin spice Oreos aren’t available
Regular Oreos still make a great filling. You’ll lose the extra spice baked into the cookie, so keep the pumpkin pie spice and cinnamon in the mixture; that’s what keeps the flavor from tasting flat.
Make them dairy-free with a plant-based cream cheese and dairy-free coating
A good dairy-free cream cheese substitute works here because the filling is chilled and dipped, not baked. Choose a brand that’s firm when cold, or the balls may spread a little more before freezing. Use dairy-free white chocolate or candy melts for the shell.
Skip the orange coloring and use pure white chocolate
The food coloring only changes appearance. Leaving it out gives you a cleaner white shell with the dark cookie topping standing out more, and the flavor stays exactly the same.
Storage and Reheating
- Refrigerator: Store in an airtight container for up to 5 days. The shell stays best when they’re kept cold, and the filling will soften at room temperature.
- Freezer: Freeze in a single layer, then transfer to a freezer bag for up to 2 months. Thaw in the refrigerator so the coating doesn’t sweat.
- Reheating: These don’t need reheating. Serve them chilled or let them sit out 10 to 15 minutes for a softer center, but don’t leave them at room temperature too long or the coating can get tacky.
Questions I Get Asked About This Recipe
Pumpkin Oreo Balls
Ingredients
Equipment
Method
- Blot the pumpkin puree dry, then crush the pumpkin spice Oreos (including filling) into fine crumbs in a food processor.
- Beat the cream cheese until smooth, then add blotted pumpkin puree, pumpkin pie spice, and cinnamon and mix until evenly combined.
- Fold the Oreo crumbs into the cream cheese mixture until fully combined, then refrigerate for 30 minutes.
- Scoop the chilled mixture into 1-inch balls and freeze for 20 minutes.
- Refrigerate until firm after dipping so the coating sets.
- Melt the white chocolate or orange candy melts, stirring until smooth; if using orange food coloring, stir it in while melted.
- Dip each frozen ball, letting excess drip, then top immediately with crushed Oreos before the chocolate sets.