Pumpkin patch dirt cups hit that sweet spot between playful and genuinely good: fluffy pumpkin mousse, a cool creamy tang, and a chocolate cookie crumble that keeps every spoonful from tasting one-note. The clear cups turn the whole thing into a tiny edible scene, which is half the fun, but the texture is what makes people go back for another cup. You get soft, airy filling layered with crunchy “soil,” then little bursts of candy pumpkin sweetness on top.
This version works because the pumpkin base is built like a quick mousse instead of a heavy pudding. Cream cheese gives it body and a little tang, while whipped topping keeps it light enough to layer cleanly in cups. The spices need to be balanced before the whipped topping goes in, since once the mixture is folded together you want to keep the stirring gentle so the filling stays fluffy. Chill time matters here too; it firms the layers just enough so the cups hold their shape when you add the dirt topping and decorations.
Below, you’ll find the small details that keep the mousse smooth, the crumbs crisp, and the decorations standing up instead of sinking into the filling.
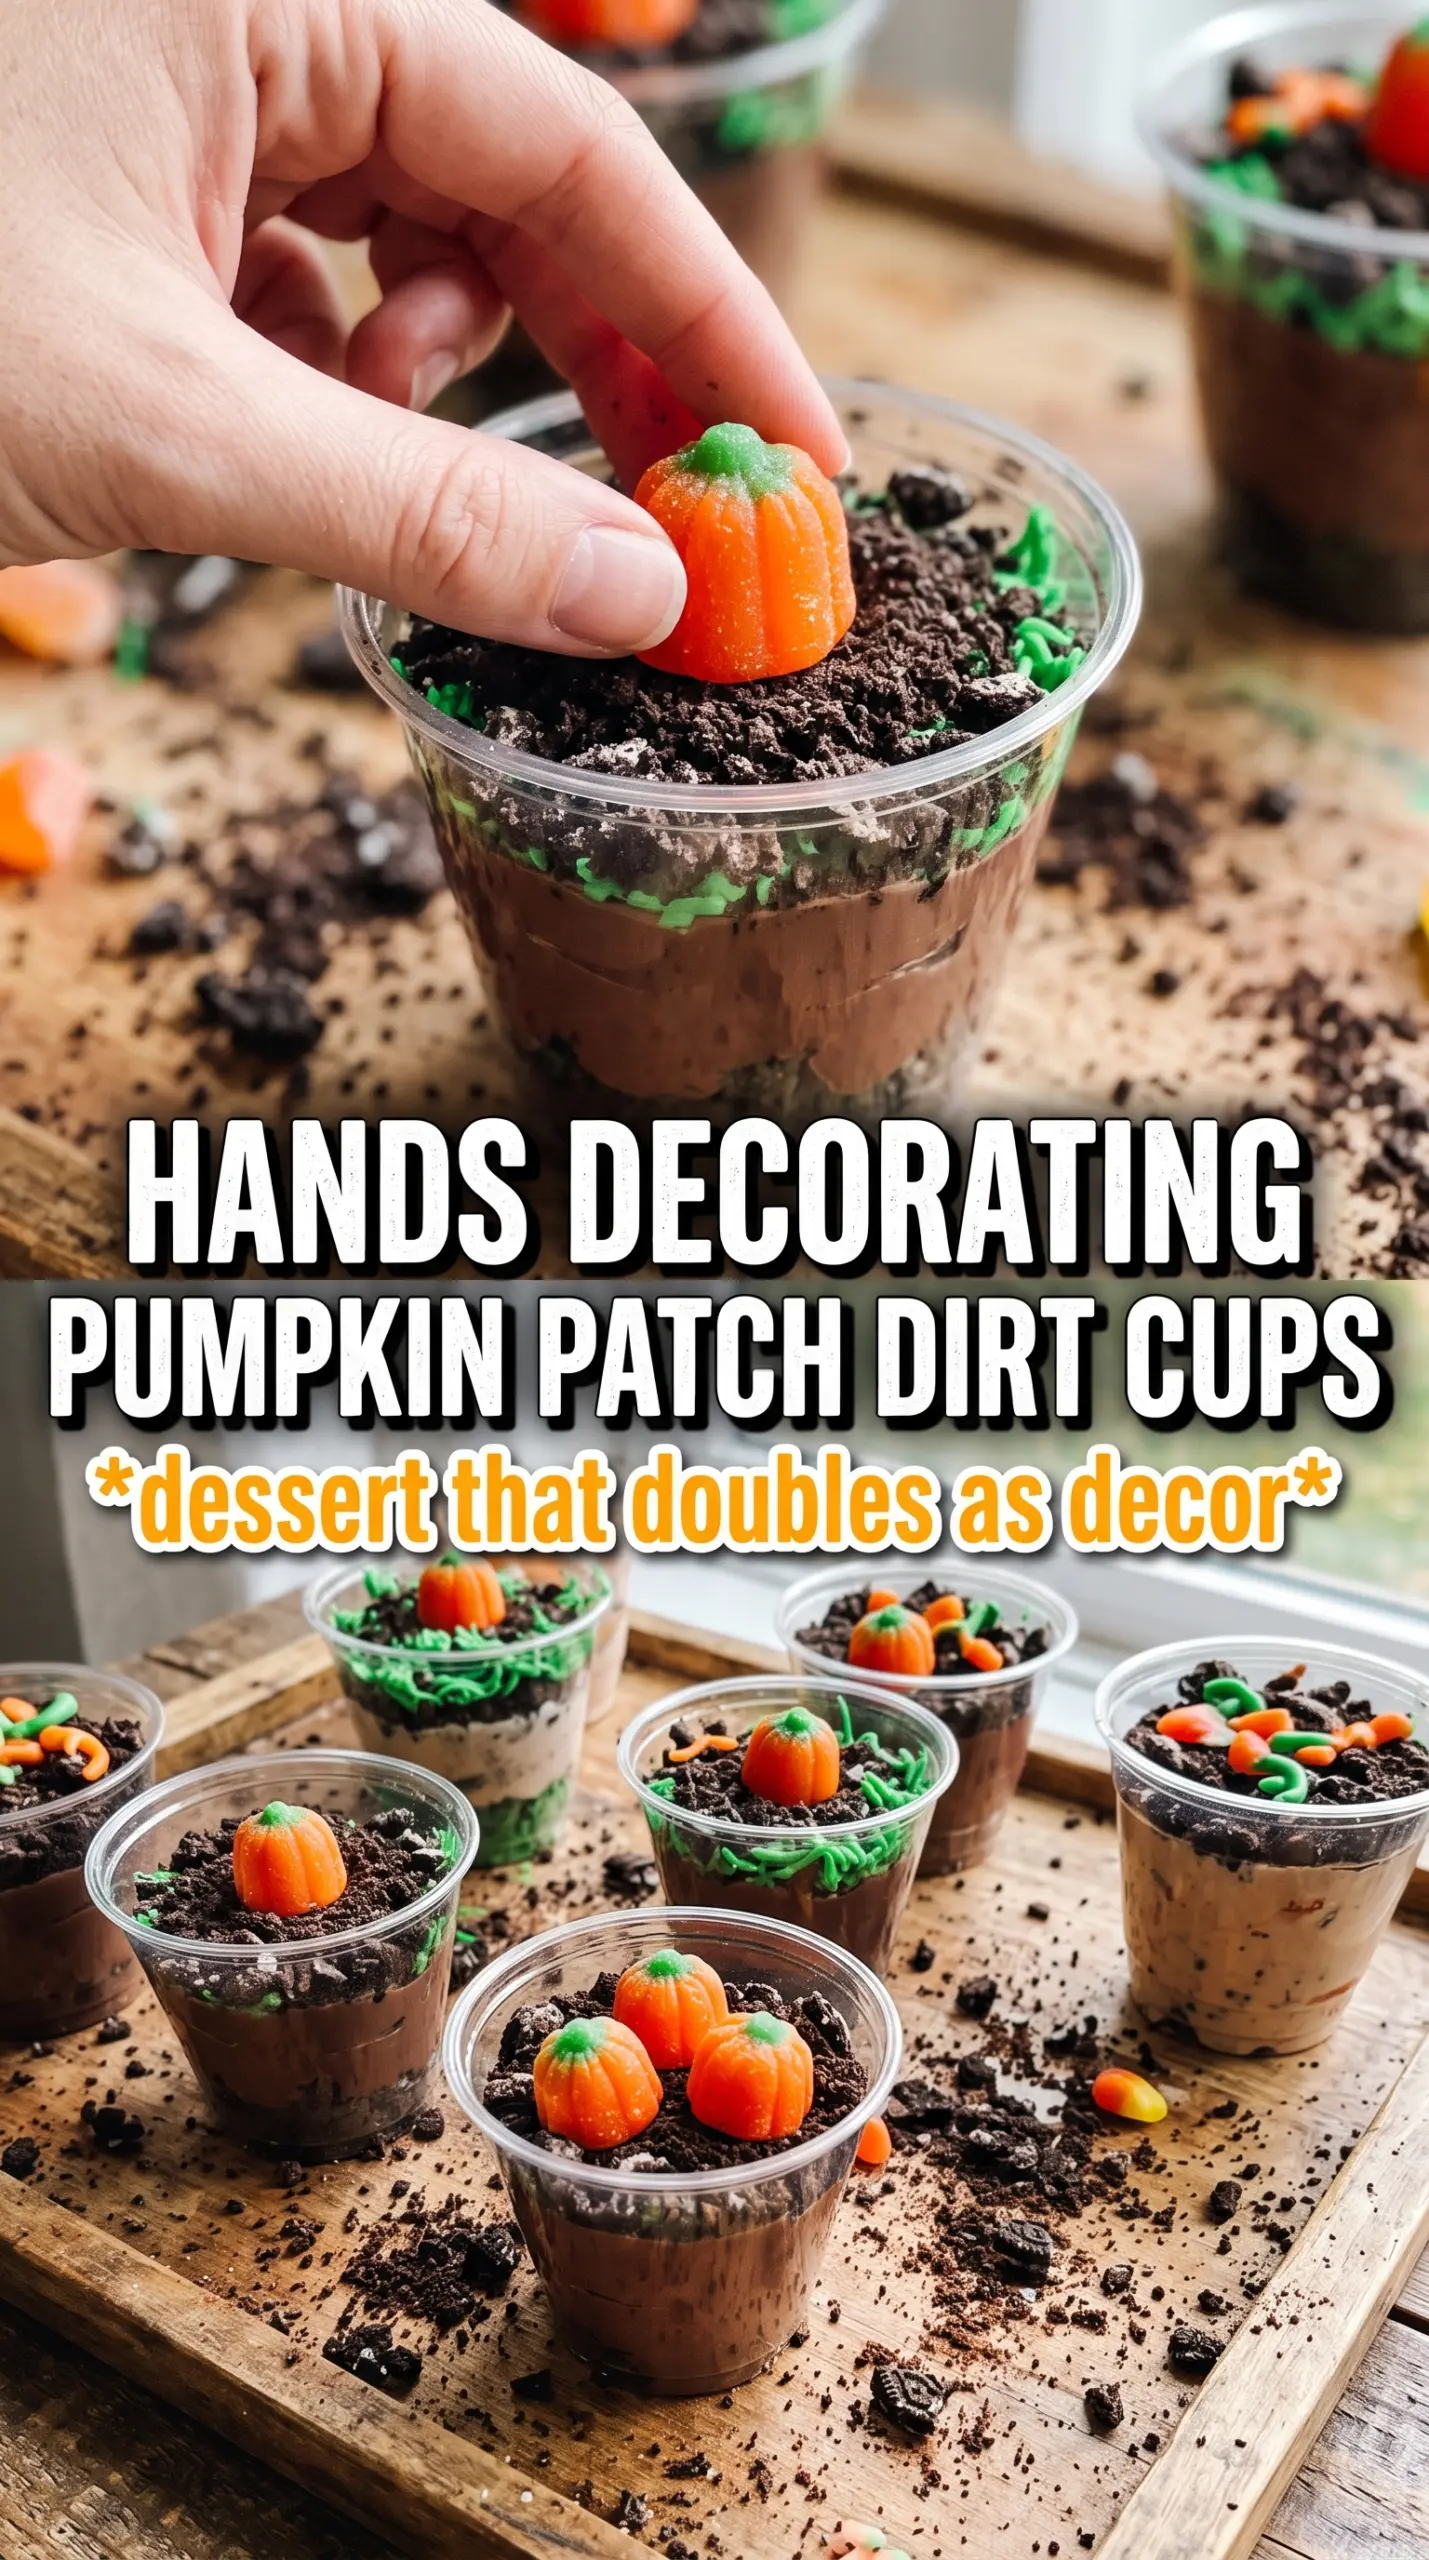
The pumpkin mousse set up beautifully after an hour in the fridge, and the Oreo crumbs stayed crunchy on top instead of getting soggy. My kids loved decorating their own cups with the candy pumpkins and gummy worms.
Save these Pumpkin Patch Dirt Cups for the next time you need a make-ahead dessert with fluffy pumpkin mousse, Oreo dirt, and cute candy-topper decorating.
The Part That Keeps the Layers from Turning Muddy
The trick with dirt cups is keeping the filling light enough to layer but sturdy enough to hold the decorations. If the pumpkin mixture is too loose, the Oreo crumbs sink and the cups turn into a gray mess instead of a defined patch. Softened cream cheese is the anchor here; it gives the mousse structure before the whipped topping goes in, and that structure is what lets the layers sit cleanly in the glass.
Another common problem is overmixing after the whipped topping is added. That knocks out the air and makes the filling dense. Fold it in until the streaks disappear and stop there. The goal is a mousse that holds a spoon mark for a moment, not a thick frosting.
- Cream cheese — This is what gives the filling enough body to layer. Let it soften all the way to room temperature so it beats smooth; cold cream cheese leaves little lumps that never fully disappear.
- Pumpkin puree — Use plain pumpkin puree, not pumpkin pie filling. Pie filling is already sweetened and spiced, which throws off the balance and makes the mousse taste muddled.
- Whipped topping — Cool Whip keeps the texture airy and stable. Fresh whipped cream can work, but it softens faster and the cups won’t hold as long in the fridge.
- Oreo crumbs — Crush them into fine crumbs for the dirt layer. Bigger chunks look rustic, but fine crumbs make the “soil” read clearly and settle better around the decorations.
- Pretzel sticks — These are the vine detail and the one decoration that adds a little salty crunch. Add them right before serving if you want them to stay crisp.
What Each Ingredient Is Actually Doing in This Recipe
- Primary ingredient (the star) — Quality matters most. Choose the best you can find.
- Cooking medium (oil, butter, or broth) — This carries flavors and prevents dryness.
- Seasonings (salt, pepper, spices, herbs) — Layer flavors so nothing overpowers. Build depth gradually.
- Aromatics (garlic, onion, herbs) — Cook with fat to bloom flavors. Become the foundation.
- Supporting ingredients — Complement the main ingredient without overpowering it.
- Sauce or liquid (if applicable) — Brings flavors together. Balance richness with acid.
- Acid (lemon, vinegar, wine, or other) — Brightens and prevents flat-tasting results.
- Final finish (garnish, glaze, or sauce) — Prevents one-dimensional taste and adds visual appeal.
Building the Pumpkin Mousse So It Stays Light
Smoothing the Base First
Beat the softened cream cheese on its own until it looks completely smooth and glossy. That first minute matters because any lumps left here get locked into the final mousse. Once the pumpkin, sugar, spice, cinnamon, and vanilla go in, beat only until the mixture looks even and pale orange. If you keep going too long, the filling can get loose instead of fluffy.
Folding in the Air
Add the whipped topping in two batches and fold it gently with a spatula. You want broad, slow turns from the bottom of the bowl so the mixture stays airy. If you stir like you’re mixing cake batter, the mousse tightens up and loses that light spoonable texture. Stop as soon as the color is uniform.
Layering the Cups
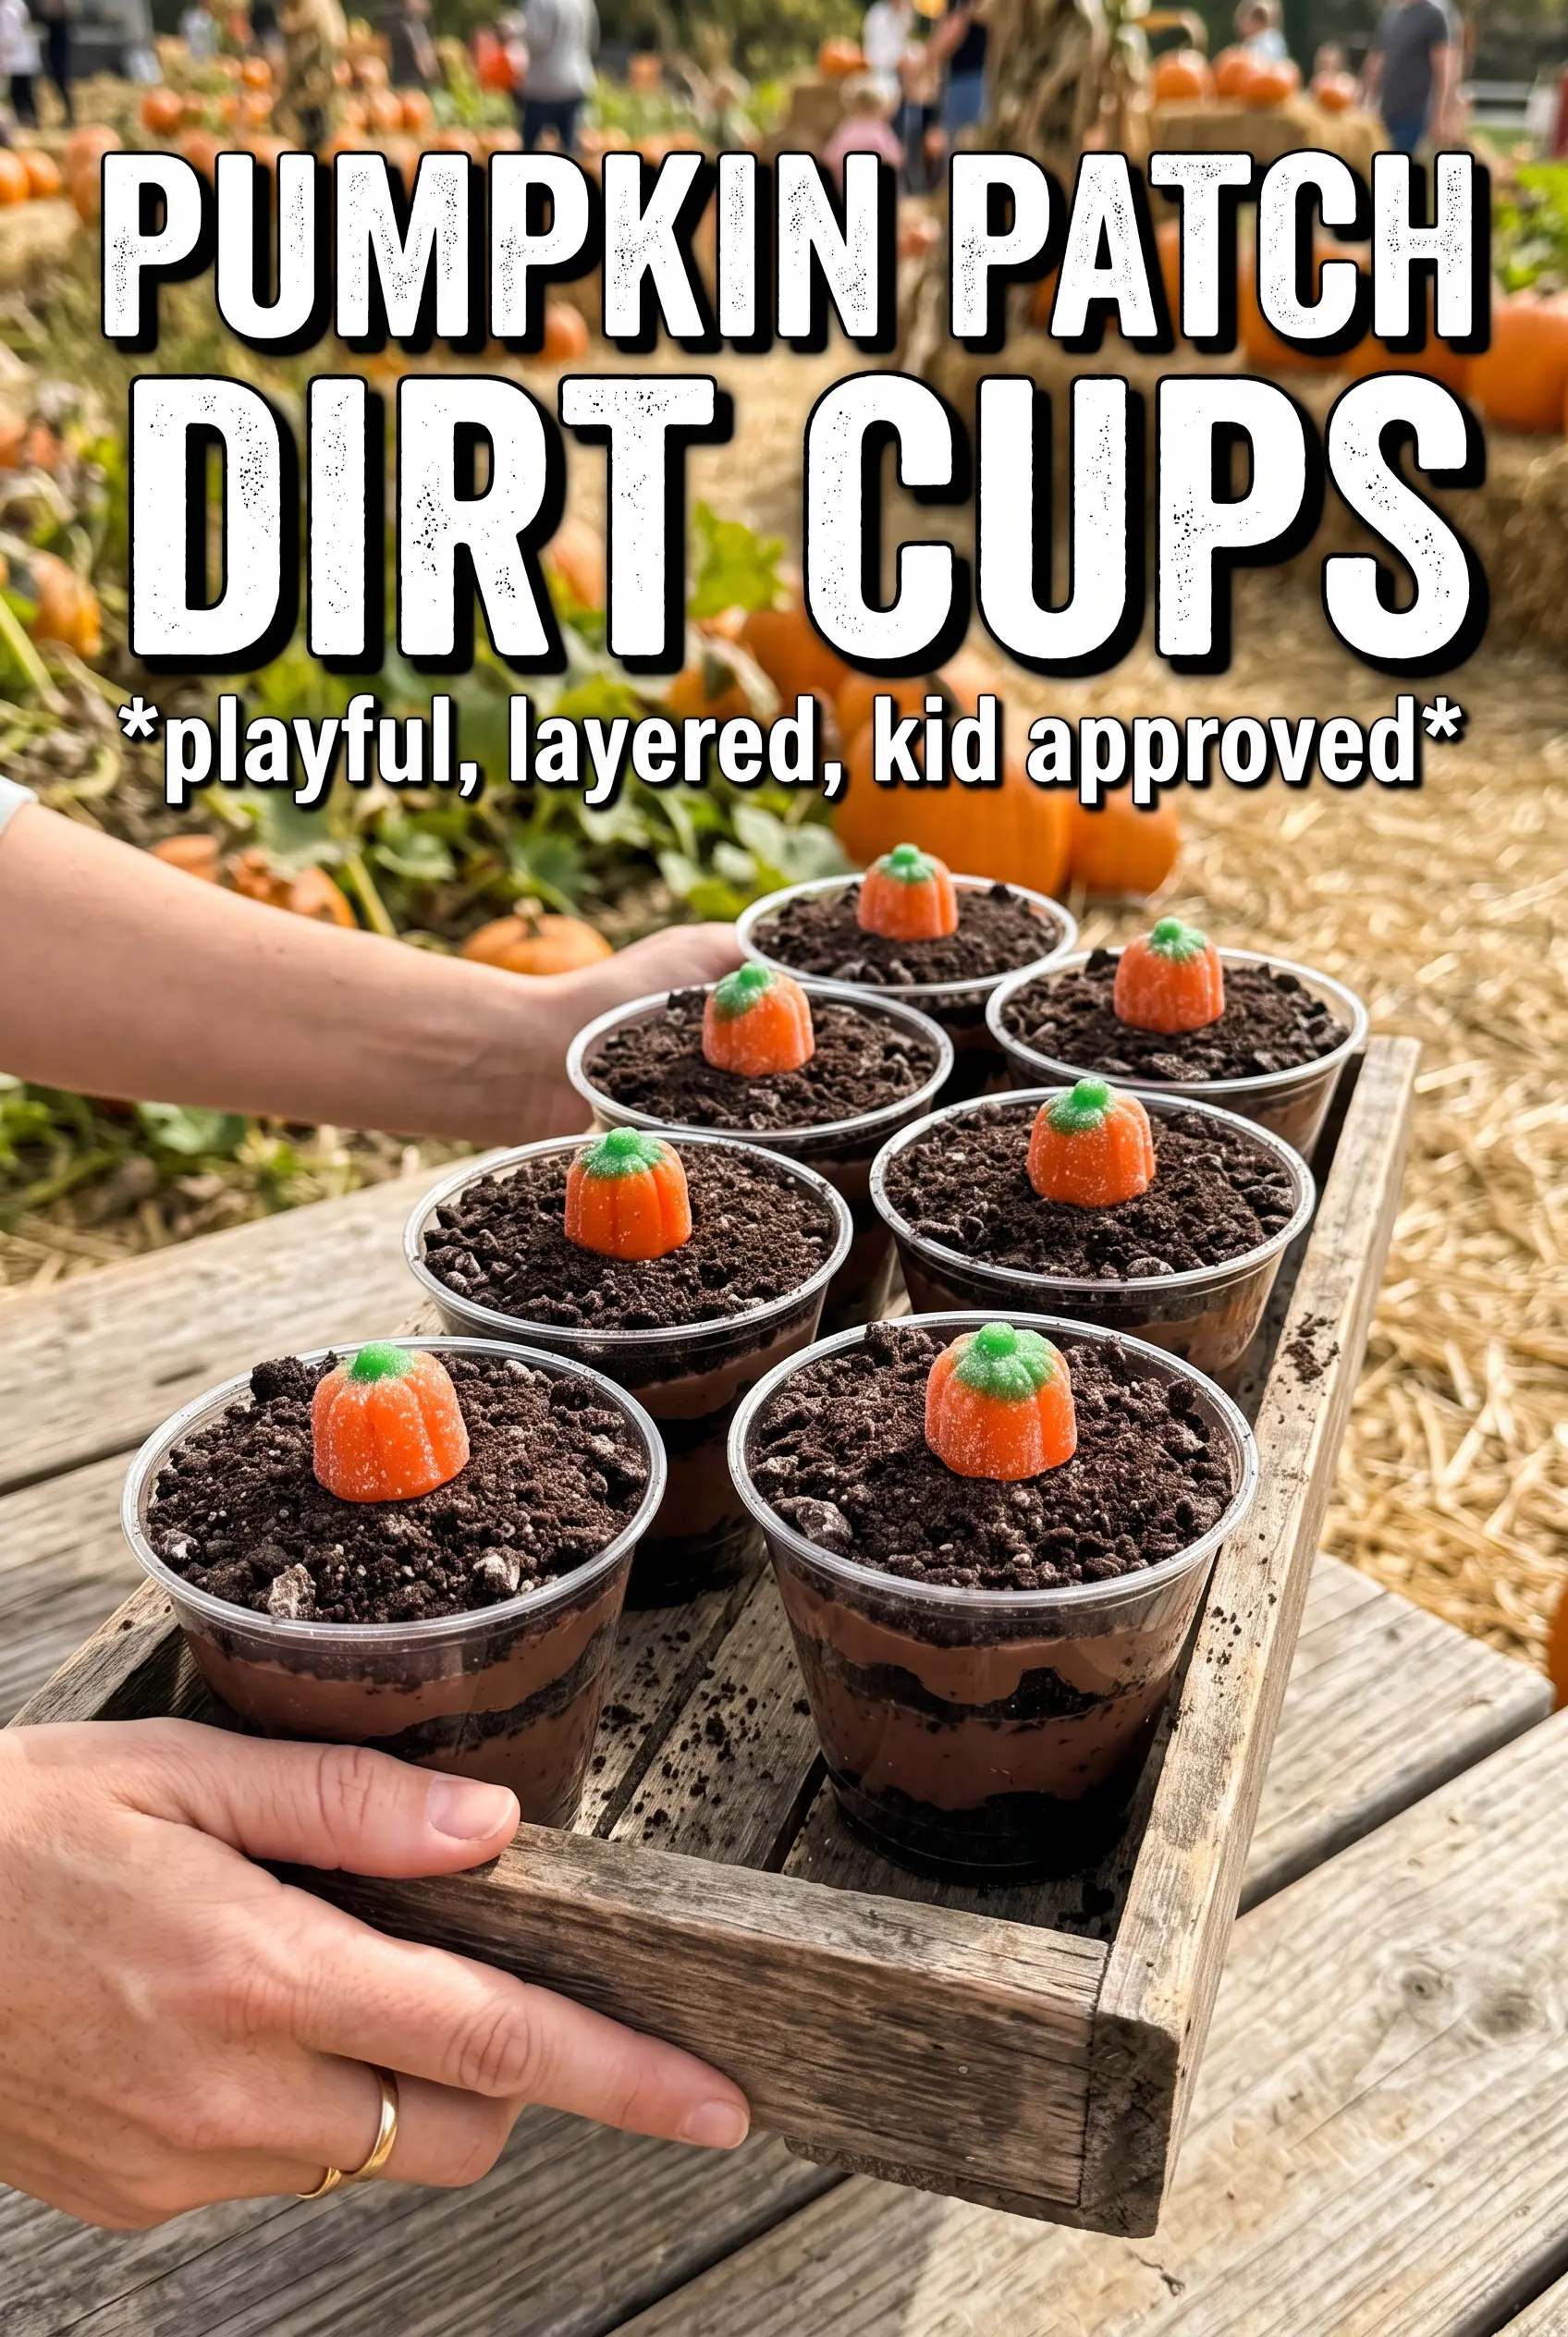
Spoon the mousse into clear cups, then add a layer of Oreo crumbs, then more mousse, and finish with another crumb layer on top. Press the crumbs in lightly, just enough to settle them, but don’t pack them down or they start looking muddy. The clear cups show off the stripes, so wipe the inside edges if any filling smears up the sides. Chill the cups before decorating so the layers set and the toppings sit on top instead of sliding around.
Decorating the Patch
Press the candy pumpkins into the top crumb layer, add a few gummy worms, and tuck in pretzel sticks last. The chilled mousse should be firm enough to support everything without collapsing. If you’re serving these later, hold the pretzels until the end so they keep their snap. The whole effect depends on the contrast between soft mousse, crunchy dirt, and those little candy details poking through.
How to Make These Dirt Cups Work for Different Occasions
Dairy-Free Version
Use a dairy-free cream cheese and a whipped topping made without dairy. The texture will still be creamy, but the tang will be a little softer, so keep the pumpkin spice and cinnamon as written. Chill time matters even more with this version because the filling firms up as it rests.
Make Them Ahead for a Party
Assemble the mousse layers a few hours ahead, then add the cookie crumbs and decorations close to serving time. If the crumbs sit on top too long, they soften a little, which blurs the dirt effect. Pre-fill the cups and keep the toppings separate for the cleanest look.
Chocolate-Forward Dirt Cups
Add a tablespoon or two of cocoa powder to the Oreo layer if you want the “soil” to taste deeper and more chocolatey. That makes the dessert lean a little more classic dirt cup while still keeping the pumpkin front and center. The filling stays the same, so the recipe doesn’t get heavier.
Storage and Reheating
- Refrigerator: Store covered for up to 3 days. The cookies soften over time, but the mousse stays creamy.
- Freezer: I don’t recommend freezing these. The whipped topping and cream cheese filling can turn grainy after thawing.
- Reheating: No reheating needed. Serve them cold from the fridge, and add pretzel sticks right before serving so they stay crisp.
Answers to the Questions Worth Asking
Pumpkin Patch Dirt Cups
Ingredients
Method
- Beat the cream cheese until smooth, then add pumpkin puree, powdered sugar, pumpkin pie spice, cinnamon, and vanilla and mix until fully combined (no lumps).
- Fold in the whipped topping until the mixture is light and evenly mixed.
- Layer into clear cups: spread pumpkin mousse, add a layer of Oreo crumbs, add more pumpkin mousse, then finish with Oreo crumbs on top to form the “dirt.”
- Refrigerate the cups for 1 hour to set the mousse.
- Press candy pumpkins into the Oreo dirt so they peek up from the soil.
- Arrange green gummy worms so they poke out of the dirt, and place pretzel sticks as vines.