These pumpkin spice waffles bake up with crisp edges, a tender center, and enough warm spice to make the whole kitchen smell like a bakery. The pumpkin keeps them soft without turning them heavy, and the whipped egg whites give the batter lift so each waffle comes out light instead of dense. Topped with cinnamon cream cheese drizzle, they hit that sweet spot between cozy and brunch-worthy.
The key is treating the batter like a waffle batter, not a quick stir-together pancake mix. Pumpkin puree adds moisture, so the dry ingredients need enough structure to handle it, and the separated eggs help with both texture and rise. If you rush the mixing or pour in the whites before the batter is ready, you lose the airy pockets that make these waffles worth repeating.
Below, I’ll walk through the one step that keeps them crisp, the ingredient choices that matter most, and the small adjustments that make these easy to adapt for different diets or make-ahead breakfasts.
The waffles came out crisp on the outside and fluffy inside, and the cinnamon cream cheese drizzle set them off perfectly. I followed the egg-white step exactly and it made a huge difference.
Save these pumpkin spice waffles for the mornings when you want crisp edges, fluffy centers, and that cinnamon cream cheese drizzle on top.
The Trick to Crisp Pumpkin Waffles Without a Soggy Middle
Pumpkin puree is the reason these waffles can go from light and crisp to soft and heavy if the batter gets handled the wrong way. The batter needs enough structure to support the moisture from the pumpkin, and the separated eggs do a lot of that work. The whipped whites add lift without making the waffles cakey, which is why this recipe tastes airy instead of bready.
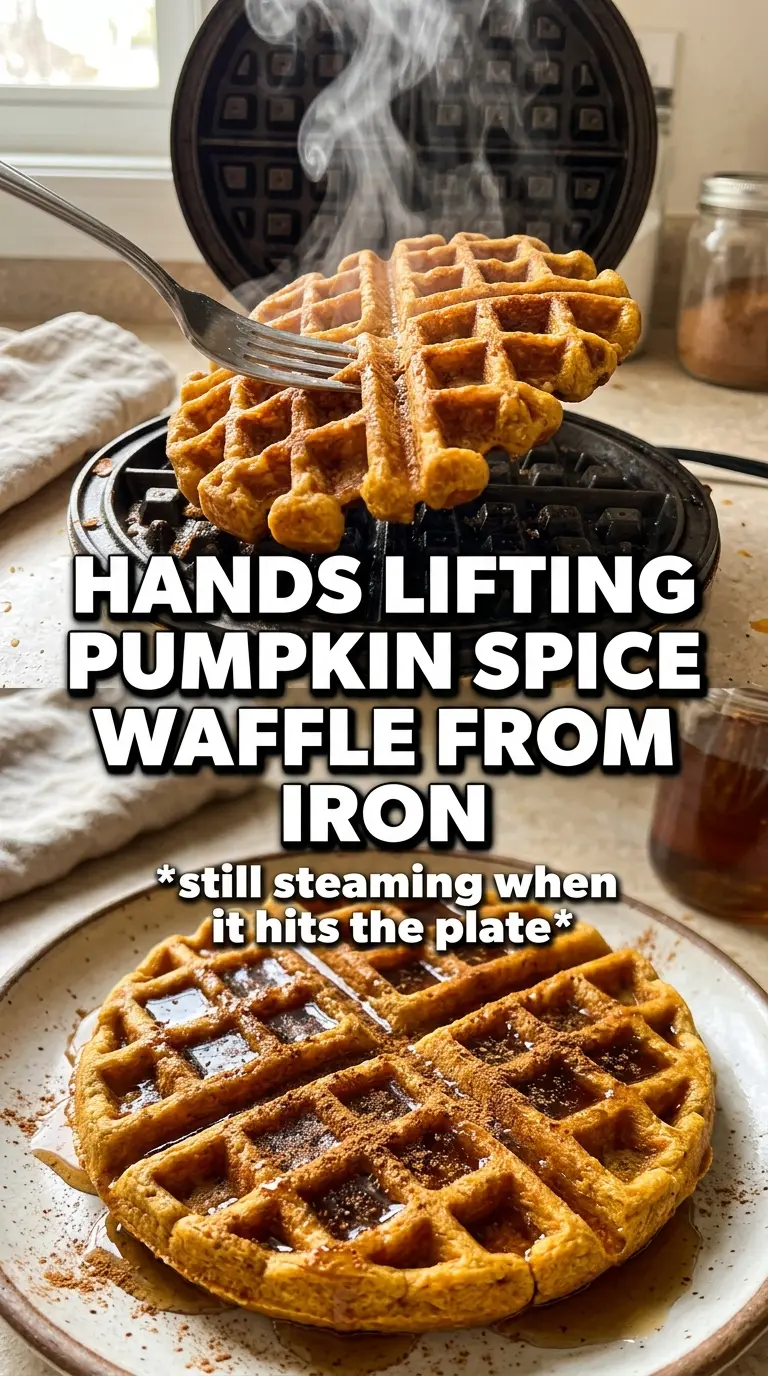
The other piece is heat. A waffle iron that isn’t fully preheated will steam the batter before the outside can set, and that’s how you end up with pale waffles that never crisp up. Cook them until the steam drops and the waffles release with a deep golden color. If they cling, they need another minute.
What the Pumpkin, Buttermilk, and Spices Are Doing Here
- Pumpkin puree — This gives the waffles their color, moisture, and that soft, custardy center. Use plain pumpkin puree, not pumpkin pie filling, or the sweetness and seasoning will throw off the balance.
- Buttermilk — The acidity helps the baking soda do its job, which is part of what keeps the waffles from tasting flat. If you don’t have it, mix whole milk with a tablespoon of lemon juice or vinegar and let it sit for 5 minutes, but the texture won’t be quite as plush.
- Eggs, separated — The yolks add richness and the whites are the lift. Whipping the whites to stiff peaks is not extra work for nothing; it gives the batter structure without making the crumb dense.
- Pumpkin pie spice, cinnamon, ginger, and cloves — The spice blend needs a little backbone here because pumpkin is mild on its own. Cinnamon leads, while the ginger and cloves keep the flavor warm instead of one-note.
- Butter — Melted butter adds flavor and helps the waffles brown. Neutral oil works in a pinch, but the waffles lose that rich finish.
- Cream cheese drizzle — This is the payoff on top. Beat it until smooth before thinning with milk; if the cream cheese is cold, you’ll get lumps that don’t dissolve no matter how much you stir.
Building the Batter So the Waffles Stay Light
Whisk the Dry Mix Thoroughly
Start by whisking the flour, sugar, baking powder, baking soda, salt, and spices until the color looks even. That matters more than it sounds, because cinnamon and pumpkin spice can clump, and clumps mean uneven bites later. You want the leaveners distributed before any wet ingredients hit the bowl. If you skip this, one waffle may rise beautifully while the next stays dense.
Mix the Pumpkin Base Separately
Whisk the pumpkin puree, buttermilk, egg yolks, melted butter, and vanilla until smooth and fully blended. The butter should be warm enough to stay liquid but not hot, or it can start cooking the yolks in streaks. A smooth base helps the dry ingredients hydrate evenly, which keeps the final batter from turning gluey.
Fold in the Whites at the End
Add the wet ingredients to the dry, then fold in the beaten egg whites with a light hand. Stop as soon as you no longer see dry flour; a few streaks are better than overmixing. The batter should look thick and airy, not pourable like crepe batter. If you beat it until perfectly smooth, you beat the air out of it.
Cook Until Deep Gold and Crisp
Grease the waffle iron lightly, then scoop in enough batter to fill the plates without overflowing. Cook until the outside is a deep golden brown and the steam mostly stops coming out of the iron, usually 4 to 5 minutes depending on the machine. Pull the waffles out too early and they’ll soften as they cool. Set them on a wire rack, not a plate, so the bottoms don’t trap steam.
How to Adapt These Waffles for Different Mornings
Dairy-Free Version
Swap the buttermilk for a dairy-free milk mixed with 1 tablespoon lemon juice, use plant-based butter, and replace the cream cheese drizzle with a powdered sugar glaze made with dairy-free milk. The waffles will still rise and brown well, but the topping loses a little tang and richness.
Gluten-Free Waffles
Use a good 1:1 gluten-free flour blend in place of the all-purpose flour. The batter will be a little more delicate, so let the waffles cook until they release cleanly before opening the iron. They may be slightly more tender and a little less crisp at the edges, but the flavor holds up well.
Make-Ahead and Freezer-Friendly
Cook the waffles all the way through, cool them on a rack, and freeze them in a single layer before bagging. They reheat better from frozen than from the fridge because they avoid going stale and soft at the same time. Re-crisp them straight from the freezer in a toaster or a 375°F oven until hot and crisp again.
Extra-Spiced Brunch Version
Add a small pinch more cloves or ginger if you want the spice to come through more sharply. Don’t go overboard, because cloves can take over fast and make the waffles taste bitter. This version works well if you’re serving them with whipped cream or maple syrup instead of the cream cheese drizzle.
Storage and Reheating
- Refrigerator: Store in an airtight container for up to 3 days. They soften a bit in the fridge, especially once the pumpkin moisture settles in.
- Freezer: Freeze cooked waffles for up to 2 months. Cool them completely first and separate layers with parchment so they don’t stick together.
- Reheating: Toast from cold or frozen until the outside crisps again. The common mistake is microwaving them, which makes the texture gummy and wipes out the crisp edges.
Questions I Get Asked About This Recipe

Pumpkin Spice Waffles
Ingredients
Equipment
Method
- Preheat the waffle iron. Separate the eggs, then beat the whites until they form stiff peaks (they should hold their shape when you lift the beaters).
- Whisk together the all-purpose flour, sugar, baking powder, baking soda, salt, pumpkin pie spice, cinnamon, ginger, and cloves in a large bowl until evenly combined.
- Whisk the pumpkin puree, buttermilk, egg yolks, melted unsalted butter, and vanilla extract in a second bowl until smooth and uniform.
- Fold the wet mixture into the dry mixture just until no dry streaks remain. Gently fold in the beaten egg whites to keep the batter airy.
- Lightly grease the waffle iron, then pour in batter and cook until deeply golden and crispy, 4-5 minutes per batch. The waffles should look set and browned at the edges.
- Beat the cinnamon cream cheese drizzle ingredients—cream cheese, powdered sugar, milk, and cinnamon—until smooth and thick, then drizzle over the warm waffles.