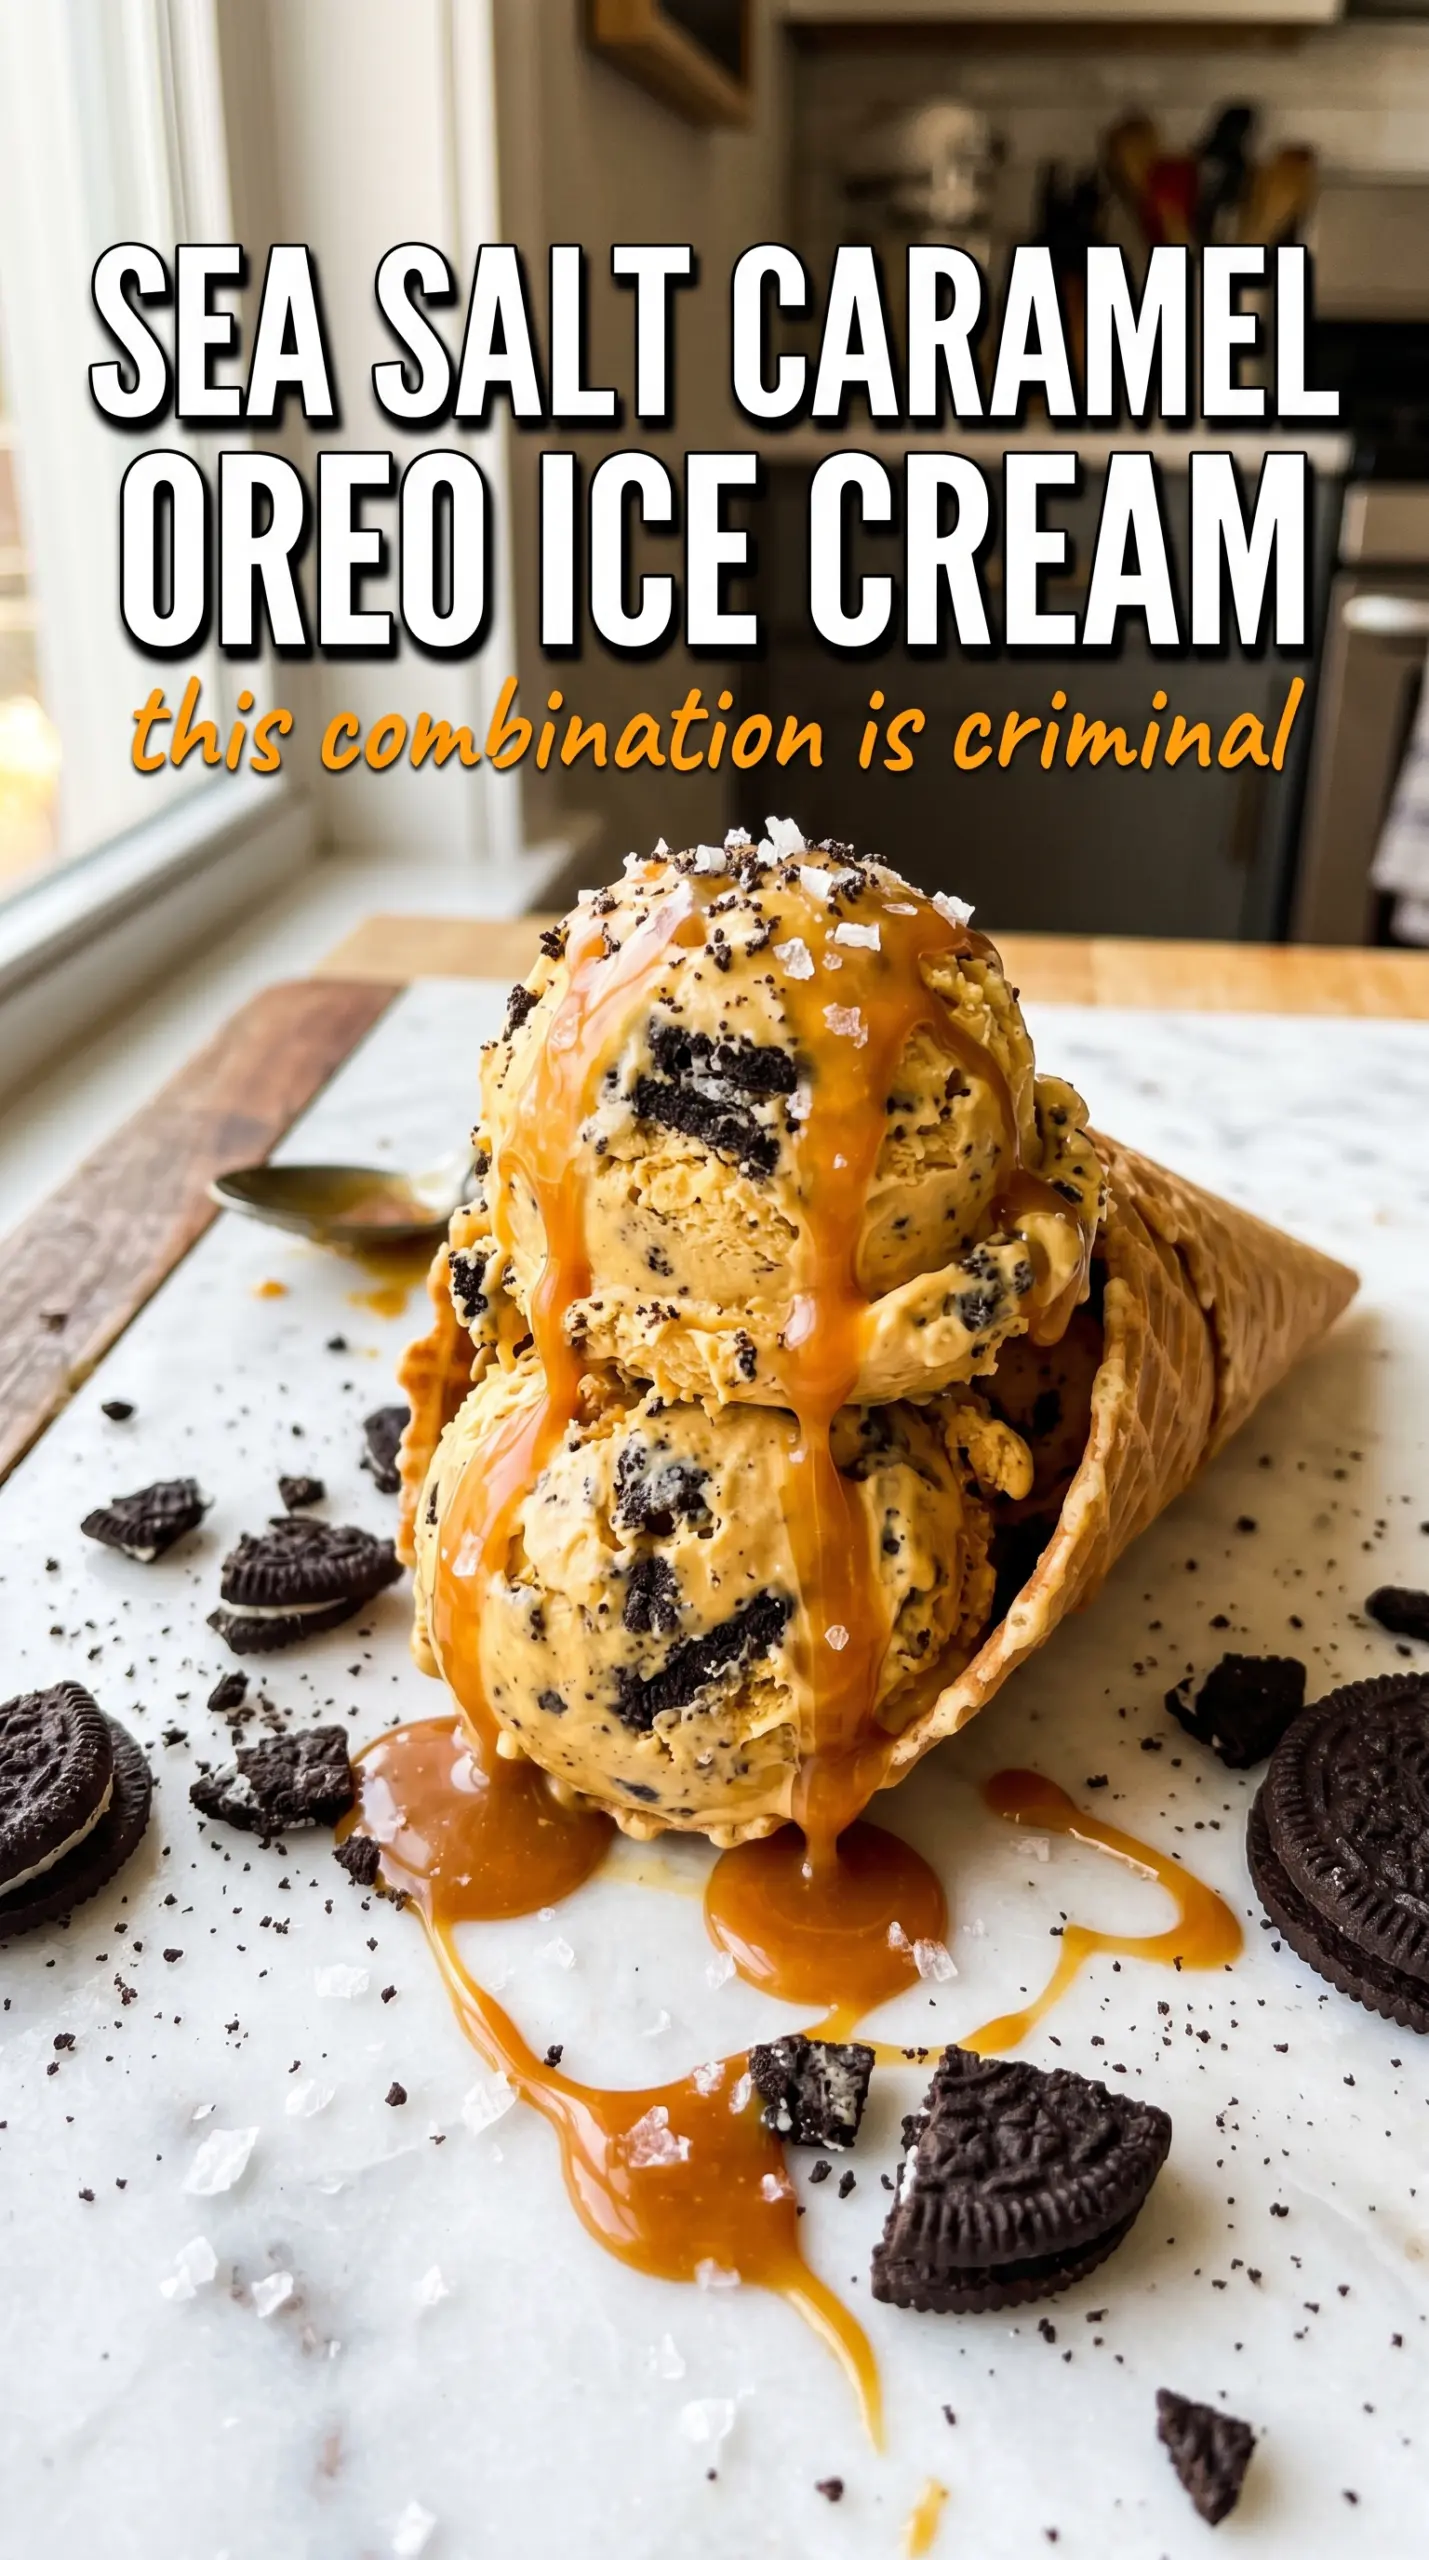
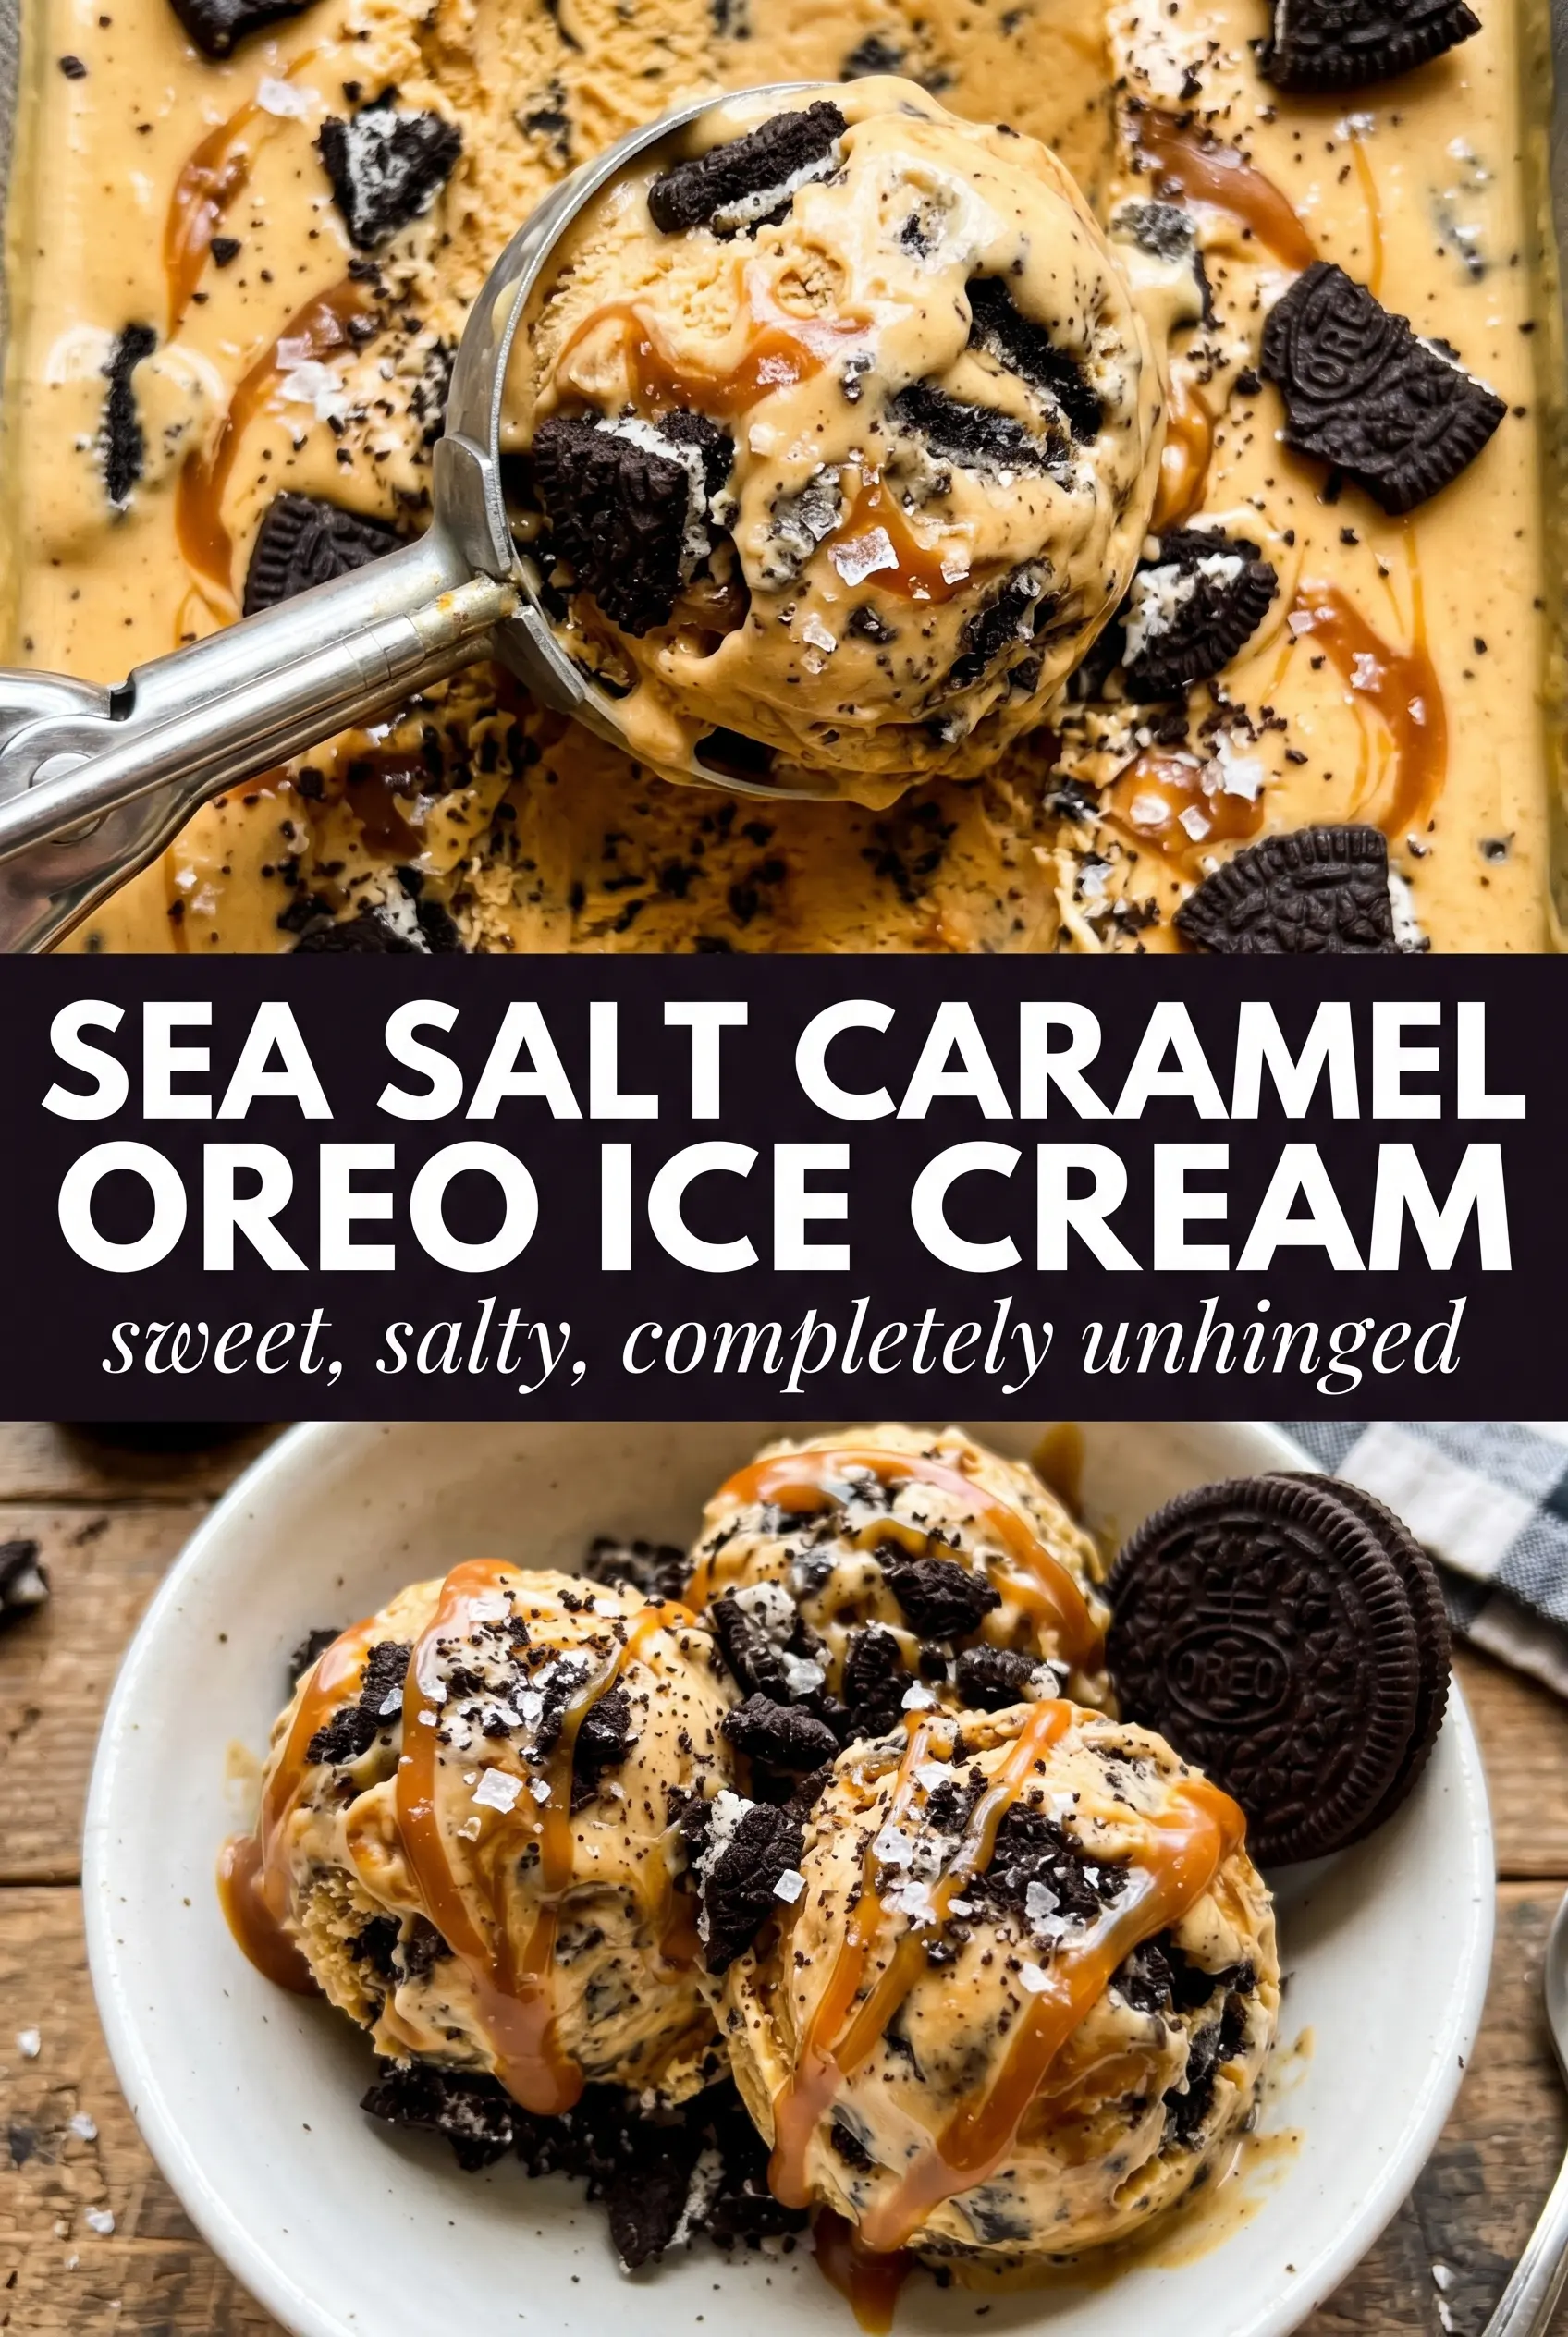
Glossy ribbons of caramel, crunchy Oreo pieces, and a scoop that lands somewhere between salty, sweet, and ice-cold creaminess make this sea salt caramel Oreo ice cream the kind of dessert people remember. The base freezes smooth instead of icy, and the cookies stay in distinct, satisfying chunks instead of disappearing into the mixture. Every bite gets a little salt to sharpen the caramel and keep the whole thing from tasting one-note.
The trick is keeping the texture light before it goes into the freezer. Whipped cream gives this no-churn ice cream its structure, while sweetened condensed milk keeps the base soft enough to scoop straight from the freezer without an ice cream machine. The caramel gets whisked into the base, then drizzled in layers, which gives you those pockets of rich, sticky sweetness instead of a blended brown swirl that tastes flat.
Below you’ll find the exact folding order that keeps the mixture airy, plus a few smart ways to change the mix-ins without throwing off the texture. If you’ve ever pulled a no-churn ice cream from the freezer and found it too hard or grainy, the details here matter.
The caramel stayed swirled instead of sinking, and the Oreo pieces stayed crunchy enough to give each bite some texture. I froze it overnight and it scooped beautifully the next day.
Like the salty caramel swirls and Oreo crunch? Save this no-churn sea salt caramel Oreo ice cream for the next time you want a frozen dessert with bold texture and an easy finish.
The Trick to Keeping the Caramel Swirls Separate
The biggest mistake with no-churn ice cream is stirring the caramel straight through the base until it disappears. That gives you a uniformly sweet mixture, but it also blurs the contrast that makes this dessert interesting. Caramel needs to stay in ribbons and pockets so each spoonful changes as you eat it.
The other thing that matters is the whipped cream. It has to reach stiff peaks before you fold anything in, because that trapped air is what keeps the final texture scoopable. If the cream is soft, the base freezes denser and the Oreos can weigh it down. Fold gently and stop as soon as the mixture looks combined. Overmixing knocks out the air you just worked to build.
- Whipped cream — This is the structure of the whole dessert. Heavy cream whips best when it’s cold, and it needs to reach stiff peaks so the finished ice cream sets creamy instead of icy.
- Sweetened condensed milk — This gives the base sweetness and keeps it soft in the freezer without an ice cream maker. There isn’t a true substitute that behaves the same way, so this is the ingredient to keep as written.
- Caramel sauce — A thick caramel sauce works better than a thin one because it stays layered instead of dissolving into the base. If your sauce is loose, chill it first so it drizzles cleanly.
- Oreos — Roughly crushed cookies give the best texture. If you crush them too fine, they melt into the base and you lose the cookie bite.
What Each Ingredient Is Actually Doing in This Ice Cream
- Base ingredient (cream, milk, or custard) — This provides the foundation and richness. Quality matters.
- Sweetener (sugar, honey, or condensed milk) — This sweetens and prevents ice crystals. The ratio is critical.
- Flavor element (vanilla, fruit, chocolate, coffee, or other) — This defines the ice cream personality. Use quality ingredients.
- Egg yolks (if making custard base) — These create richness and silky texture. Optional but elevates ice cream.
- Churning (if using ice cream maker) — This incorporates air and prevents ice crystals. Critical for smooth texture.
- Freezing temperature and time — Proper freezing prevents rock-hard texture. Store at 0°F or below.
- Mix-ins (chocolate, cookies, fruit, or swirls) — These add texture and prevent one-dimensional flavor. Add near end of churning.
- Serving temperature (slightly soft, not rock hard) — This provides creamy mouthfeel. Remove from freezer 5 minutes before serving.
How to Build the Base Without Losing the Air
Whipping the Cream to the Right Point
Pour the heavy cream into a cold bowl and whip until stiff peaks hold their shape when you lift the beaters. The surface should look billowy and the cream should stand up instead of slumping. Stop there. If you whip past that point, the cream can start to look grainy, and once that happens the final texture turns less smooth.
Making the Caramel Mixture
Whisk the sweetened condensed milk, caramel sauce, vanilla, and sea salt together until the mixture is smooth and glossy. The salt should taste present but not harsh; it’s there to sharpen the caramel, not bury it. If you use a very thick caramel, whisk it well so no streaks remain before it goes into the cream.
Folding and Layering the Cookies
Fold the caramel mixture into the whipped cream with a spatula using broad, gentle strokes. Stop when only a few streaks remain, then add half the Oreos and fold just enough to distribute them. For the pan, alternate spoonfuls of the ice cream base with the remaining cookies and extra caramel, then finish with a final drizzle and a pinch of flaky salt. That layering keeps some cookies crisp and creates those caramel pockets that make each scoop more interesting.
Freezing Until Firm
Press a piece of parchment or plastic wrap directly against the surface before freezing if your container doesn’t have a tight lid. Freeze for at least 6 hours, but overnight is better if you want clean scoops. If you serve it too early, the center will be soft and the caramel layers can slump instead of holding their shape.
How to Adapt This for Different Freezers and Different Sweetness Levels
Dairy-Free Version
Use a dairy-free whipping cream and a sweetened condensed coconut milk that whips and freezes well. The texture will be a little less rich and the coconut note will show through, but the caramel and Oreo flavor still carries the dessert.
Extra Caramel Swirl
If you want bigger caramel pockets, freeze the base for 30 to 40 minutes, then drizzle on a little more caramel and swirl lightly with a knife. Doing it at the beginning usually makes the sauce sink; waiting until the base has started to set keeps the ribbons visible.
Gluten-Free Swap
Use certified gluten-free chocolate sandwich cookies in place of the Oreos. The texture stays the same, and since the cookies are folded in at the end, the swap doesn’t change the base at all.
Less Sweet Finish
Cut the caramel sauce in the base to 2 tablespoons and keep the rest for layering and topping. You’ll still get the caramel flavor, but the salt will read a little cleaner and the dessert won’t lean as heavily into sweetness.
Storage and Reheating
- Refrigerator: This ice cream isn’t meant for the fridge. It will melt quickly and lose its structure, so keep it frozen until serving.
- Freezer: Store tightly covered for up to 2 weeks for the best texture. After that, the cookies soften and the caramel starts to get a little icy around the edges.
- Reheating: There’s no reheating here. Let the pan sit at room temperature for 5 to 10 minutes before scooping so the edges loosen without turning the whole dessert slushy.
Questions I Get Asked About This Recipe
Sea Salt Caramel Oreo Ice Cream
Ingredients
Equipment
Method
- Whip the heavy cream until stiff peaks form, about 3–5 minutes on medium-high, and look for holdable peaks that stand straight up.
- Whisk the sweetened condensed milk, caramel sauce, vanilla extract, and sea salt together until smooth and glossy.
- Fold the condensed milk mixture gently into the whipped cream until just combined, stopping as soon as no white streaks remain.
- Fold in half of the roughly crushed Oreo cookies, leaving some cookie bits visible throughout the batter.
- Layer the ice cream mixture into a 9x5 loaf pan and add the remaining Oreo cookies and extra caramel drizzled between layers.
- Finish by drizzling extra caramel sauce over the top and sprinkling flaky sea salt for a salty-sweet finish.
- Freeze at least 6 hours or overnight until firm, then scoop and serve straight from the freezer.