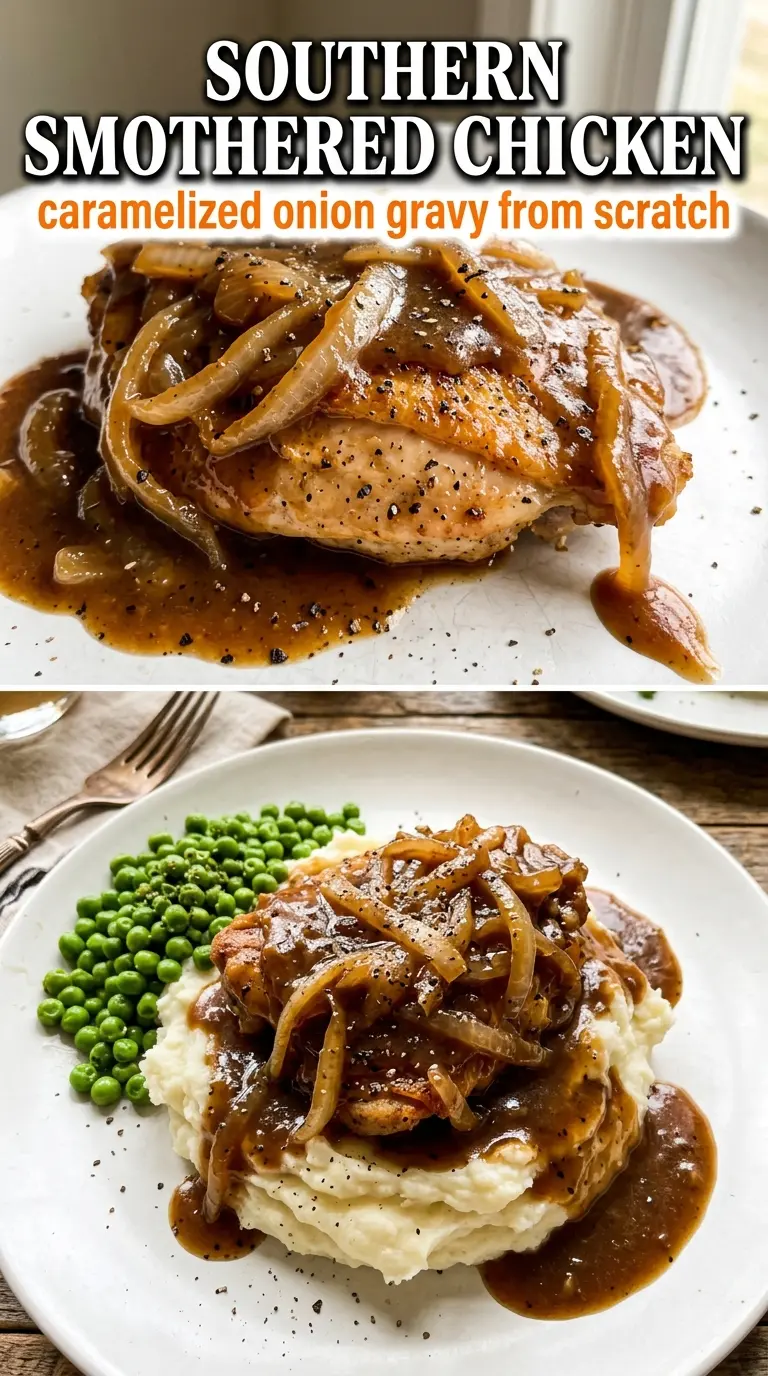
Fork-tender chicken thighs under a deep onion gravy are the kind of skillet dinner that earns its place in the regular rotation fast. The skin turns deeply golden first, then the onions and mushrooms take over and build a sauce that tastes slow-cooked even though it comes together in about half an hour. The best part is how the gravy clings to the chicken instead of pooling thinly at the bottom of the pan.
What makes this version work is the order. The chicken is seared hard enough to leave browned bits behind, then the onions cook long enough to turn sweet and jammy before the flour and broth go in. That’s what gives the gravy its color and body. A splash of Worcestershire and a little cream round it out without turning the sauce heavy or bland.
Below, I’ve included the parts that matter most: how to keep the gravy from turning pasty, why the chicken goes back in skin-side up, and a few smart swaps if you need to adjust for what’s in your kitchen.
The gravy thickened up beautifully and the chicken stayed juicy. I served it over mashed potatoes, and even the mushrooms disappeared first.
Save this smothered chicken for the nights when you want golden skillet chicken and rich onion gravy without a long simmer.
The Part Most People Rush: Browning the Chicken Before the Gravy
If the chicken goes into the skillet pale, the gravy has to carry the whole dish on its own. That works only on paper. Here, the sear is doing double duty: it crisps the skin and leaves browned fond behind for the onions and broth to pick up later. Those bits are what give the sauce its deep, cooked-all-day taste.
The other trap is crowding the pan or moving the thighs too soon. Let the skin sit undisturbed until it releases on its own and turns a deep golden brown with some darker spots at the edges. If you flip too early, the skin sticks and tears, and you lose both texture and flavor.
- Chicken thighs — Bone-in, skin-on thighs stay juicy through the simmer and hold up to the gravy better than breasts. Breasts can work, but they need less simmering time and dry out faster.
- Smoked paprika — This adds a deeper, rounder note than regular paprika. It supports the gravy without turning the dish smoky in a barbecue way.
- Cremini mushrooms — They bring a meaty, savory base and help the gravy taste fuller. White button mushrooms work too, but they’re milder and need a little more browning to build the same depth.
- Heavy cream — This softens the sauce and gives it that silky finish. Half-and-half can work in a pinch, but add it off the heat if you want the best chance of keeping the gravy smooth.
What Each Ingredient Is Actually Doing in This Recipe
- Primary ingredient (the star) — Quality matters most. Choose the best you can find.
- Cooking medium (oil, butter, or broth) — This carries flavors and prevents dryness.
- Seasonings (salt, pepper, spices, herbs) — Layer flavors so nothing overpowers. Build depth gradually.
- Aromatics (garlic, onion, herbs) — Cook with fat to bloom flavors. Become the foundation.
- Supporting ingredients — Complement the main ingredient without overpowering it.
- Sauce or liquid (if applicable) — Brings flavors together. Balance richness with acid.
- Acid (lemon, vinegar, wine, or other) — Brightens and prevents flat-tasting results.
- Final finish (garnish, glaze, or sauce) — Prevents one-dimensional taste and adds visual appeal.
Building the Gravy Without Losing the Browned Bits
Seasoning and Searing the Chicken
Pat the chicken dry before the seasoning goes on, or the spices slide off and the skin steams instead of browns. Lay the thighs skin-side down in hot oil and leave them alone for 6 to 7 minutes until the skin turns a deep golden brown. If the pan is crowded, the chicken will release moisture and the skin will go soft, so cook in batches if your skillet is tight. Pull the chicken out once the first side is well colored; it finishes cooking later in the gravy.
Caramelizing the Onions and Mushrooms
The onions need time, not just heat. Cook them over medium heat until they soften, shrink, and pick up browned edges, then add the mushrooms and let their liquid cook off before the garlic goes in. If you add the garlic too soon, it can burn while the onions are still working toward sweetness. You want the vegetables tender and glossy, with the bottom of the pan showing dark spots that will dissolve into the sauce.
Turning the Skillet into Gravy
Sprinkle the flour over the vegetables and stir for a full minute so it loses that raw flour taste. Then whisk in the broth slowly, a little at a time, scraping the pan as you go so the browned bits dissolve into the liquid instead of staying stuck. If the sauce looks lumpy, keep whisking before adding the cream; rushing the broth in all at once is the fastest way to trap flour clumps.
Finishing the Chicken in the Sauce
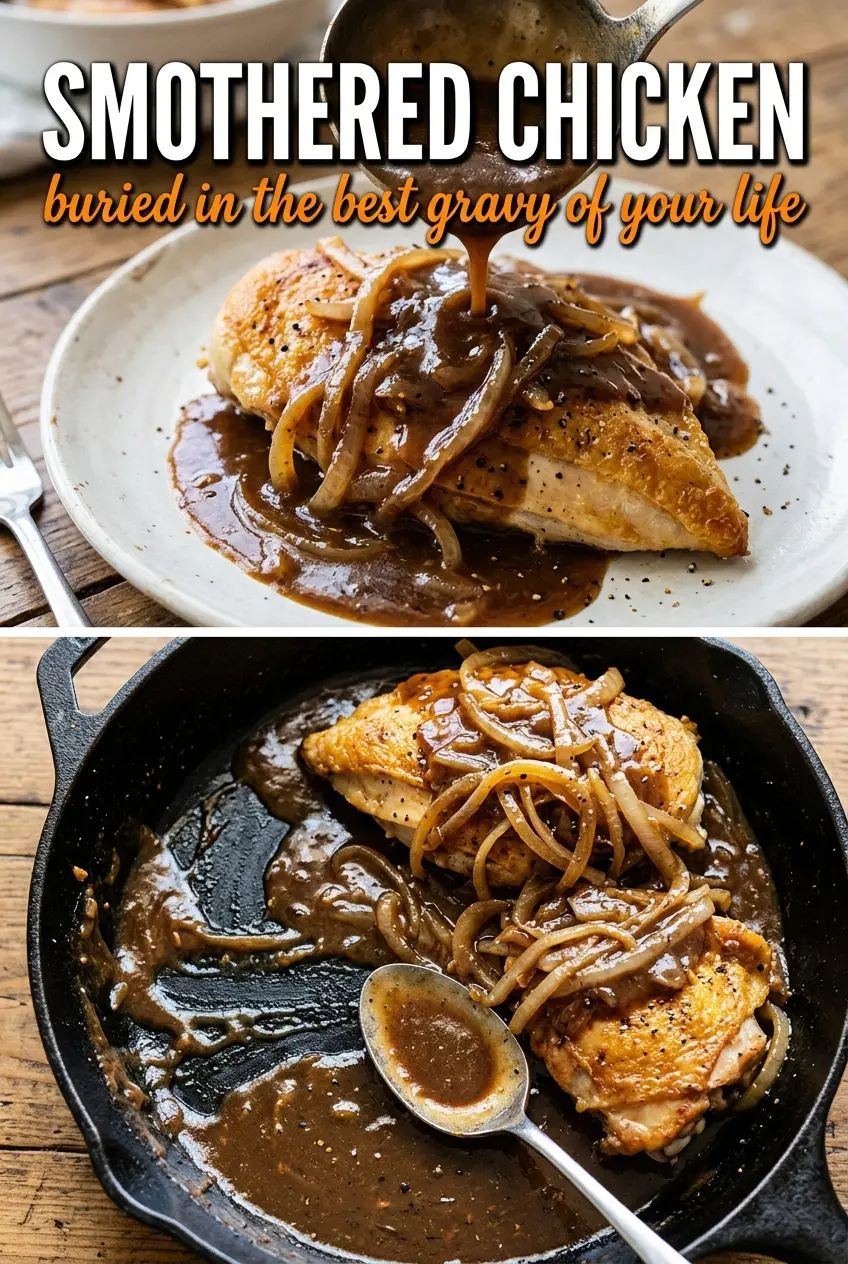
Return the chicken skin-side up so the skin stays on top of the gravy instead of turning soggy underneath it. Cover the skillet and simmer gently until the chicken is cooked through and the sauce coats a spoon. A hard boil will tighten the meat and can break the cream, so keep the heat low enough that the gravy barely bubbles around the edges. The chicken is ready when it pulls easily at the bone and the sauce has turned dark, glossy, and thick.
How to Adjust This Skillet for What You Have on Hand
Make It Dairy-Free
Swap the heavy cream for full-fat coconut milk or an unsweetened dairy-free cooking cream. Coconut milk gives the sauce a faint sweetness and a softer finish, while dairy-free cream keeps the gravy closer to the original flavor. Either way, add it at the end and keep the simmer gentle so the sauce stays smooth.
Use Chicken Breasts Instead of Thighs
Boneless breasts work, but they need a shorter finish in the gravy and a gentler simmer. Sear them well, then tuck them into the sauce just long enough to cook through. If you leave them in as long as the thighs, they’ll go dry and stringy.
Skip the Mushrooms
Leave them out and add an extra half onion if you want a more classic onion gravy. The sauce will be a little lighter and less earthy, but still rich if you let the onions cook until properly browned. Don’t replace them with extra broth alone, or the gravy will taste flat.
Storage and Reheating
- Refrigerator: Store for up to 4 days. The gravy thickens as it chills, and the chicken will pull even more easily from the bone.
- Freezer: This freezes well for up to 2 months, though the cream may look a little separated after thawing. It comes back together once reheated slowly.
- Reheating: Warm it covered over low heat on the stove with a splash of broth to loosen the gravy. High heat is the mistake here; it can tighten the chicken and make the sauce split.
Questions I Get Asked About This Recipe
Smothered Chicken
Ingredients
Equipment
Method
- Season the chicken thighs with garlic powder, onion powder, smoked paprika, salt, and cracked black pepper.
- Heat the vegetable oil in a cast iron skillet over medium-high heat, then sear the chicken skin-side down for 6-7 minutes until deeply golden (visual cue: browned, caramelized skin).
- Flip the chicken and sear for 4 minutes more until browned, then remove from the skillet.
- In the same skillet, cook the onion over medium heat for 6-7 minutes until deeply caramelized, then add the mushrooms and garlic and cook 4-5 minutes (visual cue: mushrooms are browned and onions look jammy).
- Sprinkle the all-purpose flour over the vegetables and stir for 1 minute to cook out the raw flour taste.
- Gradually whisk in the chicken broth, scraping up the browned bits from the bottom of the skillet.
- Stir in the heavy cream, Worcestershire sauce, and dried thyme, then return the chicken skin-side up.
- Cover and simmer for 15 minutes until the chicken is cooked through and the gravy is thick and bubbling at the edges (visual cue: dark gravy thickens and coats the spoon).
- Garnish with fresh parsley and serve over mashed potatoes or rice.