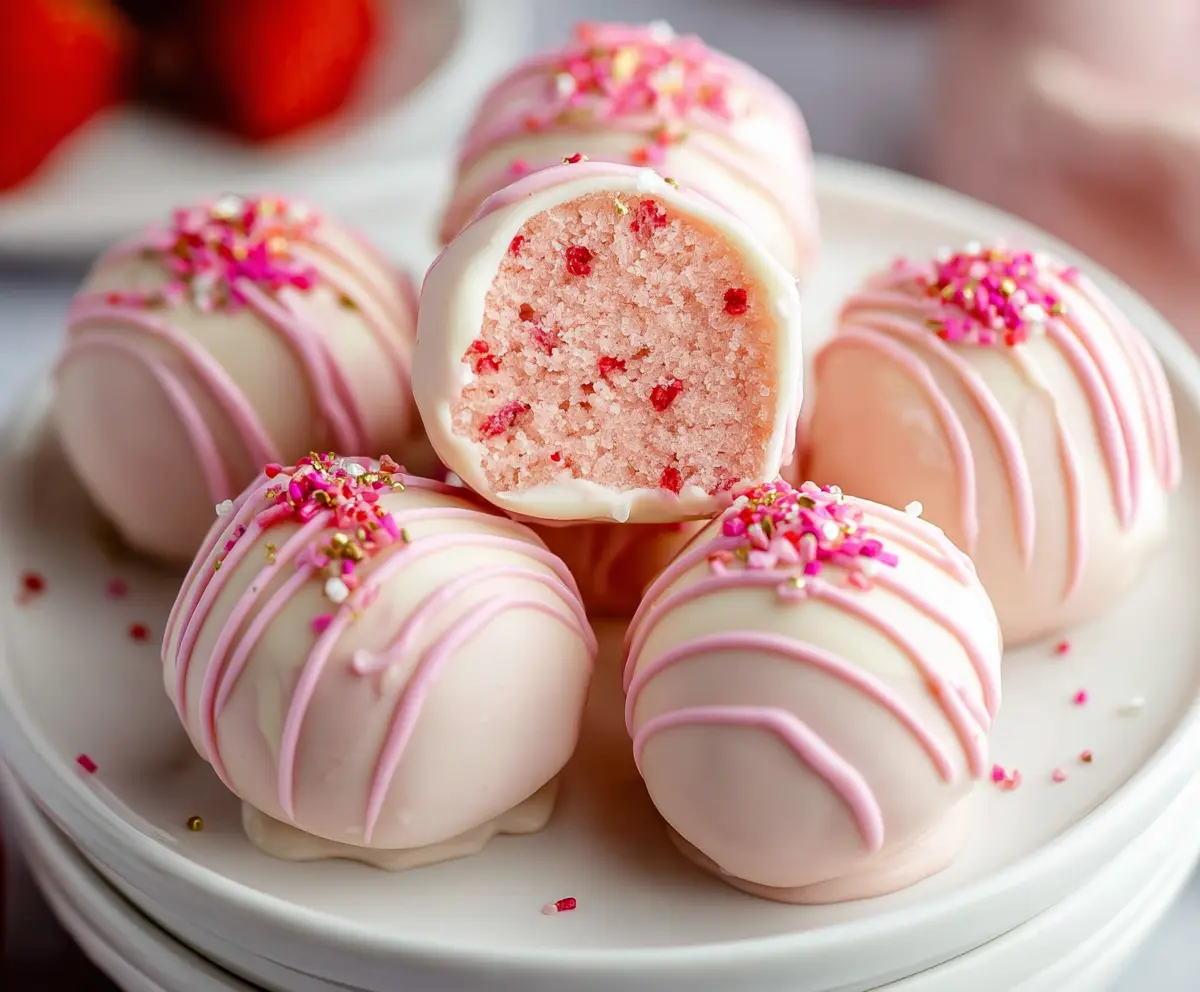
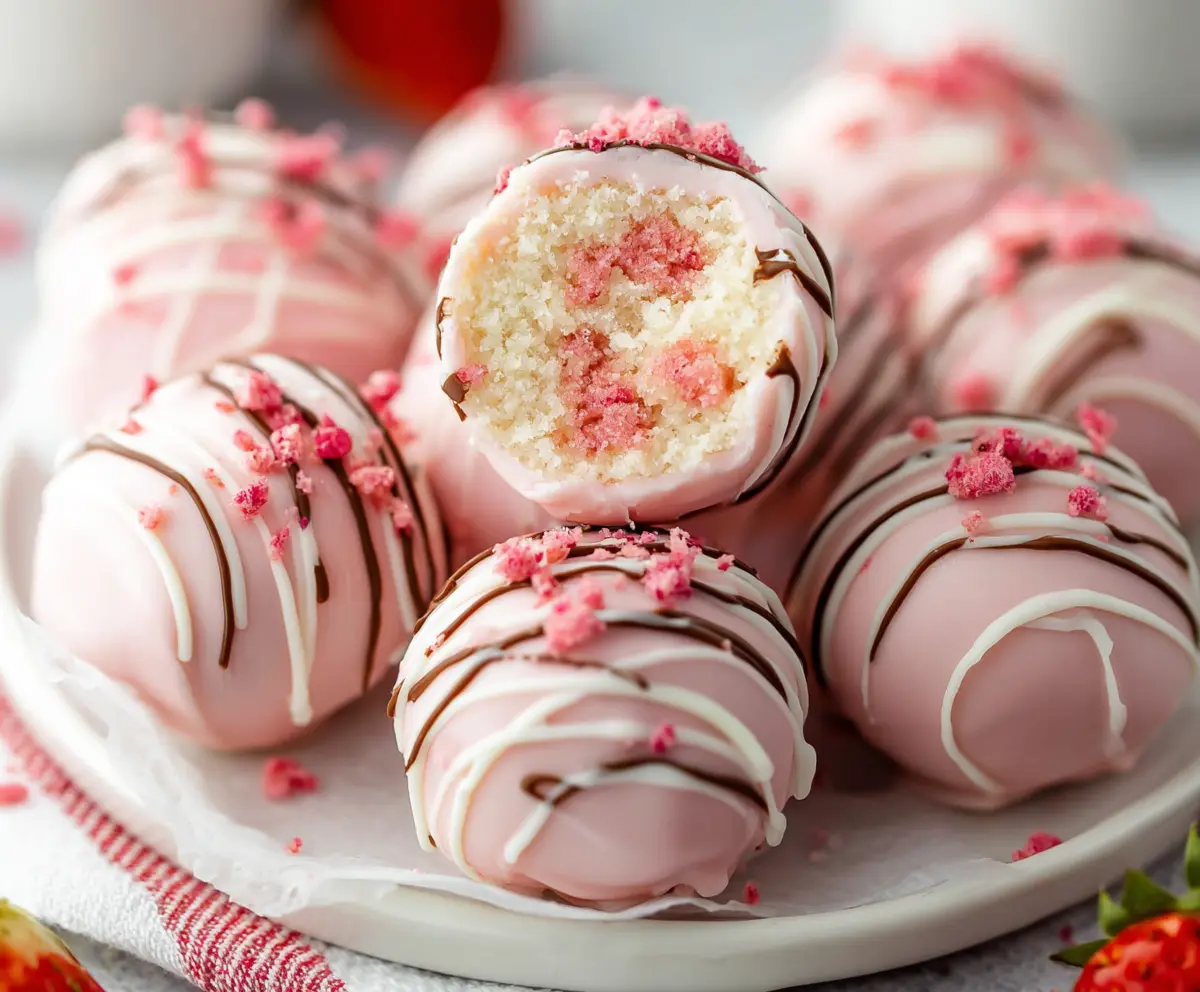
These strawberry cake balls are bite-sized treats bursting with sweet strawberry flavor! They’re made with easy-to-find ingredients and covered in a delicious chocolate coating.
Making these cake balls is like playing with your food! I love popping them into my mouth—who can resist that sweet strawberry goodness? Perfect for any get-together!
Key Ingredients & Substitutions
Strawberry Cake Mix: This is the star of the show! For a homemade touch, you could make your own cake from scratch, but using the mix is super easy and still delicious. If you want a healthier option, look for sugar-free or gluten-free cake mixes available on the market.
Cream Cheese: Cream cheese adds richness and helps bind the cake balls. If you’re after a lighter version, you can substitute with Greek yogurt or low-fat cream cheese. I’ve tried both, and they still taste fantastic!
White Chocolate/Candy Melts: These give your cake balls a lovely coating. If you’re not a fan, you could use dark chocolate or even milk chocolate! Just remember, white chocolate melts a bit more easily, which might help in your dipping process.
Freeze-Dried Strawberries: These add a nice crunch and flavor. If you can’t find them, finely chopped fresh strawberries or even raspberry pieces can be a fun twist. They’ll still add that fruity texture, but be mindful of adding too much moisture.
How Do You Achieve the Perfect Cake Balls?
Making cake balls can be tricky, but a few simple steps can ensure success! First, ensure your cake is completely cooled before crumbling; otherwise, the heat can affect the consistency.
- Crumble the cooled cake thoroughly to ensure even mixing. You want fine crumbs—no large pieces!
- When mixing in the cream cheese, don’t be afraid to get your hands in there for an even blend.
- Roll the dough into balls gently; try not to pack them too tightly, or they might get too dense.
- Refrigerating them is crucial for firmness; this will help with dipping later.
- For dipping, have everything ready: melted chocolate, sprinkles, and parchment paper. This makes the process smoother.
Following these tips will help you create beautiful, tasty cake balls every time! Enjoy making this sweet treat.
How to Make Strawberry Cake Balls
Ingredients You’ll Need:
For the Cake Balls:
- 1 box strawberry cake mix (about 15.25 oz)
- Ingredients listed on the cake mix box (usually eggs, oil, and water)
- 1 cup cream cheese, softened
- Freeze-dried strawberries or finely chopped fresh strawberries (optional, for adding texture inside)
For the Coating:
- 16 oz white chocolate or white candy melts
- Pink candy melts or white chocolate tinted pink (for drizzle)
- Sprinkles (pink, white, and gold for decoration)
How Much Time Will You Need?
This recipe will take about 30 minutes of active time for preparation, along with 1 hour for the cake balls to chill in the refrigerator. Including the baking time for the cake, you can expect it to take around 2 hours from start to finish!
Step-by-Step Instructions:
1. Prepare the Cake:
First, preheat your oven according to the instructions on the cake mix box. Then, prepare the strawberry cake mix using the ingredients listed—this usually includes eggs, oil, and water. Pour the mixture into a 9×13-inch pan and bake as directed. Once the cake is baked, allow it to cool completely on a wire rack.
2. Crumble the Cake:
After the cake has completely cooled, crumble it into a large mixing bowl until it looks like fine crumbs. Make sure there are no large chunks left!
3. Mix in the Cream Cheese:
Add the softened cream cheese into the bowl with the cake crumbs. Use your hands or a spoon to mix everything together until it forms a dough-like consistency. If you want, fold in some freeze-dried or finely chopped fresh strawberries for extra flavor and texture.
4. Shape the Cake Balls:
Roll the mixture into 1 to 1.5-inch balls and place them on a baking sheet lined with parchment paper. Make sure to leave a bit of space between each ball.
5. Chill the Cake Balls:
Now, pop the baking sheet in the refrigerator for at least 1 hour. This helps the cake balls firm up, making them easier to dip in chocolate later.
6. Melt the Coating:
In a microwave-safe bowl, melt the white chocolate or candy melts. Do this by heating in 30-second intervals, stirring in between until it’s smooth and completely melted.
7. Dip the Cake Balls:
Take each chilled cake ball and dip it into the melted white chocolate until it’s fully coated. Allow any excess chocolate to drip off before placing it back on the parchment-lined tray.
8. Decorate:
While the chocolate is still wet, sprinkle your choice of sprinkles on top for decoration. It’s a fun way to make them look festive!
9. Drizzle with Pink Chocolate:
If you want an extra touch, melt the pink candy melts or tint some white chocolate with pink coloring. Use a spoon or a piping bag to drizzle it over the coated cake balls for an adorable finish.
10. Set and Serve:
Finally, let the cake balls set completely in the refrigerator before serving. Once they’re firm, they’re ready to enjoy!
These strawberry cake balls are not only tasty but also a delightful treat to share with friends and family! Happy baking!
Can I Use Gluten-Free Cake Mix?
Absolutely! Just substitute the regular strawberry cake mix with your favorite gluten-free version. The texture will be similar, and you’ll still enjoy those delicious strawberry flavors!
What If I Don’t Have Cream Cheese?
If cream cheese isn’t available, you can use Greek yogurt or mascarpone cheese instead. They’ll help achieve a creamy consistency while adding a bit of tanginess!
How Do I Store Leftovers?
Store any leftover cake balls in an airtight container in the refrigerator for up to 5 days. You can also freeze them for up to 3 months; just make sure to let them thaw in the fridge before serving!
Can I Make These Cake Balls Vegan?
Yes! To make this recipe vegan, use a vegan cake mix and substitute the cream cheese with a vegan cream cheese alternative. You can also use dairy-free chocolate for the coating. Enjoy!