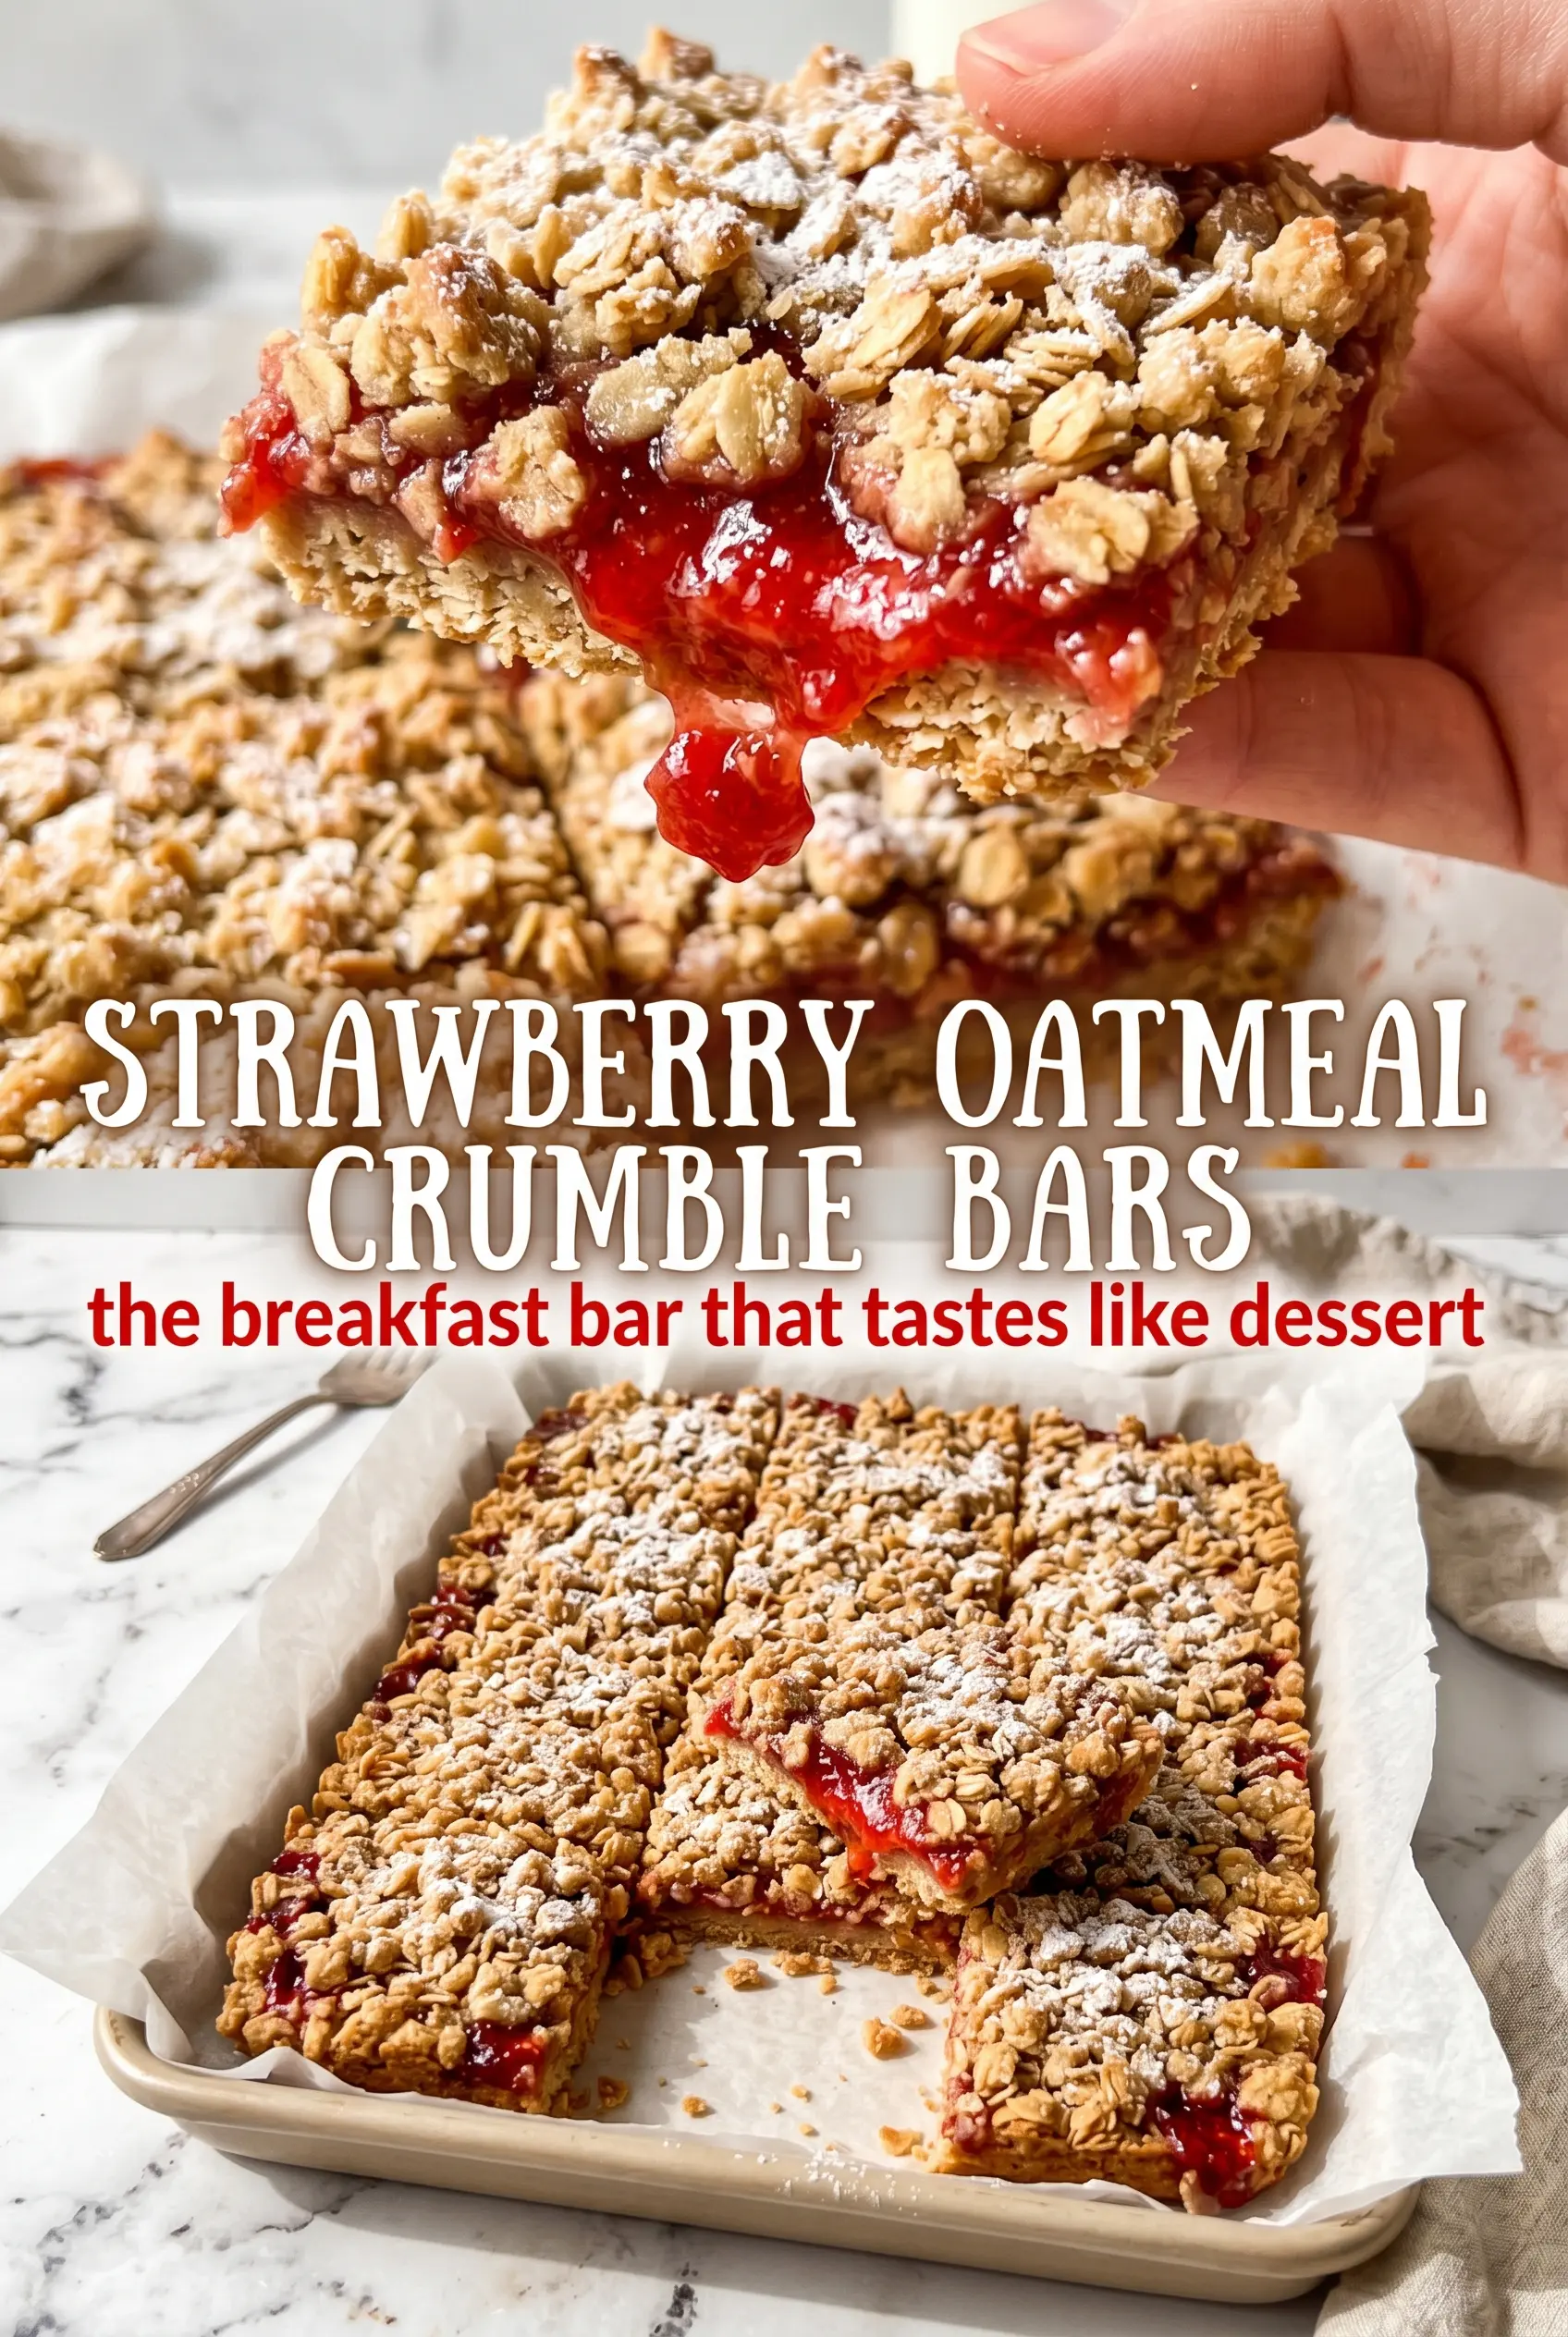
Strawberry oatmeal crumble bars hit that sweet spot between jammy fruit dessert and sturdy bake-sale bar. The bottom bakes into a firm, buttery oat layer, the center turns glossy and bright with strawberries, and the top keeps enough crunch to give each bite a little contrast. They cut cleanly once cooled, which matters if you want bars that look as good as they taste.
The trick is in the balance: enough cornstarch to keep the filling from running, enough lemon juice to sharpen the strawberries, and enough butter worked into the dry mix to hold the crumble together without turning it into dough. Old-fashioned oats matter here because they keep their shape and give the bars that hearty, nubby texture you want in a crumble. Quick oats just don’t give the same result.
Below, I’ve included the small things that make these bars behave, from how firmly to press the base to when to cut them so the filling stays neat instead of sliding apart. If you’ve had crumb bars go soggy or fall apart before, this version fixes both problems.
The strawberry layer set up beautifully and the bars held their shape once cooled. I was surprised how the lemon made the filling taste brighter without making it sour.
Love the jammy strawberry center and buttery oat crumble? Save these strawberry oatmeal crumble bars for the next time you want an easy fruit dessert that slices cleanly.
The Secret to Bars That Slice Clean Instead of Crumbling Apart
Most fruit crumble bars fail for one of two reasons: the base is too loose, or the filling is too wet. This version avoids both by packing the bottom layer firmly and giving the strawberries just enough starch to turn glossy and thick as they bake. The filling should look juicy before it goes in the oven, but not watery. That small difference is what keeps the bars from turning into a soft mess when you cut them.
The other mistake is rushing the cooling time. Warm fruit bars always seem set until the knife goes in, then the middle slides. Letting them rest for at least 15 minutes helps, but for the cleanest edges, longer cooling is even better. The oat layer firms as it cools, and the strawberry filling tightens into something you can actually lift from the pan.
- Pressing the base firmly — This is what gives the bars structure. If you barely pat it into the pan, the bottom will flake apart instead of supporting the filling.
- Using cornstarch with the strawberries — Fresh strawberries release juice as they bake. Cornstarch catches that moisture and turns it into a thick filling instead of a puddle.
- Cooling before cutting — A hot bar looks finished but behaves like a dessert in transition. Wait until the pan is warm, not hot, so the layers stay intact.
What the Strawberries and Oats Are Each Doing Here
Old-fashioned oats are the backbone of these bars. They give you a chewy, rustic crumble that holds together better than quick oats and tastes more substantial after baking. If you only have quick oats, the bars will still work, but the texture gets denser and softer.
The strawberries need to be fresh and sliced, not puréed. Slices keep some texture in the filling and give the bars those pockets of bright fruit. Lemon juice wakes up the berries without making the filling taste citrusy, and brown sugar deepens the crumb topping with a little molasses note that plain white sugar can’t give you.
- Old-fashioned oats — Keep their shape and make the crumble more distinct. Instant oats break down too much.
- Unsalted butter — Softened butter coats the dry ingredients evenly. Cold butter won’t blend properly here, and melted butter will make the crust greasy instead of crumbly.
- Cornstarch — Thickens the strawberry juice during baking. Arrowroot can work in a pinch, but cornstarch gives the most reliable set.
- Lemon juice — Brightens the filling and balances the sugar. Fresh is best, but bottled works if that’s what you have.
Building the Layers So the Filling Stays Put
Mixing the Crumble
Stir the oats, flour, sugars, baking powder, and salt first, then cut in the softened butter until the mixture looks like damp crumbs with some pea-sized bits. Those larger bits bake into little crunchy clusters on top. If you keep mixing until it turns pasty, you’ve gone too far and the topping will bake up dense instead of crumbly.
Pressing the Base
Take half of the mixture and press it into the parchment-lined pan in an even layer. Use the bottom of a measuring cup or your fingers to compact it well, especially into the corners. A loose base falls apart under the filling, so give it enough pressure to look packed but not crushed.
Cooking the Strawberries Just by Baking Them
Mix the sliced strawberries with sugar, lemon juice, and cornstarch until every piece is coated. The berries will start to look a little glossy and slightly sticky, which is exactly what you want. Spread them evenly over the base so the filling reaches the edges; uneven piles bake unevenly and make cutting messy.
Finishing With the Top Crumble
Scatter the remaining oat mixture over the strawberries and press it down very gently, just enough to help it cling together. You don’t want to seal the filling in completely. Bake until the top is deep golden and the strawberry juices are bubbling at the edges, then let the pan cool before lifting the bars out with the parchment.
How to Adapt These Bars Without Losing the Good Texture
Make Them Gluten-Free
Use a 1:1 gluten-free baking flour in place of the all-purpose flour and check that your oats are certified gluten-free. The bars will still hold together well, though the crumble may be a little more delicate once cooled.
Swap in Other Berries
Blueberries, raspberries, or a mix of berries all work, but the filling texture changes depending on how juicy the fruit is. If you use raspberries, keep the cornstarch as written. If you use extra-watery berries, add another teaspoon of cornstarch so the center still sets.
Make Them Dairy-Free
Use a firm plant-based butter stick instead of regular butter. Tub spreads are usually too soft and can make the crumble greasy. The bars will still bake up with good structure, but the flavor will be a little less rich.
Storage and Reheating
- Refrigerator: Store in an airtight container for up to 5 days. The topping softens slightly, but the bars stay tidy and sliceable.
- Freezer: These freeze well. Wrap individual bars tightly and freeze for up to 2 months, then thaw in the refrigerator so the filling doesn’t weep as it warms.
- Reheating: Eat them cold, room temperature, or warmed for a few seconds in the microwave. Don’t heat them long enough to make the filling run; that’s the fastest way to lose the clean layers.
Answers to the Questions Worth Asking
Strawberry Oatmeal Crumble Bars
Ingredients
Equipment
Method
- Preheat oven to 350°F and line a 9x13 baking dish with parchment paper. Make sure the paper overhangs for easy lifting.
- Combine old-fashioned oats, all-purpose flour, granulated sugar, brown sugar, baking powder, and salt in a large bowl. Mix until evenly blended with no visible sugar pockets.
- Cut in softened unsalted butter until the mixture resembles coarse crumbs. Stop when clumps form and the mixture looks sandy with uneven oat pieces.
- Press half of the oatmeal mixture firmly into the prepared baking dish. Use your palm to compress it into an even layer.
- Combine sliced fresh strawberries, granulated sugar, lemon juice, and cornstarch in a bowl. Stir until the cornstarch is fully incorporated and the mixture looks glossy.
- Spread the strawberry filling evenly over the base layer. Leave a small border so it doesn’t reach the edges of the crust.
- Spread the remaining oatmeal mixture over the strawberries and press gently. Lightly tamp so the topping stays crumbly but adheres.
- Bake at 350°F for 30-35 minutes until the top is golden brown. Watch for deeper golden edges and a set-looking center.
- Allow to cool for 15 minutes before cutting into bars. This rest helps the strawberry layer thicken for cleaner slices.
- Dust with powdered sugar before serving. Use a light, even shake so the crumble texture stays visible.