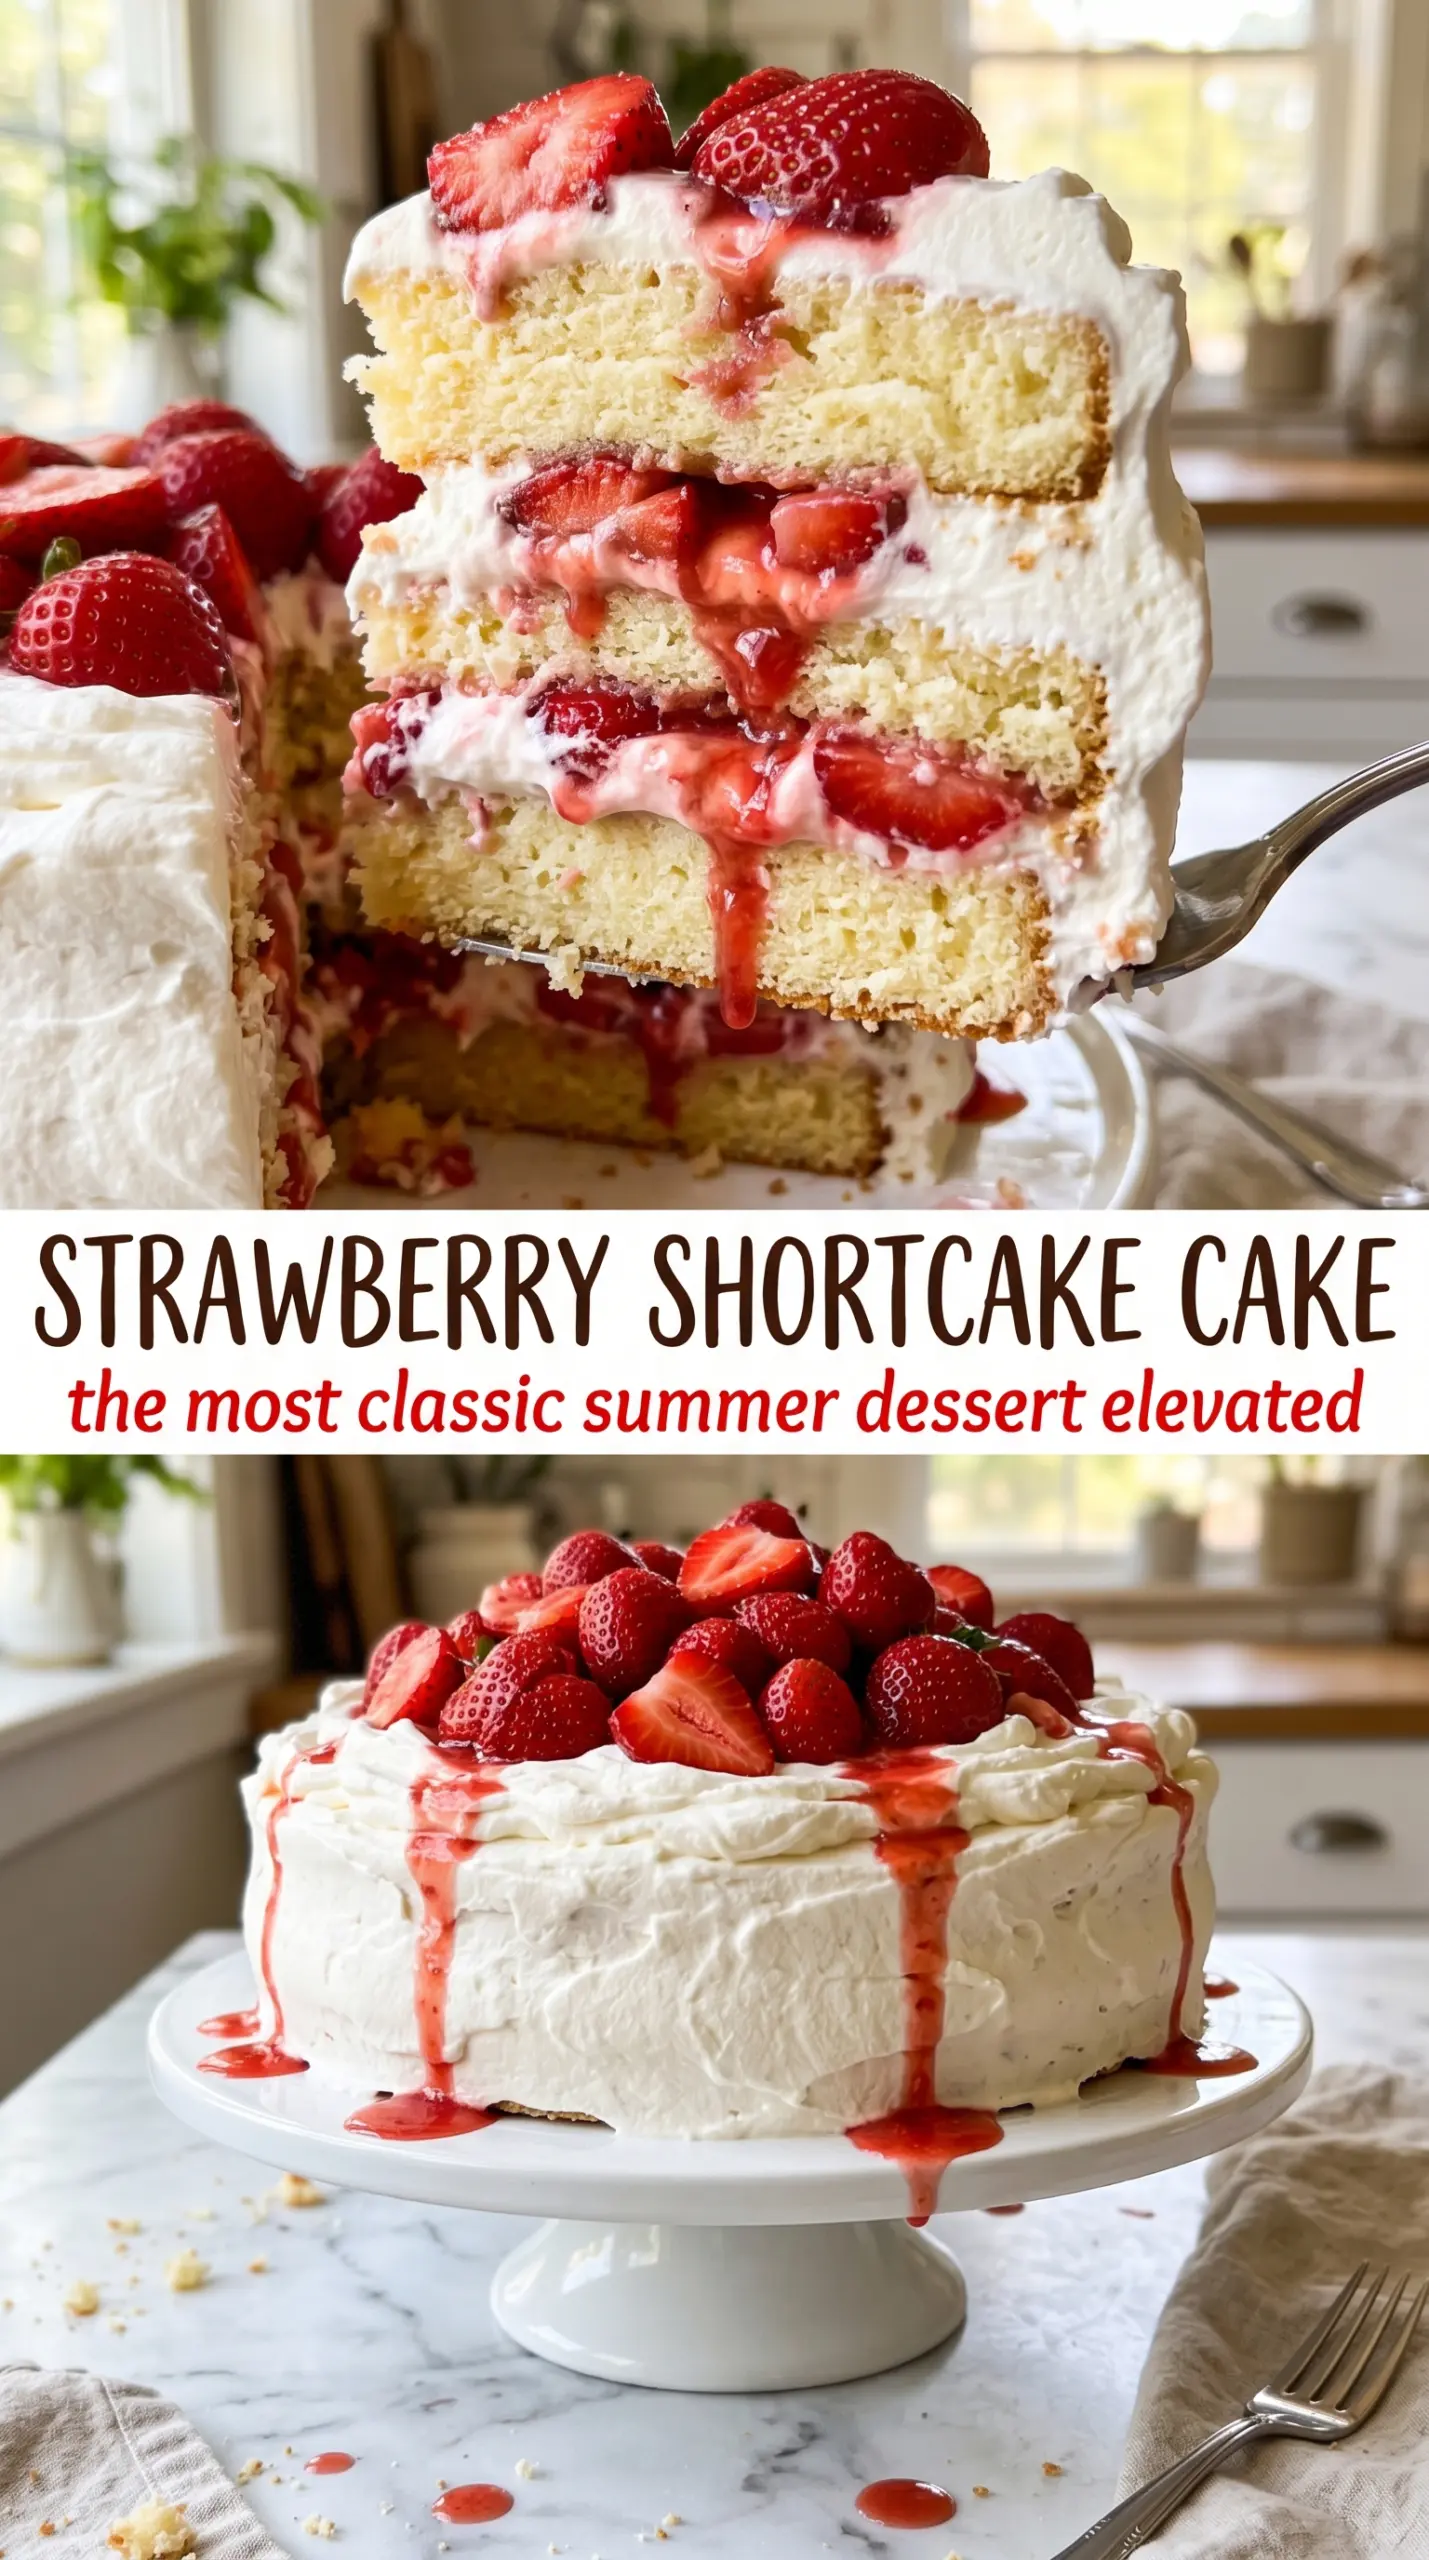
Strawberry shortcake cake delivers the best parts of the classic dessert in a form that slices cleanly and holds its layers without turning soggy. You get a tender vanilla cake, a cloud of whipped cream, and strawberries that taste brighter and juicier after they’ve sat with sugar just long enough to make their own syrup. It’s the kind of dessert that looks special on the table but still feels familiar the first bite in.
The key is in the balance. The cake needs to be soft enough to soak up a little berry juice, but sturdy enough to carry cream and fruit without collapsing. That’s why the batter is built with butter and whole milk, and why the strawberries are macerated instead of piled on raw. A little sugar pulls out their juices and gives you a natural sauce that spreads through the layers instead of leaking all over the plate.
Below, you’ll find the small details that matter most: how to keep the whipped cream stable, when the strawberries are ready, and what to do if you need to make this ahead for a gathering.
The strawberries made their own syrup and the cream stayed fluffy even after chilling. I liked that the cake layers held up without getting mushy, and the whole thing sliced beautifully.
Save this strawberry shortcake cake for the first dessert that disappears at the table — soft vanilla layers, whipped cream, and juicy berries in every slice.
The Trick to Keeping the Layers Light Instead of Dense
This cake works because it stays in the sweet spot between a true sponge and a butter cake. You want enough structure to support the cream and berries, but not so much richness that the layers turn heavy under all that filling. Creaming the butter and sugar until pale is what traps the air that helps the cake rise, and alternating the dry ingredients with the milk keeps the batter smooth instead of overworked.
The most common mistake is rushing the mixing after the flour goes in. That’s where a cake turns tight and dry. Stop as soon as the batter comes together and scrape the bowl well so the last streaks of flour don’t hide at the bottom. A tender crumb is what gives each slice that classic shortcake feel.
What Each Ingredient Is Doing in the Strawberry Shortcake
- All-purpose flour — Gives the cake its structure without making it bready. Cake flour will make it a little softer, but all-purpose keeps the layers sturdy enough for stacking.
- Baking powder — This is the lift in the recipe. If yours is old, the cake will bake up flat and a little heavy, so check the date before you start.
- Unsalted butter — Softened butter creams with the sugar to build the cake’s texture. Salted butter works in a pinch, but the crumb is best when you control the salt separately.
- Whole milk — Adds moisture and keeps the batter smooth. Lower-fat milk will work, but the cake won’t taste as rich.
- Fresh strawberries — These need to be ripe and fragrant. Out-of-season berries can still work, but they won’t release the same syrup or give the filling much flavor.
- Heavy cream — The whipped cream is the frosting here, so use the real thing. Anything lighter won’t hold the layers as well.
- Powdered sugar — Sweetens the cream without graininess and helps it whip smoothly.
Building the Cake So the Layers Stay Clean
Make the Batter in the Right Order
Start by whisking the dry ingredients so the baking powder is evenly distributed. Then cream the butter and sugar until the mixture looks pale and fluffy; that color change matters because it means air has been whipped in. Add the eggs one at a time so the batter stays emulsified, and alternate the flour mixture with the milk to keep it from curdling or turning lumpy.
Bake Until the Center Springs Back
Divide the batter evenly between the pans and smooth the tops so the layers bake at the same rate. The cakes are done when a toothpick comes out clean and the tops spring back when pressed lightly. If the centers still wobble, give them a few more minutes; underbaked layers will sink when you stack them.
Macerate the Berries and Whip the Cream Last
Mix the sliced strawberries with sugar and let them sit for about 30 minutes. That waiting time turns the sugar into a glossy syrup and softens the berries just enough. Whip the cream only when the cakes are fully cool, and stop at stiff peaks. If you whip it too early, it can loosen while the cake sits, and if the cakes are even a little warm, the cream will slide.
Three Ways to Make This Strawberry Shortcake Cake Work for Your Table
Gluten-Free Version
Use a 1:1 gluten-free baking flour with xanthan gum already included. The cake will be a touch more delicate, so let it cool completely before removing it from the pans.
Dairy-Free Shortcake Cake
Swap the butter for a plant-based baking stick, use a neutral non-dairy milk, and whip chilled coconut cream instead of heavy cream. The result is still layered and light, but the flavor will lean a little more toward coconut.
Make It Ahead for a Crowd
Bake the cake layers a day early and keep them wrapped at room temperature. Macerate the strawberries and whip the cream close to serving time so the berries stay juicy and the cream keeps its lift.
Storage and Reheating
- Refrigerator: Store leftovers covered for up to 3 days. The cake will soften as it sits because the berries continue to release juice.
- Freezer: Freeze the plain cake layers, well wrapped, for up to 2 months. Don’t freeze the assembled cake; whipped cream and berries don’t thaw with good texture.
- Reheating: This dessert isn’t meant to be reheated. Let chilled slices sit at room temperature for 10 to 15 minutes before serving so the cake softens and the cream tastes fresh again.
Answers to the Questions Worth Asking

Strawberry Shortcake Cake
Ingredients
Equipment
Method
- Preheat oven to 350°F and grease two 8-inch round cake pans. Make sure the pans are evenly coated so the cake releases cleanly.
- Whisk together all-purpose flour, baking powder, and salt. Mix until no visible clumps remain.
- Cream softened unsalted butter and granulated sugar together until light and fluffy, about 2-3 minutes. Stop and scrape the bowl once for even aeration.
- Beat in large eggs one at a time, then alternate adding the flour mixture and whole milk, beginning and ending with flour. Mix just until the batter looks smooth and cohesive.
- Stir in vanilla extract. Stop mixing as soon as the batter is evenly scented.
- Divide batter evenly between the prepared pans and bake for 25-30 minutes until a toothpick comes out clean. Look for lightly golden tops and springy centers.
- Allow the cakes to cool completely. Wait until fully cool so the whipped cream won’t melt.
- Combine fresh strawberries, sliced, with granulated sugar and let macerate for 30 minutes. The berries should become syrupy and glossy.
- Beat heavy cream with powdered sugar until stiff peaks form. The cream should hold shape when lifted.
- Place one cake layer on a serving plate and spread half of the whipped cream over it. Smooth the top to form an even layer.
- Arrange half of the strawberries over the cream. Distribute them so every slice will include berries.
- Place the second cake layer on top and frost with remaining whipped cream. Use a flat edge to make the surface look tidy.
- Top with remaining strawberries and garnish with additional strawberries for serving. Add them right before eating so the cake stays fresh.