Crunchy, salty, and built for eating with one hand, taco salad in a bag turns a regular taco night into something people actually talk about. The best part is the contrast: warm seasoned beef, cool lettuce, sharp cheese, juicy tomatoes, and the chips staying crisp until the last bite. It’s casual in the best way, but it still eats like a real meal.
This version works because the hot filling goes in first and the wet toppings stay on top, which keeps the chips from turning soggy before everyone gets to the table. Doritos bring a little extra seasoning and richness, while Fritos give you a sturdier, corn-forward bite. Either way, the whole thing comes together fast, and it’s easy enough for camping, a backyard cookout, or a weeknight when you want dinner with almost no cleanup.
Below you’ll find the layering order that keeps everything crisp, plus a few smart swaps if you’re feeding a crowd, cooking outdoors, or working with what’s already in the pantry.
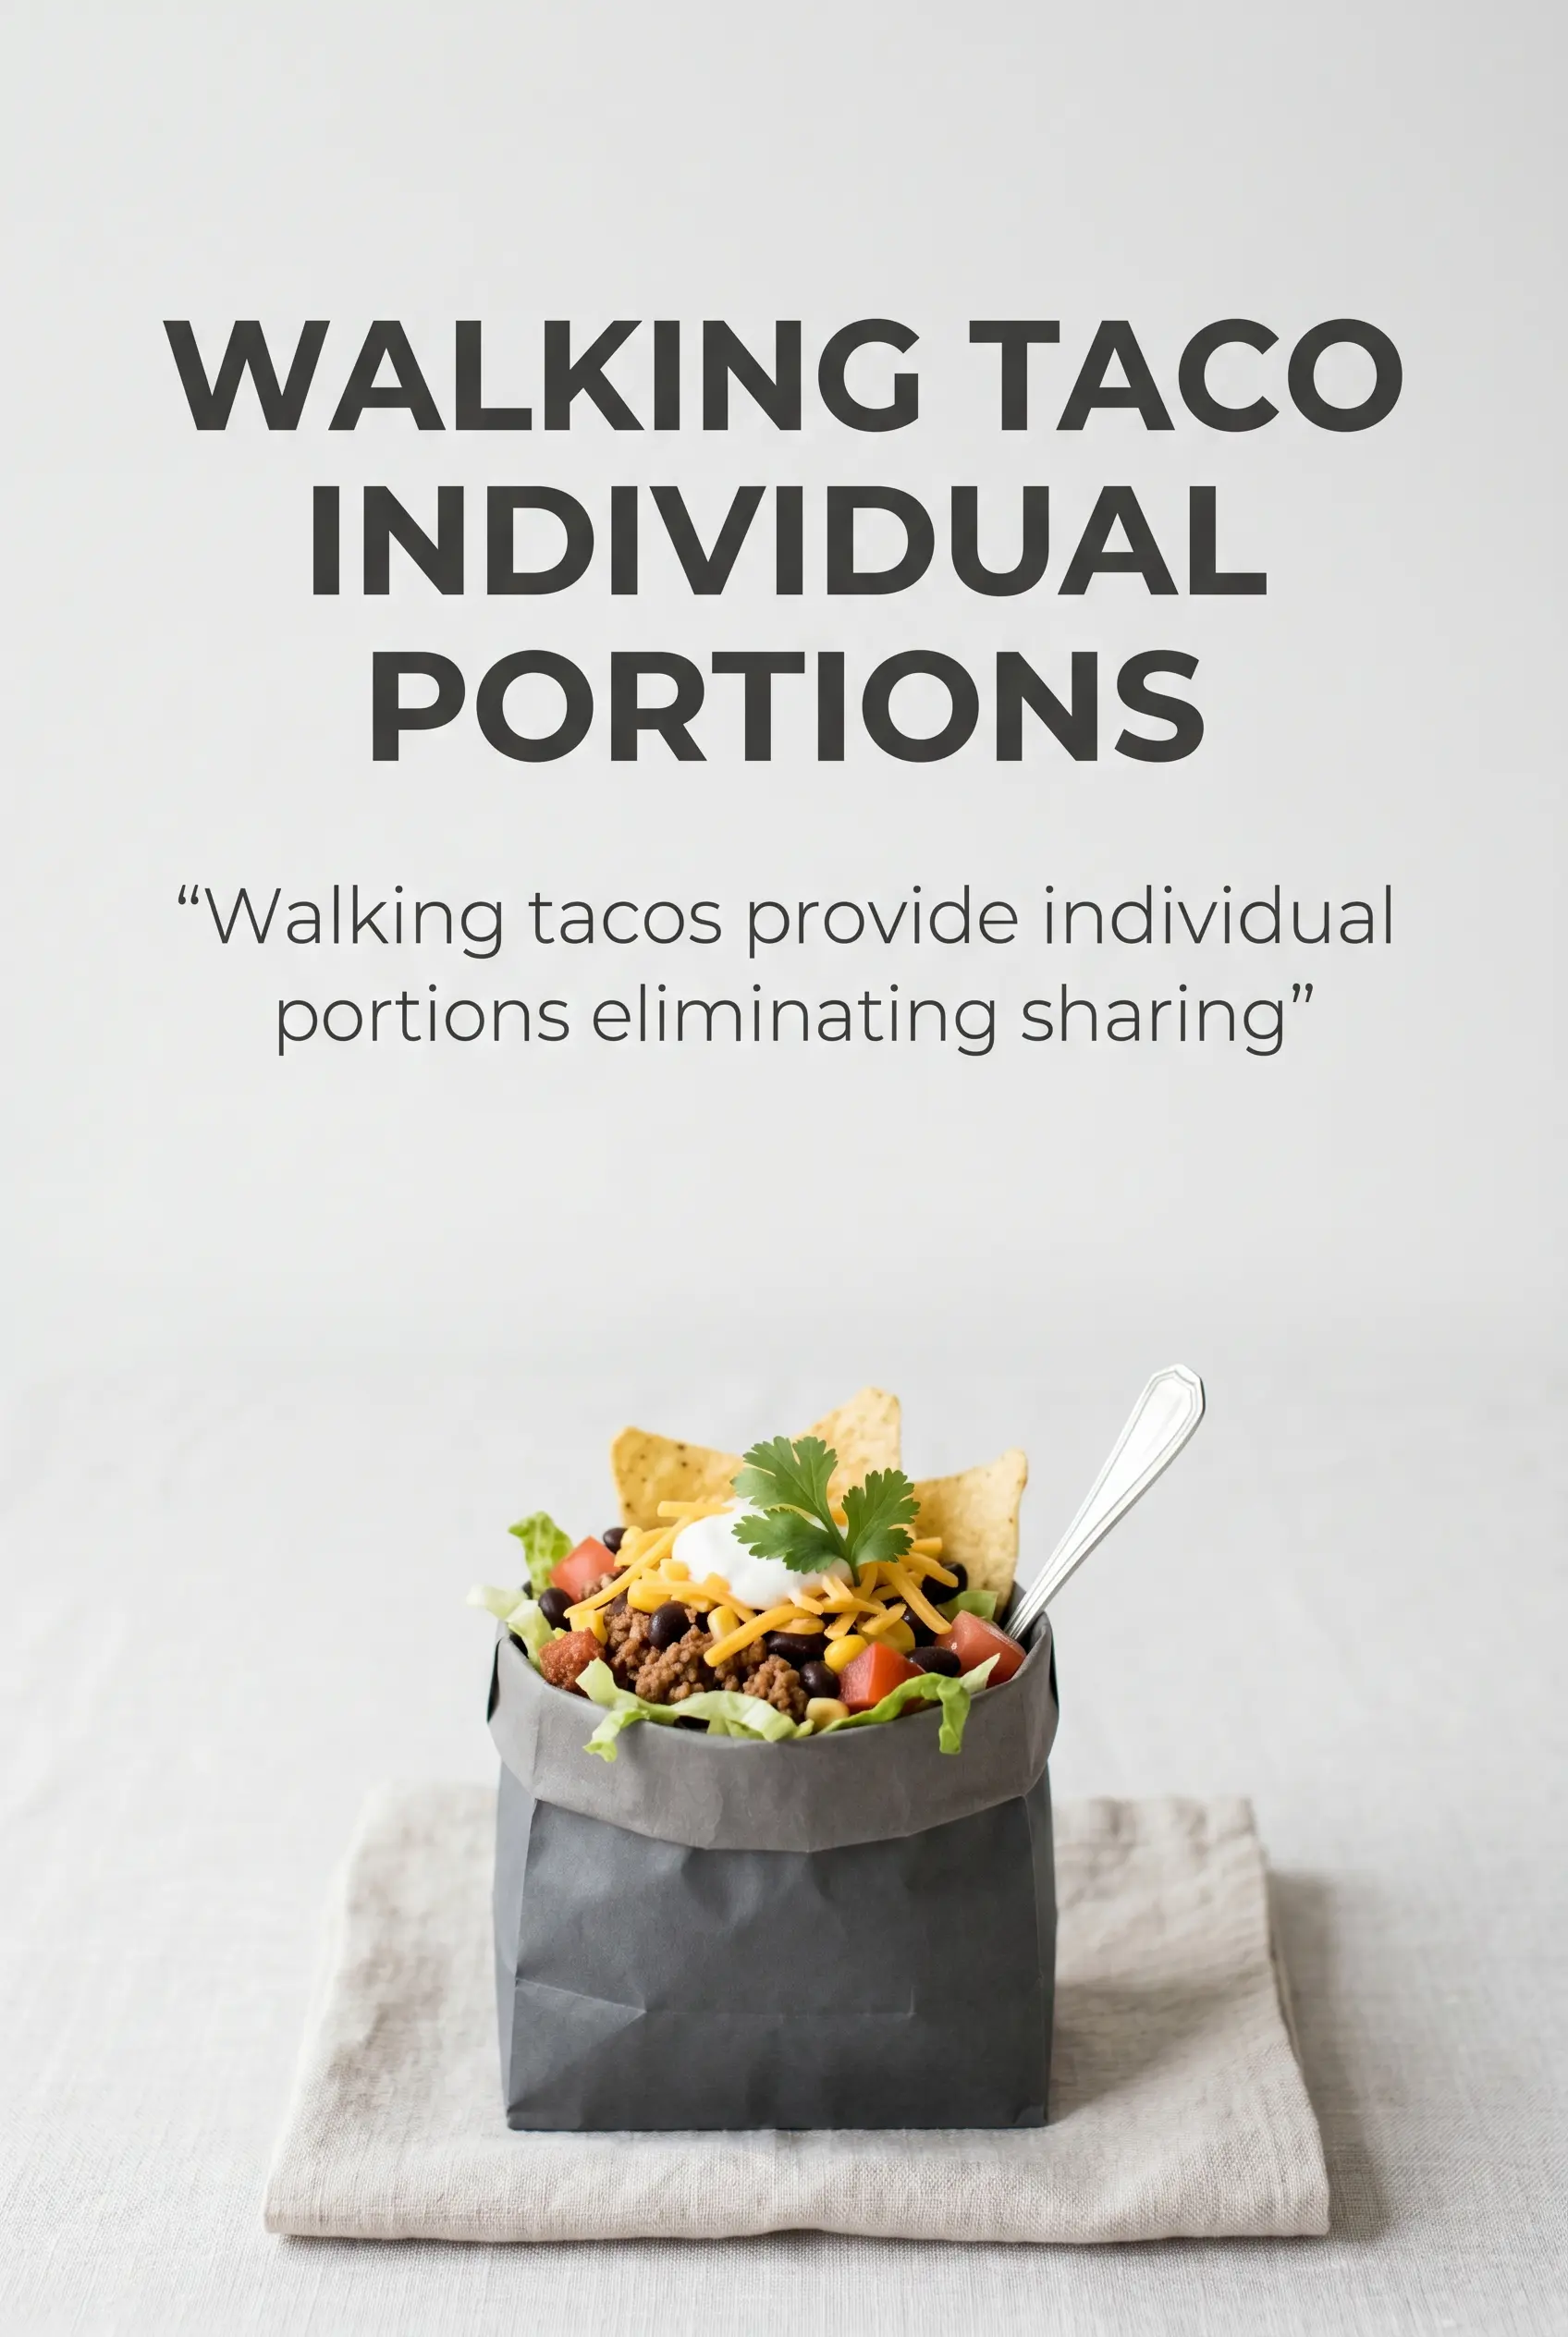
The taco meat stayed hot, the chips stayed crunchy, and we ate straight out of the bags around the picnic table. It was the easiest camping dinner I’ve made that still felt like a real meal.
Save Taco Salad in a Bag for crunchy, layered bags of taco beef, lettuce, cheese, and toppings that stay crisp until the last bite.
The Trick Is Keeping the Chips Dry Until the Very End
The mistake with taco salad in a bag is building it like a bowl salad. Once the warm meat starts soaking the chips, the crunch disappears fast. The fix is simple: open the bag, add the hot taco meat first, then pile on the lettuce and cheese before you add the juicy toppings on top. That way the chips at the bottom get just enough flavor without turning soft.
Using individual bags also changes the texture in your favor. The bag itself acts like a serving vessel and a little steam trap, but only for a short time, so this is the kind of meal that should be assembled and eaten right away. If you’re cooking for a group, keep the meat hot in the skillet and set out the toppings separately so everyone can build theirs fresh.
What Each Ingredient Is Actually Doing In This Dish
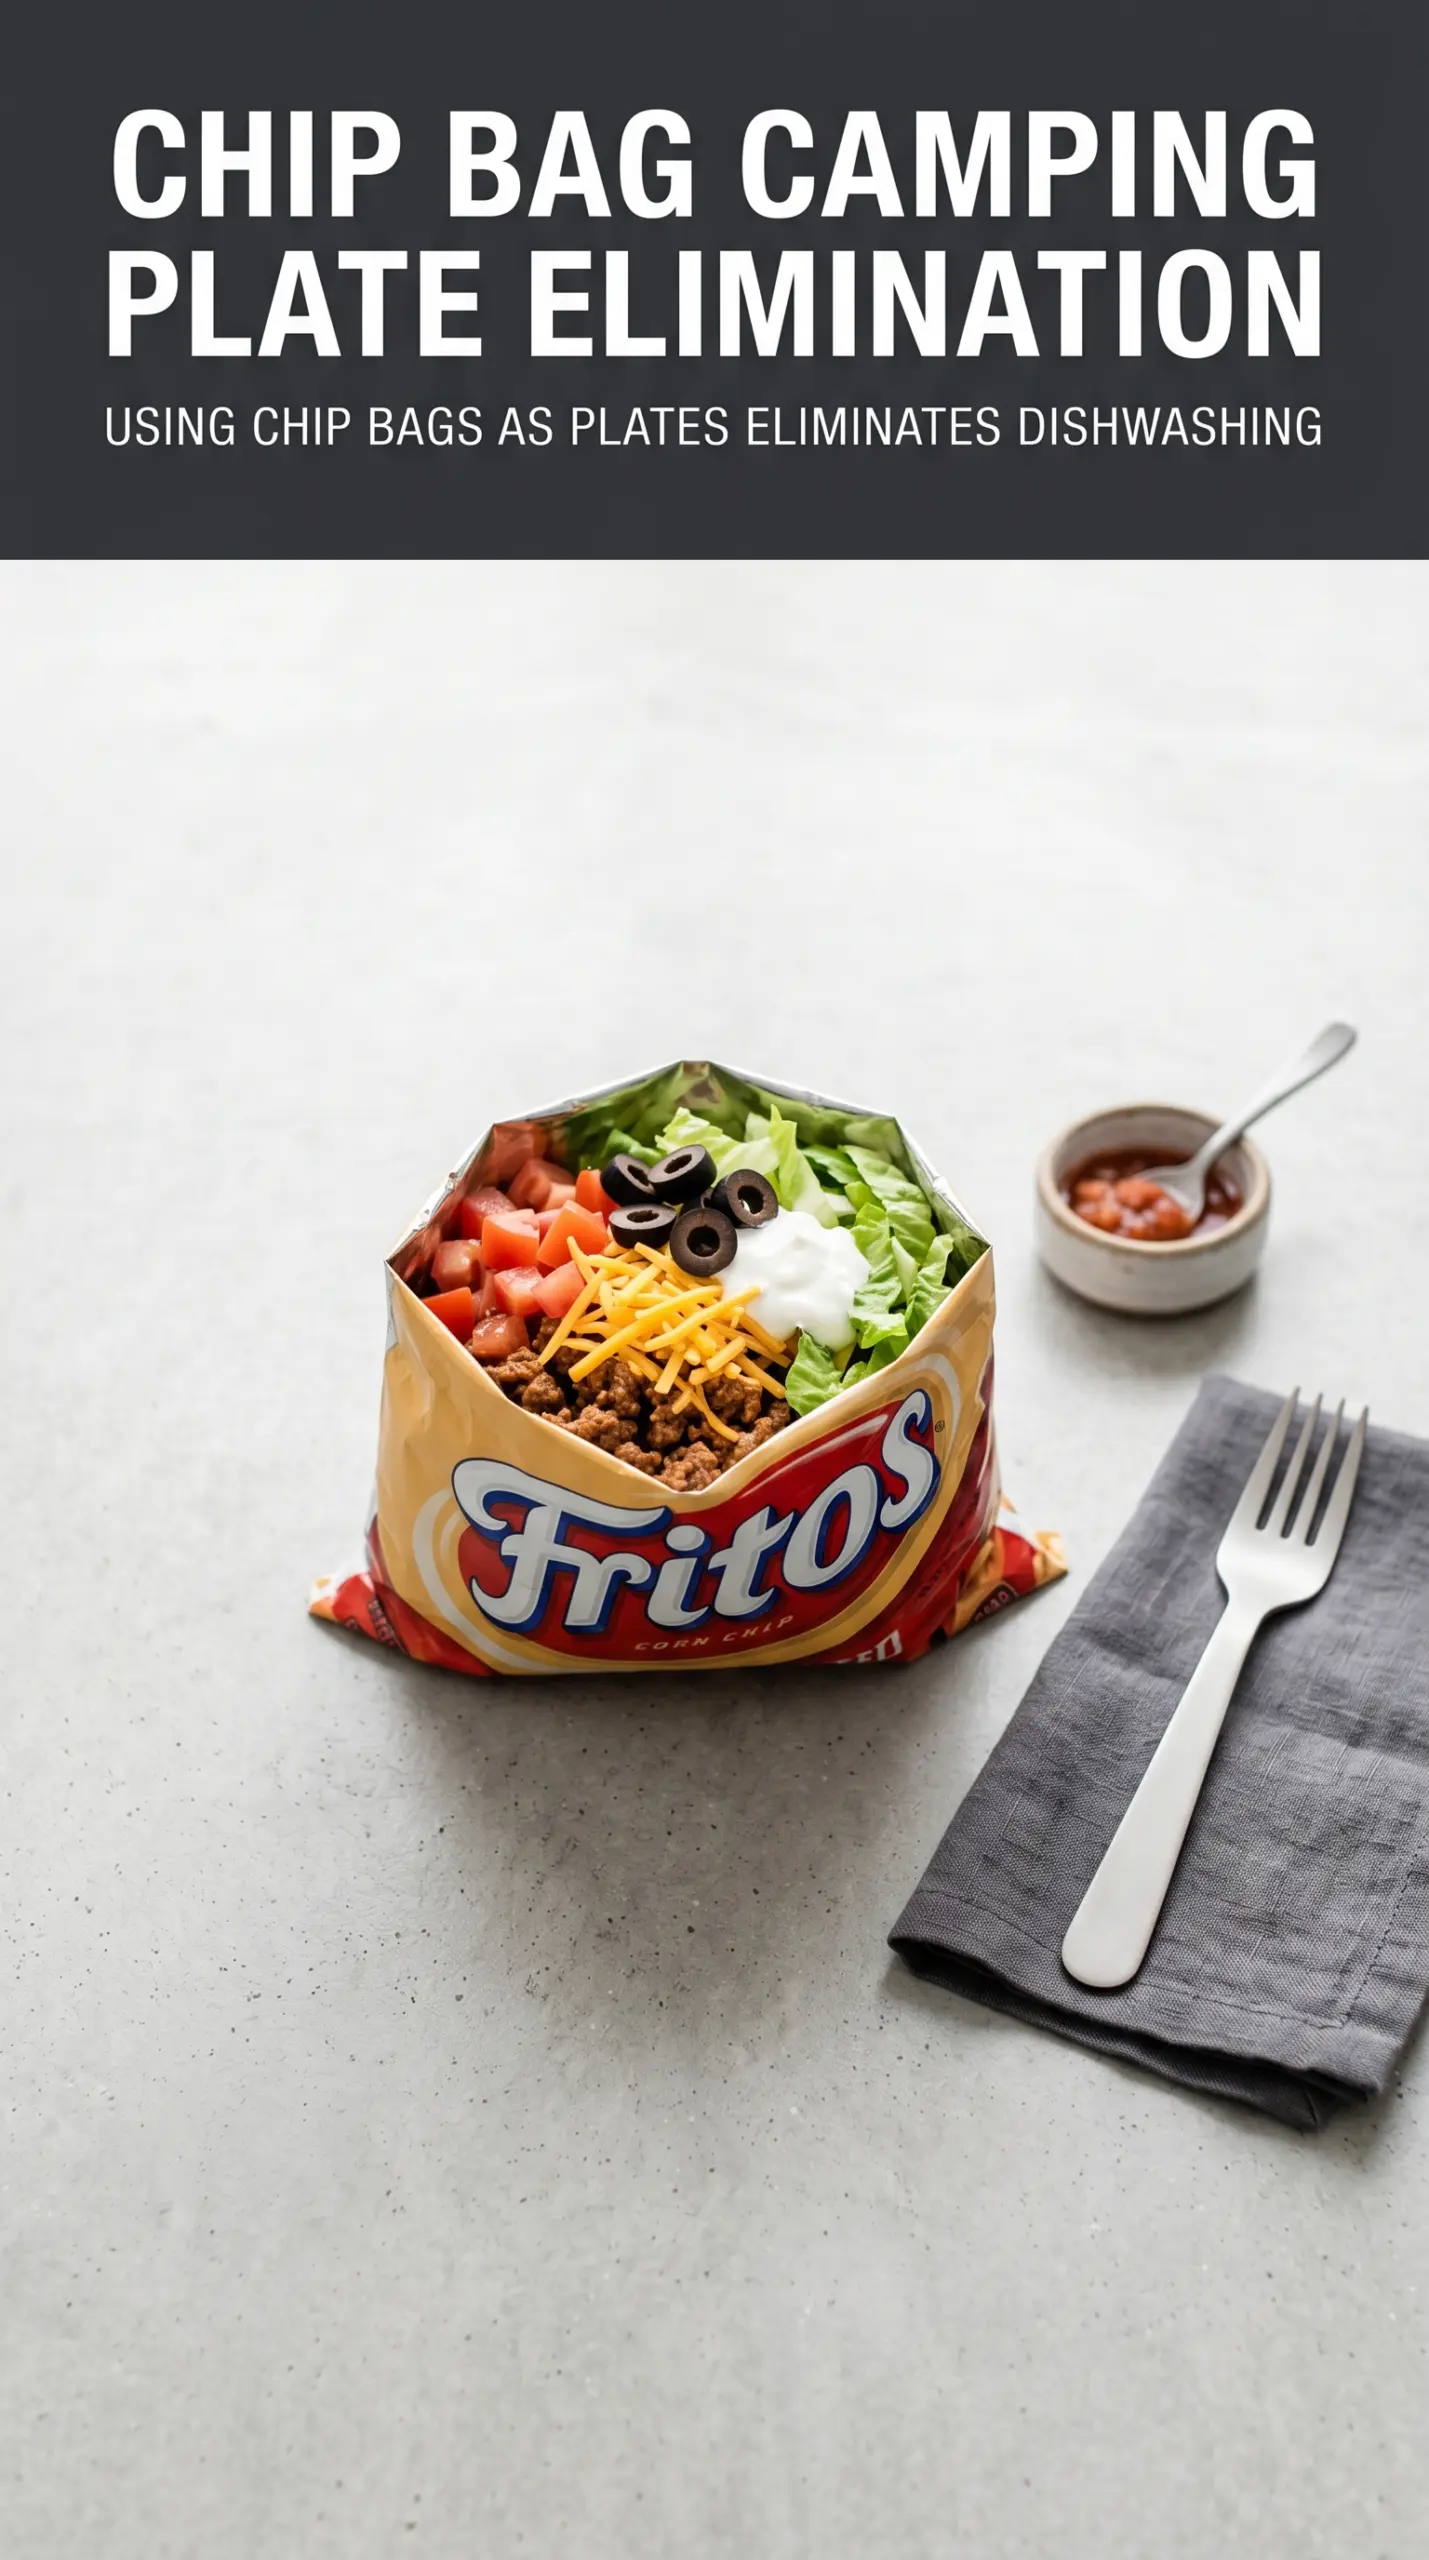
- Doritos or Fritos — Doritos give you that bold, cheesy seasoning that makes the whole thing taste bigger than the ingredient list. Fritos hold up a little better if you’re packing these for camping or sitting outside for a while. The bag chips matter here because crushed tortilla chips won’t give you the same built-in serving and crunch.
- Ground beef — This is the warm, savory base that carries the taco seasoning. A leaner beef works fine, but drain off excess fat so it doesn’t pool in the bottom of the bag. If you swap in ground turkey, add a touch of oil and don’t overcook it or it goes dry fast.
- Taco seasoning — Store-bought seasoning is perfect here because it dissolves evenly into the meat and gives you that familiar taco stand flavor without extra steps. If your blend is salt-heavy, use a little less than the packet says and taste before adding more.
- Lettuce, cheese, tomatoes, sour cream, salsa, and olives — These are the contrast ingredients. Lettuce keeps the texture light, cheese melts slightly against the hot meat, and the wet toppings belong on top so they don’t soak the chips early. If you want to use what’s on hand, swap the olives for pickled jalapeños or diced onion for the same salty bite.
Build Each Bag in the Right Order So It Stays Crunchy
Cooking the Taco Meat
Brown the ground beef in a skillet over medium heat until there’s no pink left and the edges start to pick up a little color. Drain off the excess fat before stirring in the taco seasoning, then cook it just long enough for the spices to bloom and coat the meat. If the pan looks greasy, the chips will taste slick later, so take the extra minute to drain it well. Keep the filling hot, but not soupy.
Opening the Chip Bags Without Tearing Them Up
Cut along the top edge or one side of each bag so the opening is wide enough to build in layers. Don’t rip the bag unevenly or you’ll fight with the filling the whole time. If you’re using a spoon, a scoop with a little curve helps keep the chips from breaking before you even start eating. Set the bags upright in bowls if they keep tipping over.
Layering for the Best Bite
Add the hot taco meat first, then lettuce, cheese, and diced tomatoes. Leave the sour cream, salsa, and olives for the top so the chips underneath stay crisp as long as possible. The order matters because the moisture needs to stay away from the bottom of the bag until the moment you eat. Once everything’s in, serve immediately and hand out forks.
Eating It Straight From the Bag
Fold the top of the bag down a little if you want it easier to hold, then dig in from the top and work your way down. The first few bites should be cool and crunchy, then you’ll hit the warm beef and seasoned chips underneath. If the bag sits too long, the chips soften and the whole point gets lost, so don’t let them wait around.
How to Adapt Taco Salad in a Bag for a Crowd, a Cooler, or a Meatless Night
Make It Vegetarian
Swap the beef for seasoned black beans, pinto beans, or crumbled meatless taco filling. Beans bring a softer texture and a little less richness, but they still give you that savory taco base. If you use beans, warm them with a splash of salsa so they don’t eat dry.
Make It Dairy-Free
Skip the cheese and sour cream, then add extra salsa, avocado, or dairy-free crema if you want a creamy finish. You’ll lose some of the classic taco salad richness, but the bag still eats well because the chips, seasoned meat, and fresh toppings carry the flavor.
Use It for Camping or a Picnic
Cook the meat ahead of time and pack it in a sealed container or insulated bag. Keep the cold toppings chilled until serving, then assemble at the table or picnic bench. The whole recipe works best when the hot and cold parts stay separate until the last minute.
Storage and Reheating
- Refrigerator: Store the taco meat for up to 4 days, and keep the toppings separate. Once assembled, the chips soften fast and don’t hold well.
- Freezer: The seasoned beef freezes well for up to 2 months. Freeze it flat in a sealed bag or container, then thaw in the fridge before reheating.
- Reheating: Warm the meat in a skillet over low heat or in the microwave until hot. Add a splash of water if it looks dry. Don’t reheat the whole bag; the chips will go stale and the lettuce will wilt.
Questions I Get Asked About This Recipe
Taco Salad In A Bag
Ingredients
Equipment
Method
- Heat a cast iron skillet over a campfire until hot, then cook the ground beef until browned, stirring to break up clumps, about 8–10 minutes.
- Stir in taco seasoning and mix until the beef is evenly coated and fragrant, about 1–2 minutes, then remove from heat to cool slightly.
- Open each individual Doritos or Fritos chip bag by cutting along the top or side, then keep the mouth facing upward for easy layering.
- Add a layer of seasoned taco meat to each bag so the chips stay supported from the bottom.
- Add shredded lettuce over the taco meat, pressing gently to fill the bag without crushing the chips.
- Sprinkle shredded cheese evenly over the lettuce layer to form a complete top layer.
- Add diced tomatoes on top in a thin, even layer.
- Finish each bag with sour cream, salsa, and sliced black olives, distributing so every bite gets a topping.
- Eat directly from the bag with a fork, mixing the layers as you go for the crunch-and-cream texture.