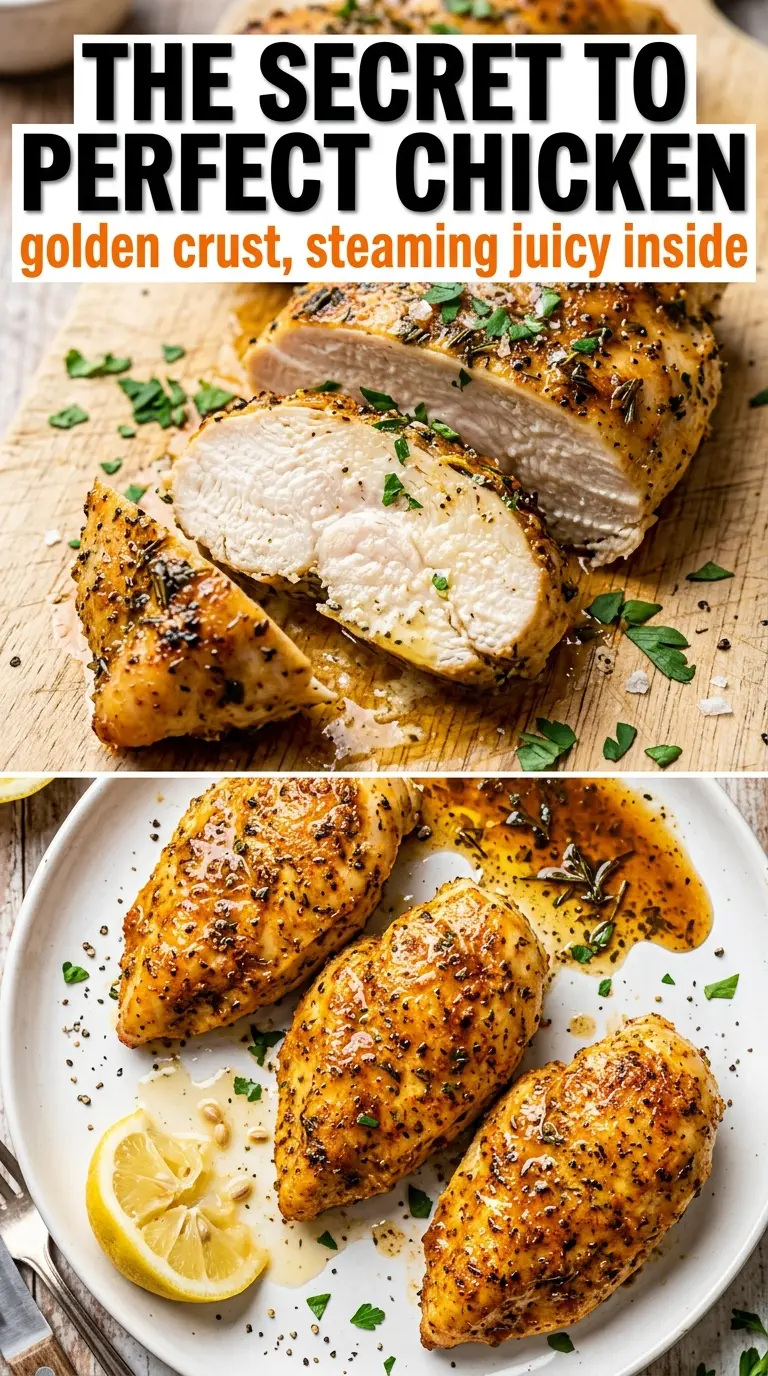
Juicy baked chicken breasts need a little more care than a lot of people give them, and that’s what makes the difference between dry, stringy meat and a piece of chicken that slices cleanly and stays tender. This version keeps the seasoning simple, but the method pays attention to the two things that matter most: even thickness and the right oven temperature. You get a golden, fragrant crust on the outside and a moist center that still has a little give when it comes out of the oven.
Chicken breasts dry out fast when the thick end and thin end cook at different speeds. Pounding them to an even thickness solves that before they ever hit the oven, and the olive oil helps the spices cling while also encouraging browning. The smoked paprika and Italian seasoning do more than add flavor; they help build that caramelized top that makes the chicken look and taste finished without needing a sauce.
Below, I’ve included the exact timing cues I watch for, the temperature that keeps the chicken from overshooting, and a few ways to adapt this for different meals without losing the texture that makes it worth making in the first place.
I finally got baked chicken breasts that stayed juicy all the way through. Pounding them even and pulling them at 165°F made a huge difference, and the top had that seasoned crust instead of just looking pale and plain.
Perfectly seasoned baked chicken breasts with a golden herb crust are worth saving for quick dinners and meal prep.
The Small Mistake That Dries Chicken Out Before the Oven Does
The biggest problem with baked chicken breasts isn’t the oven temperature alone. It’s uneven thickness. A thick center can still be underdone while the thin end is already chalky, and by the time the thick part catches up, the rest has gone past juicy. Pounding the breasts to an even 3/4-inch thickness gives you one cooking pace across the whole piece, which is the cleanest way to protect texture.
The other issue is carrying over too long after it comes out of the oven. Chicken breast keeps cooking on the counter, so pulling it when the center reaches 165°F and then letting it rest for five minutes matters. If you slice too soon, the juices run out onto the board instead of staying in the meat.
What the Seasoning Blend Is Actually Doing Here
- Chicken breasts — Boneless, skinless breasts are lean, which is exactly why the method matters. They need even thickness and a hot oven to brown quickly before they dry out. If your pieces are large, split them horizontally after pounding so they don’t take forever to cook.
- Olive oil — This helps the seasoning stick and encourages the top to brown instead of turning dusty. You can swap in avocado oil if that’s what you keep on hand; just use an oil that can handle the oven heat without tasting sharp.
- Garlic powder, onion powder, smoked paprika, and Italian seasoning — This mix gives the chicken depth without needing a marinade. Garlic and onion powder bring savory backbone, paprika adds color and a little warmth, and Italian seasoning makes the crust taste herb-forward instead of flat.
- Salt and black pepper — These aren’t background players here. Salt pulls the seasoning into the meat’s surface, and cracked black pepper gives the crust a little bite. If you cut the salt much lower, the chicken tastes seasoned on the outside but bland in the middle.
- Parsley and lemon wedges — These are for the finish, not decoration. Parsley wakes up the herbs, and a squeeze of lemon cuts through the richness so the chicken tastes brighter once it’s sliced.
Getting the Golden Crust Without Overcooking the Center
Start With Even Thickness
Preheat the oven to 425°F and lightly grease your baking dish before you do anything else. If the chicken breasts vary in thickness, pound them to an even 3/4-inch layer so the thin end doesn’t go dry before the center is cooked. The goal is a piece that looks and feels uniform all the way across, not a lopsided breast with one side already threatening to overbake.
Build the Seasoning Layer
Brush the chicken with olive oil on both sides, then coat it evenly with the spice mixture. The oil helps the spices spread without clumping, and it keeps the surface from drying out before browning starts. If the seasoning looks patchy, press it lightly into the chicken with your fingers so it stays put in the oven.
Bake Until the Top Is Fragrant and Set
Slide the dish into the hot oven and bake for 18 to 22 minutes, depending on the size of the breasts. You’re looking for golden tops and an internal temperature of 165°F in the thickest part. If the chicken is much thicker than 3/4 inch, it needs more time; if you keep going past 165°F, the texture goes from juicy to dry fast.
Rest Before Slicing
Let the chicken rest for 5 minutes before cutting into it. That short pause gives the juices time to settle back through the meat, which is what keeps the slices moist instead of leaving a wet spot on the cutting board. Finish with parsley and a squeeze of lemon right before serving so the crust stays crisp and the flavor stays bright.
How to Adapt These Baked Chicken Breasts Without Losing Juiciness
Dairy-Free and Gluten-Free by Default
This recipe already fits both of those needs as written. The only thing that can trip people up is using a seasoning blend with hidden fillers, so check that your Italian seasoning is just herbs and your paprika is pure. That keeps the crust clean and the texture exactly the same.
Use Chicken Thighs Instead
Boneless skinless thighs work well here if you want darker, richer meat. They usually need a few extra minutes in the oven and are less likely to dry out, but they won’t give you the same clean sliced look as breasts. Cook them until they reach 165°F to 175°F and the juices run clear.
Turn It Into Meal Prep Chicken
Bake the chicken exactly as written, then cool it before slicing or leaving whole. Stored that way, it stays juicier than if you slice it hot and let the moisture escape right away. This version is good for salads, grain bowls, and sandwiches because the seasoning stays balanced even after reheating.
Storage and Reheating
- Refrigerator: Store in an airtight container for up to 4 days. The crust softens a little, but the chicken stays useful for lunches and quick dinners.
- Freezer: Freeze cooked chicken breasts for up to 2 months, wrapped well and sealed in a freezer bag. Slice them first if you plan to use them in soups or wraps later.
- Reheating: Warm gently in a covered skillet with a splash of water or broth, or in a 300°F oven until just heated through. High heat is the fastest way to turn leftover chicken dry and stringy.
Answers to the Questions Worth Asking

Baked Chicken Breasts
Ingredients
Equipment
Method
- Preheat the oven to 425°F and lightly grease a baking dish so the chicken won’t stick and the crust can brown.
- Pound the chicken breasts to an even 3/4-inch thickness if they vary in size, so they cook through at the same rate.
- Brush both sides of each chicken breast with olive oil to help seasonings adhere and promote browning.
- Mix together garlic powder, onion powder, smoked paprika, Italian seasoning, salt, and pepper, then rub evenly over both sides of the chicken.
- Bake for 18–22 minutes at 425°F until the internal temperature reaches 165°F and the tops are golden; do not overbake to keep the centers juicy.
- Rest for 5 minutes before slicing, then garnish with fresh parsley and lemon wedges for bright, herb-fresh flavor.